
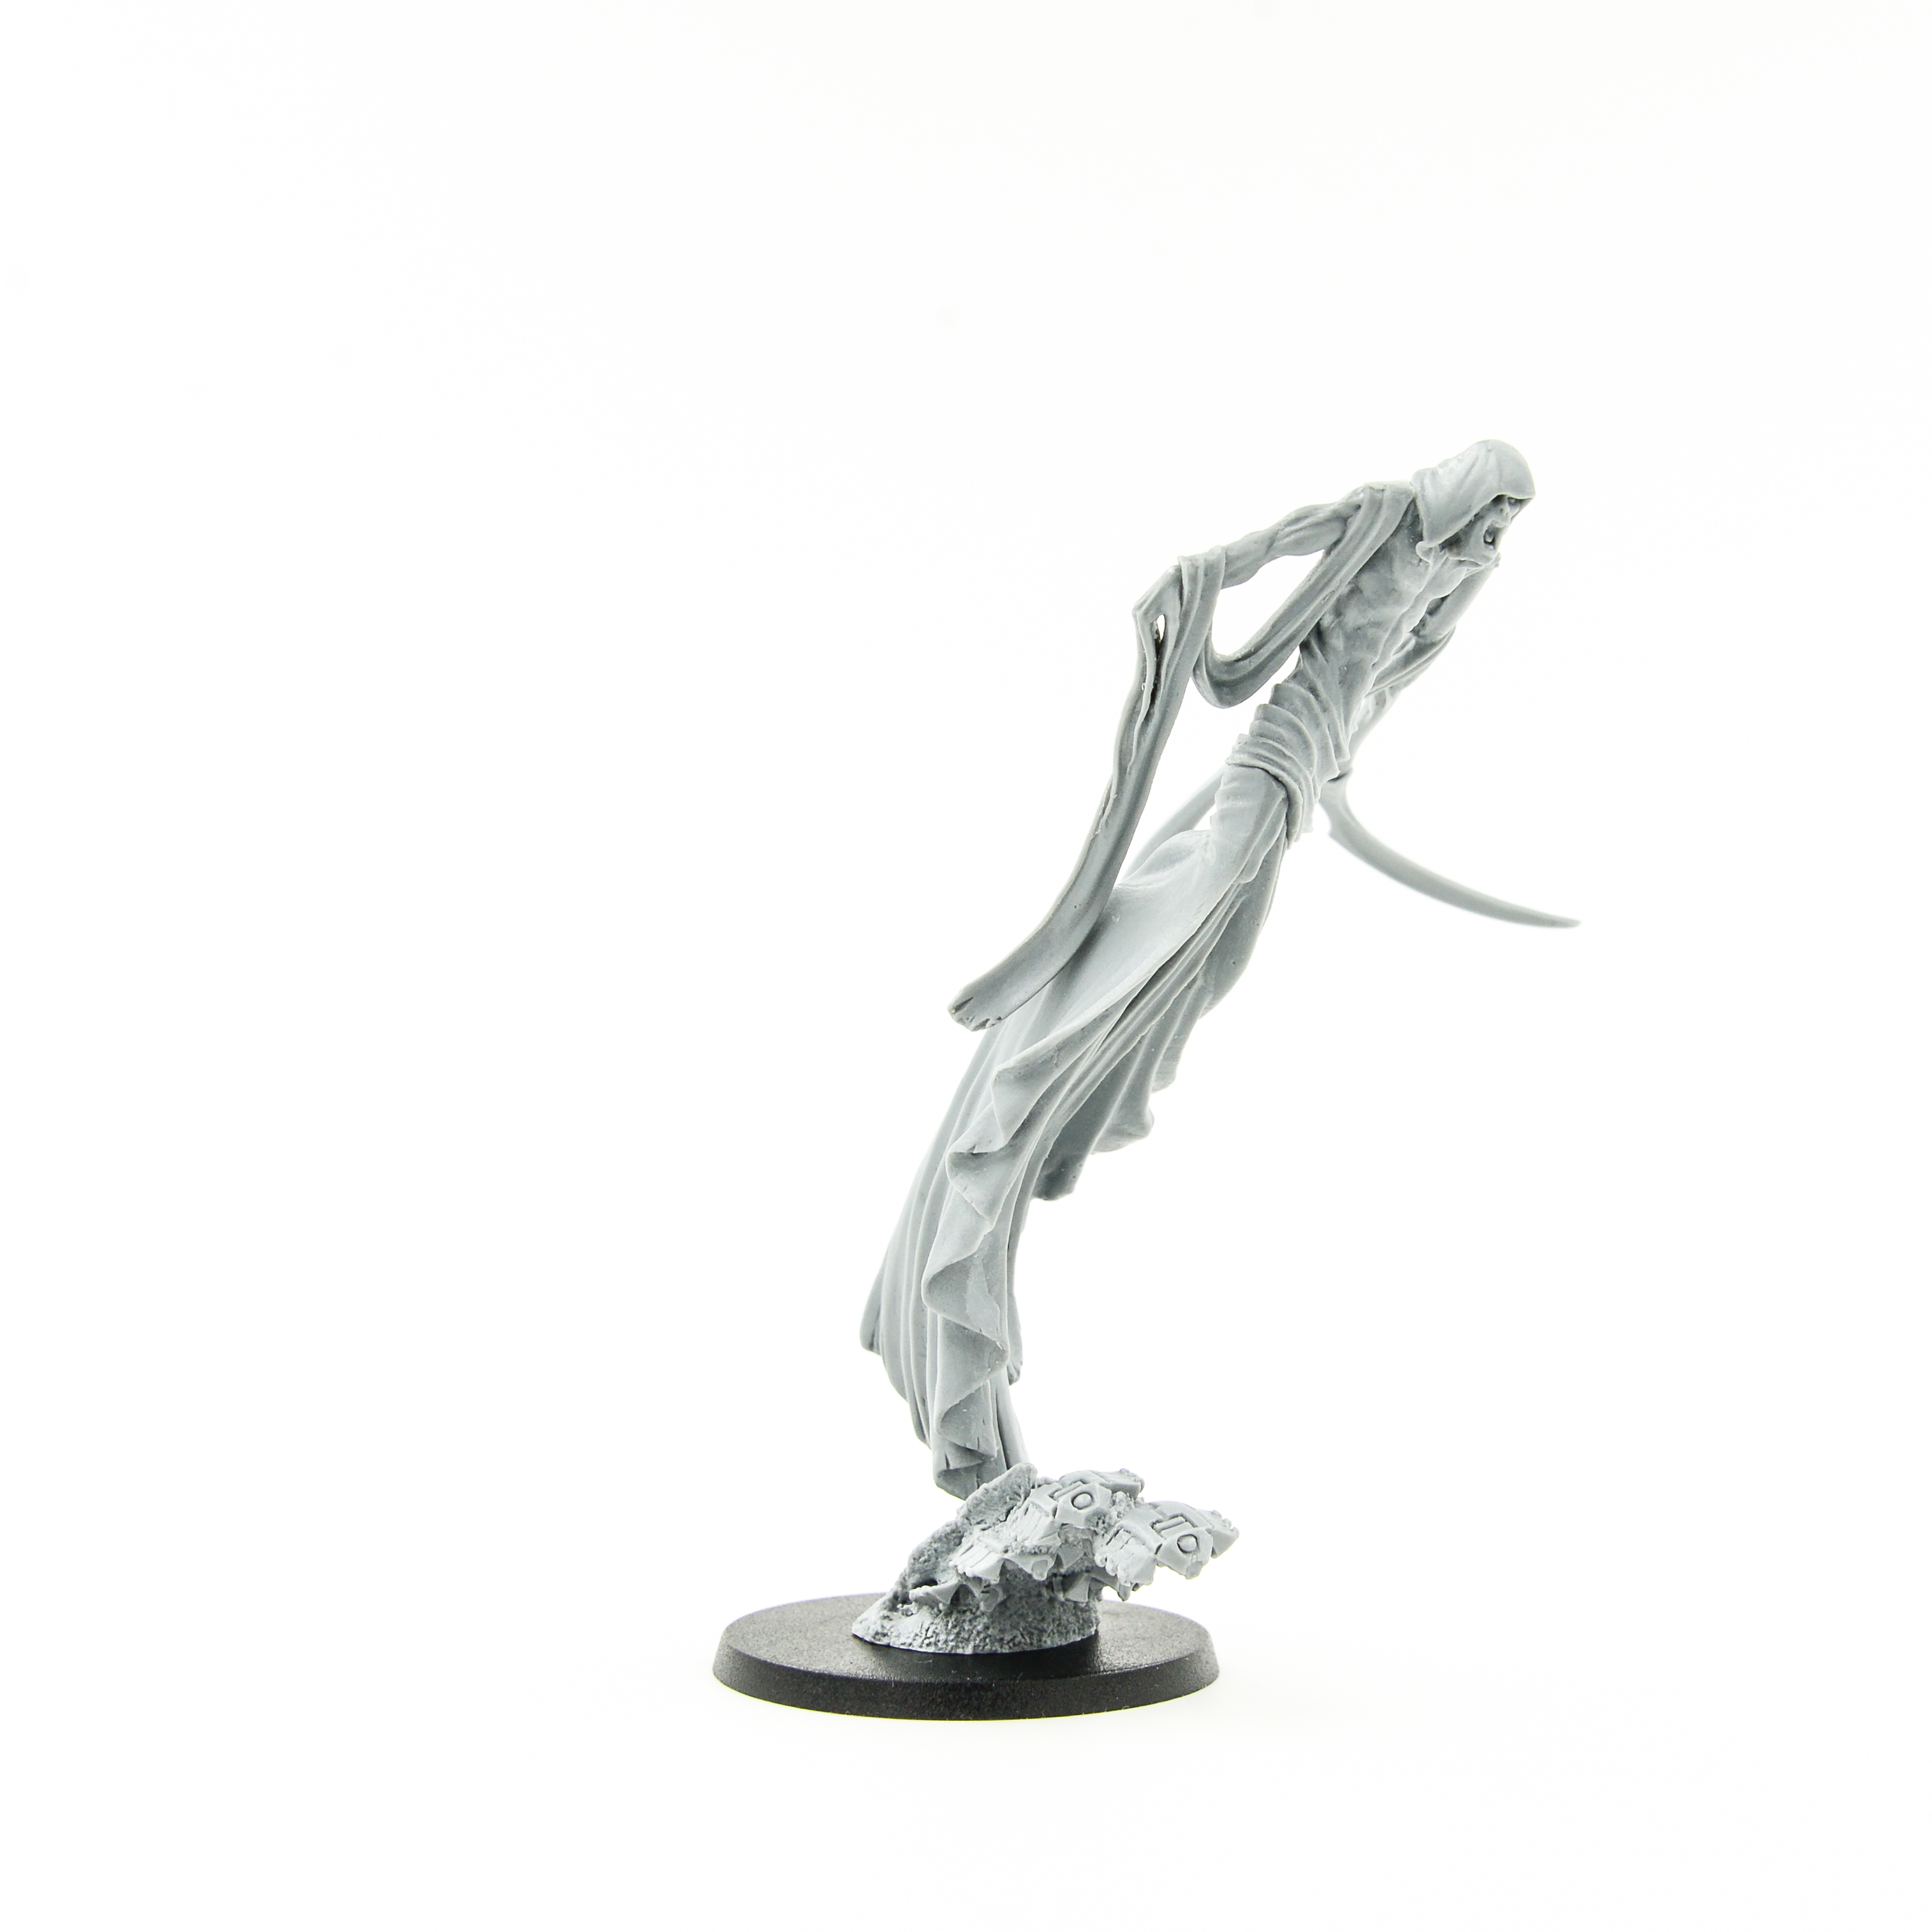
Story №1.
Why it’s so expensive?
We are often asked by our customers- “Why it’s so expensive!? Other do much cheaper, and a miniature – it’s a miniature!”. In this review, we decided to describe in detail the process of our work on a miniature before it falls into your hands. Considering we will be a miniature Gryphon from the remarkable universe of Kingdom Death. So, let’s begin!
At first we debunk the delusion: Originals from the manufacturer very rarely are the standard of quality in themselves. The problem is that the sculptor, working on his master-model, made it like he wanted. But after the master-model falls into the hands of the organization, which has a contract for a certain, often a huge amount of goods. As a rule, in 90% of cases, this organization is located on the territory of China (So for the owner of the brand is cheaper). And accordingly the master-model of the Chinese employee is dismembered on an industrial scale (that is, several dozen pieces per day). We have nothing against Chinese casters, but it’s like roulette is lucky / unlucky. After that, the parts of the master model are molded into silicone master molds (made in China naturally) and sent to the casting department. Then it’s all sent back to the brand owner and sold to you. Since the print editions are huge, and the resources of the matrixes are not unlimited, the quality of the finished miniatures is very rarely high. Because of this, already on the original miniatures very often we see bubbles, matrix displacements, lack of conjugation between parts, deformation. So, in fact, in 90% of cases, the so-called original miniature does not really differ much from what you buy from Chinese recasters on aliexpress, for example.
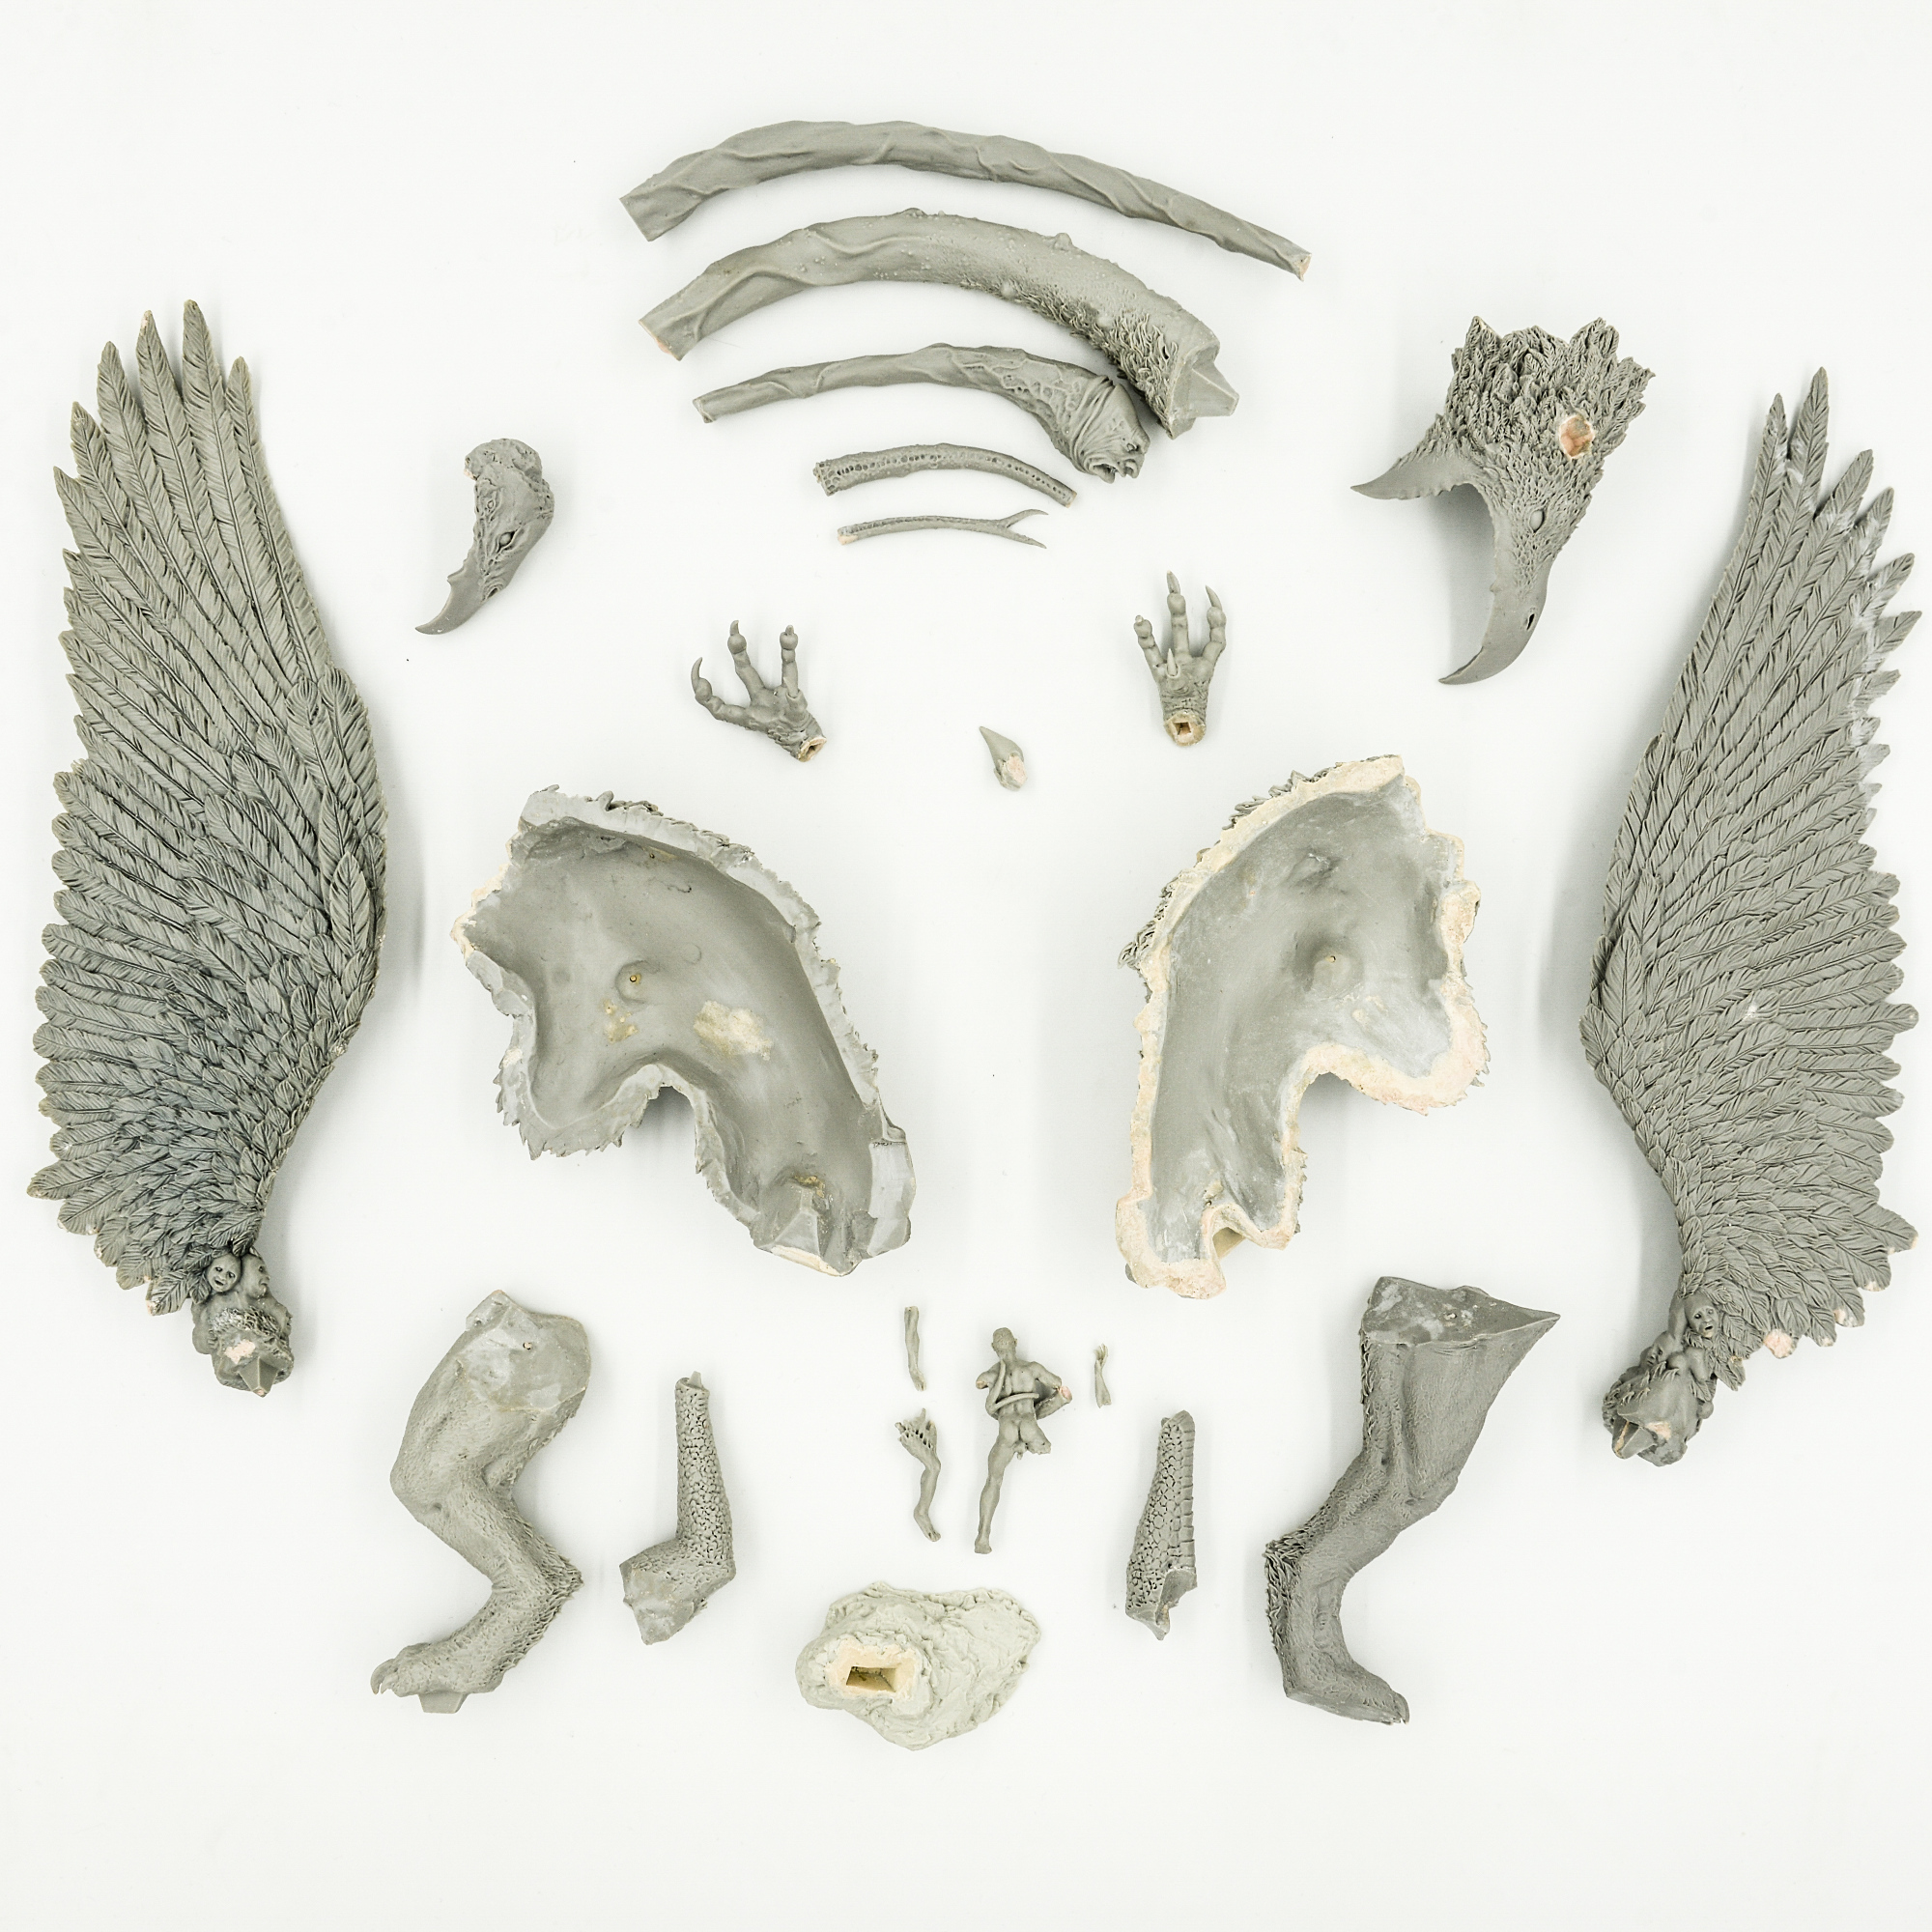
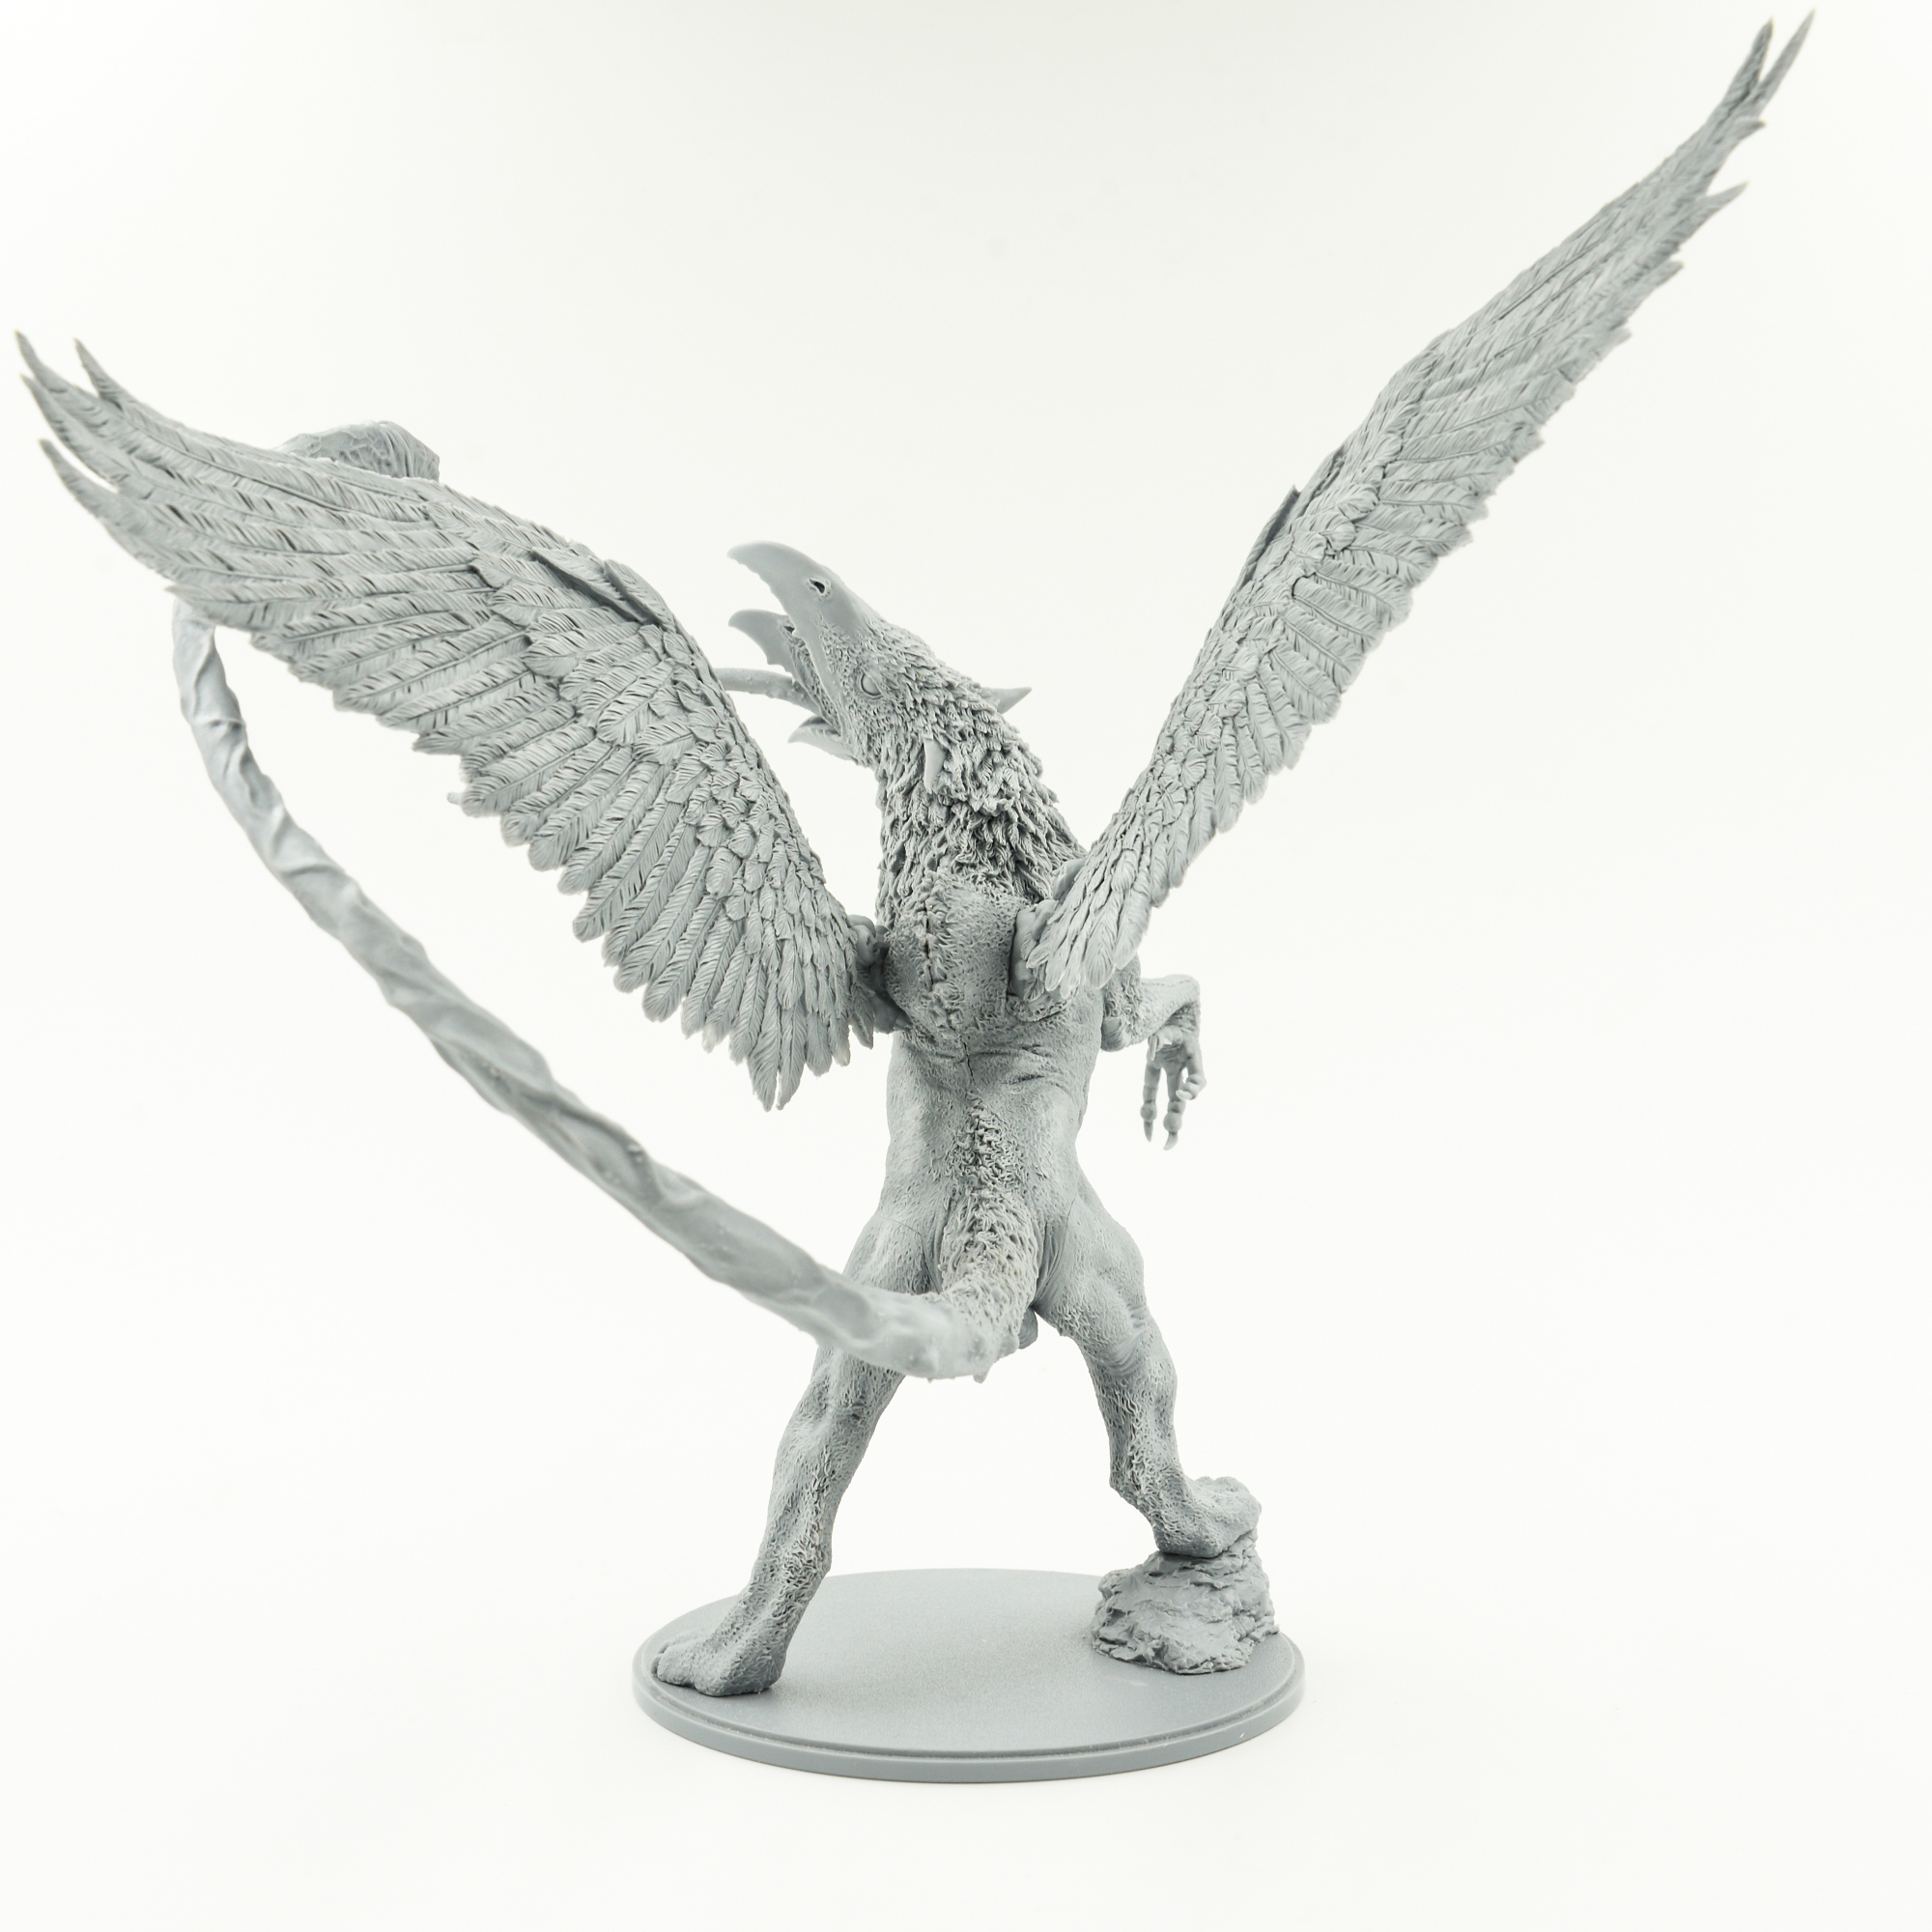
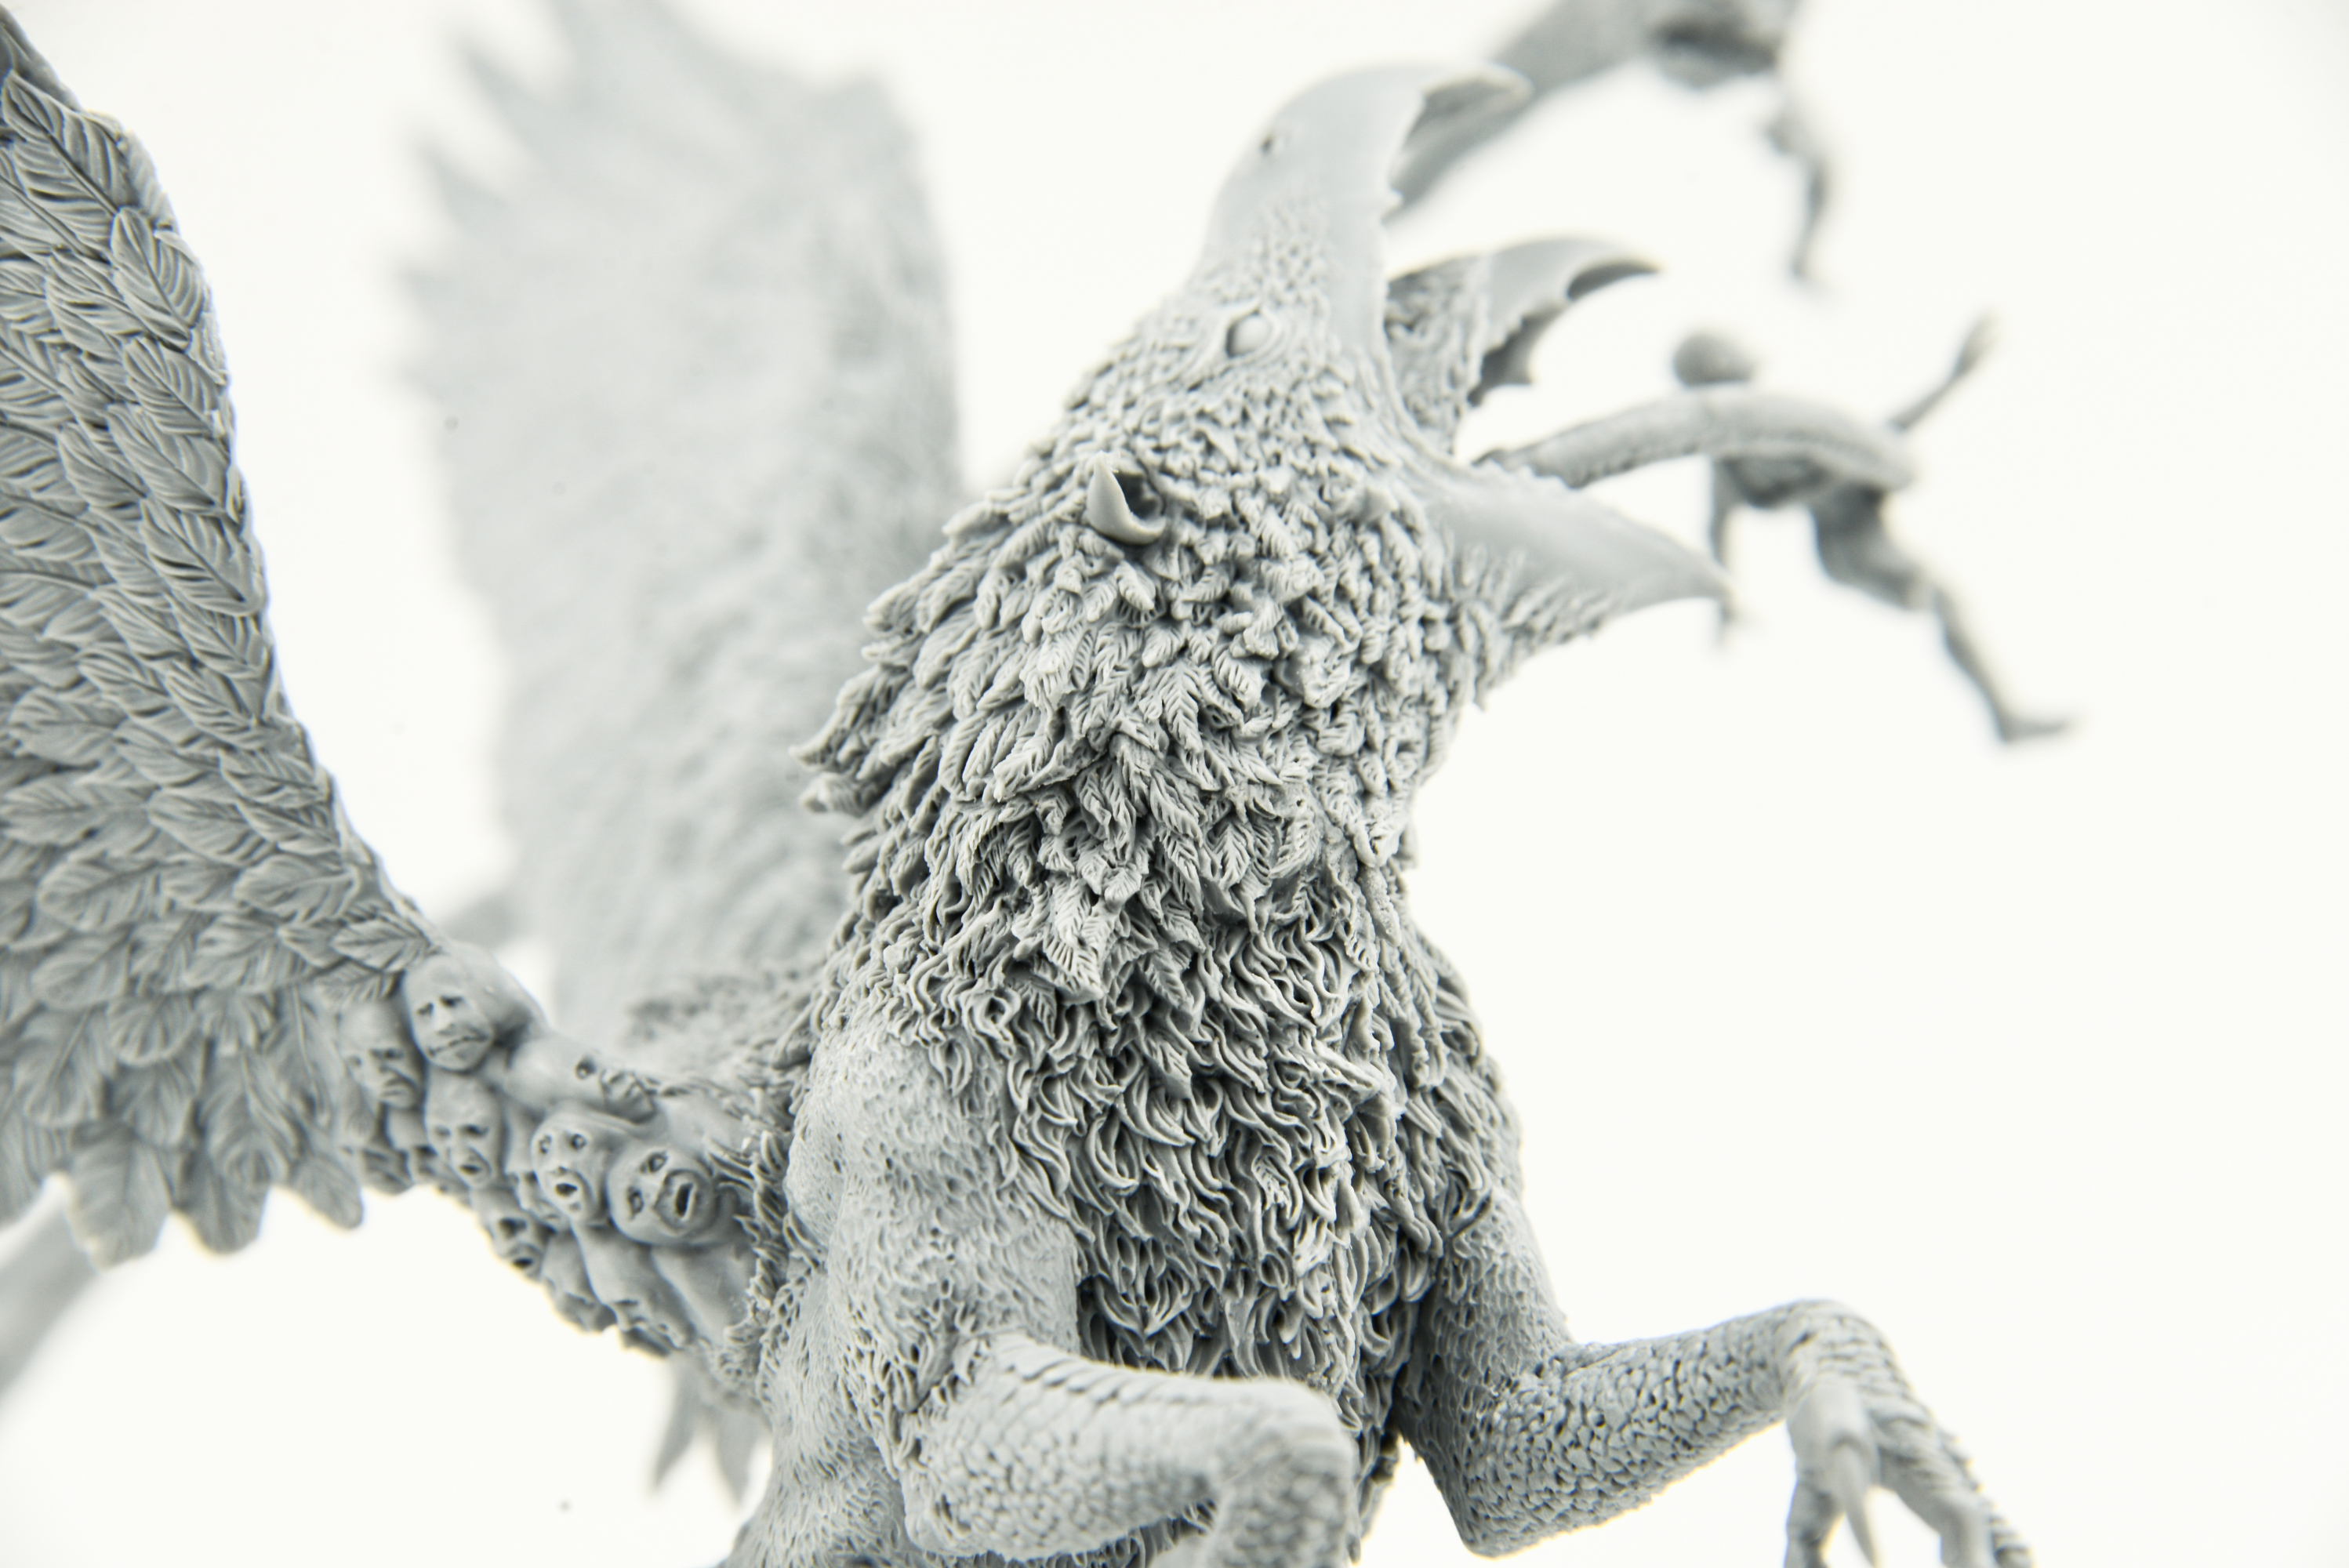
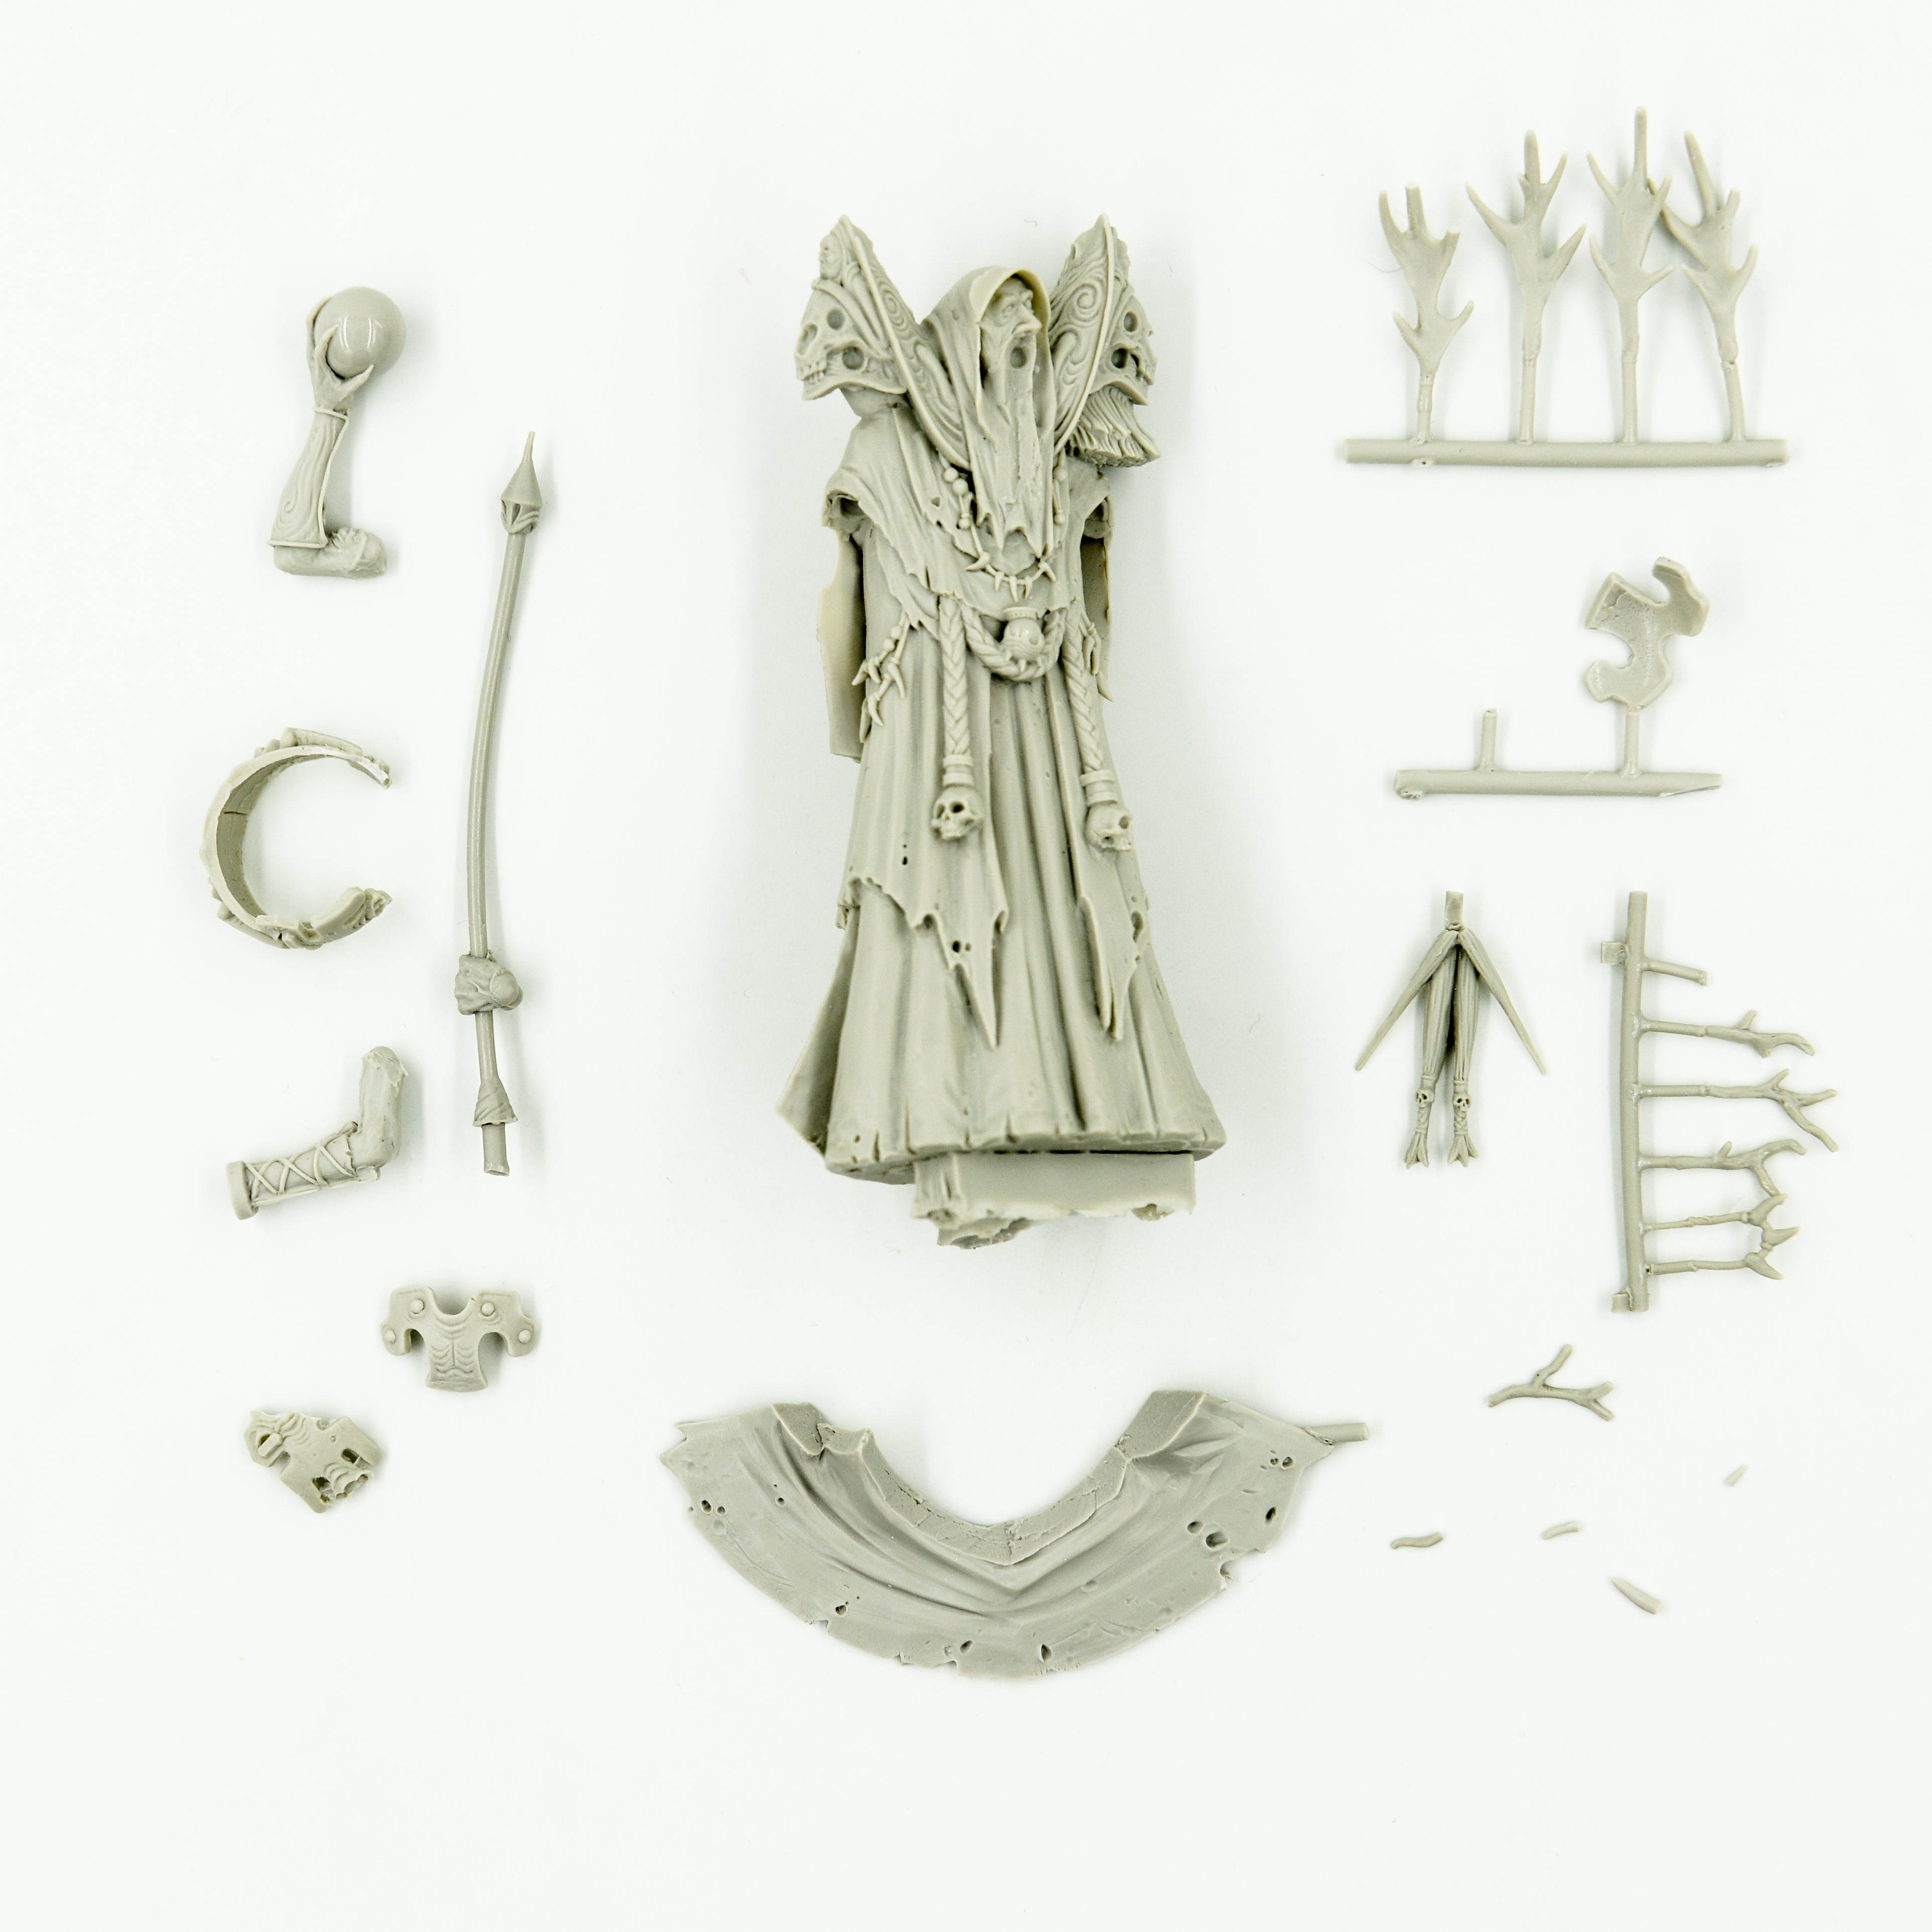
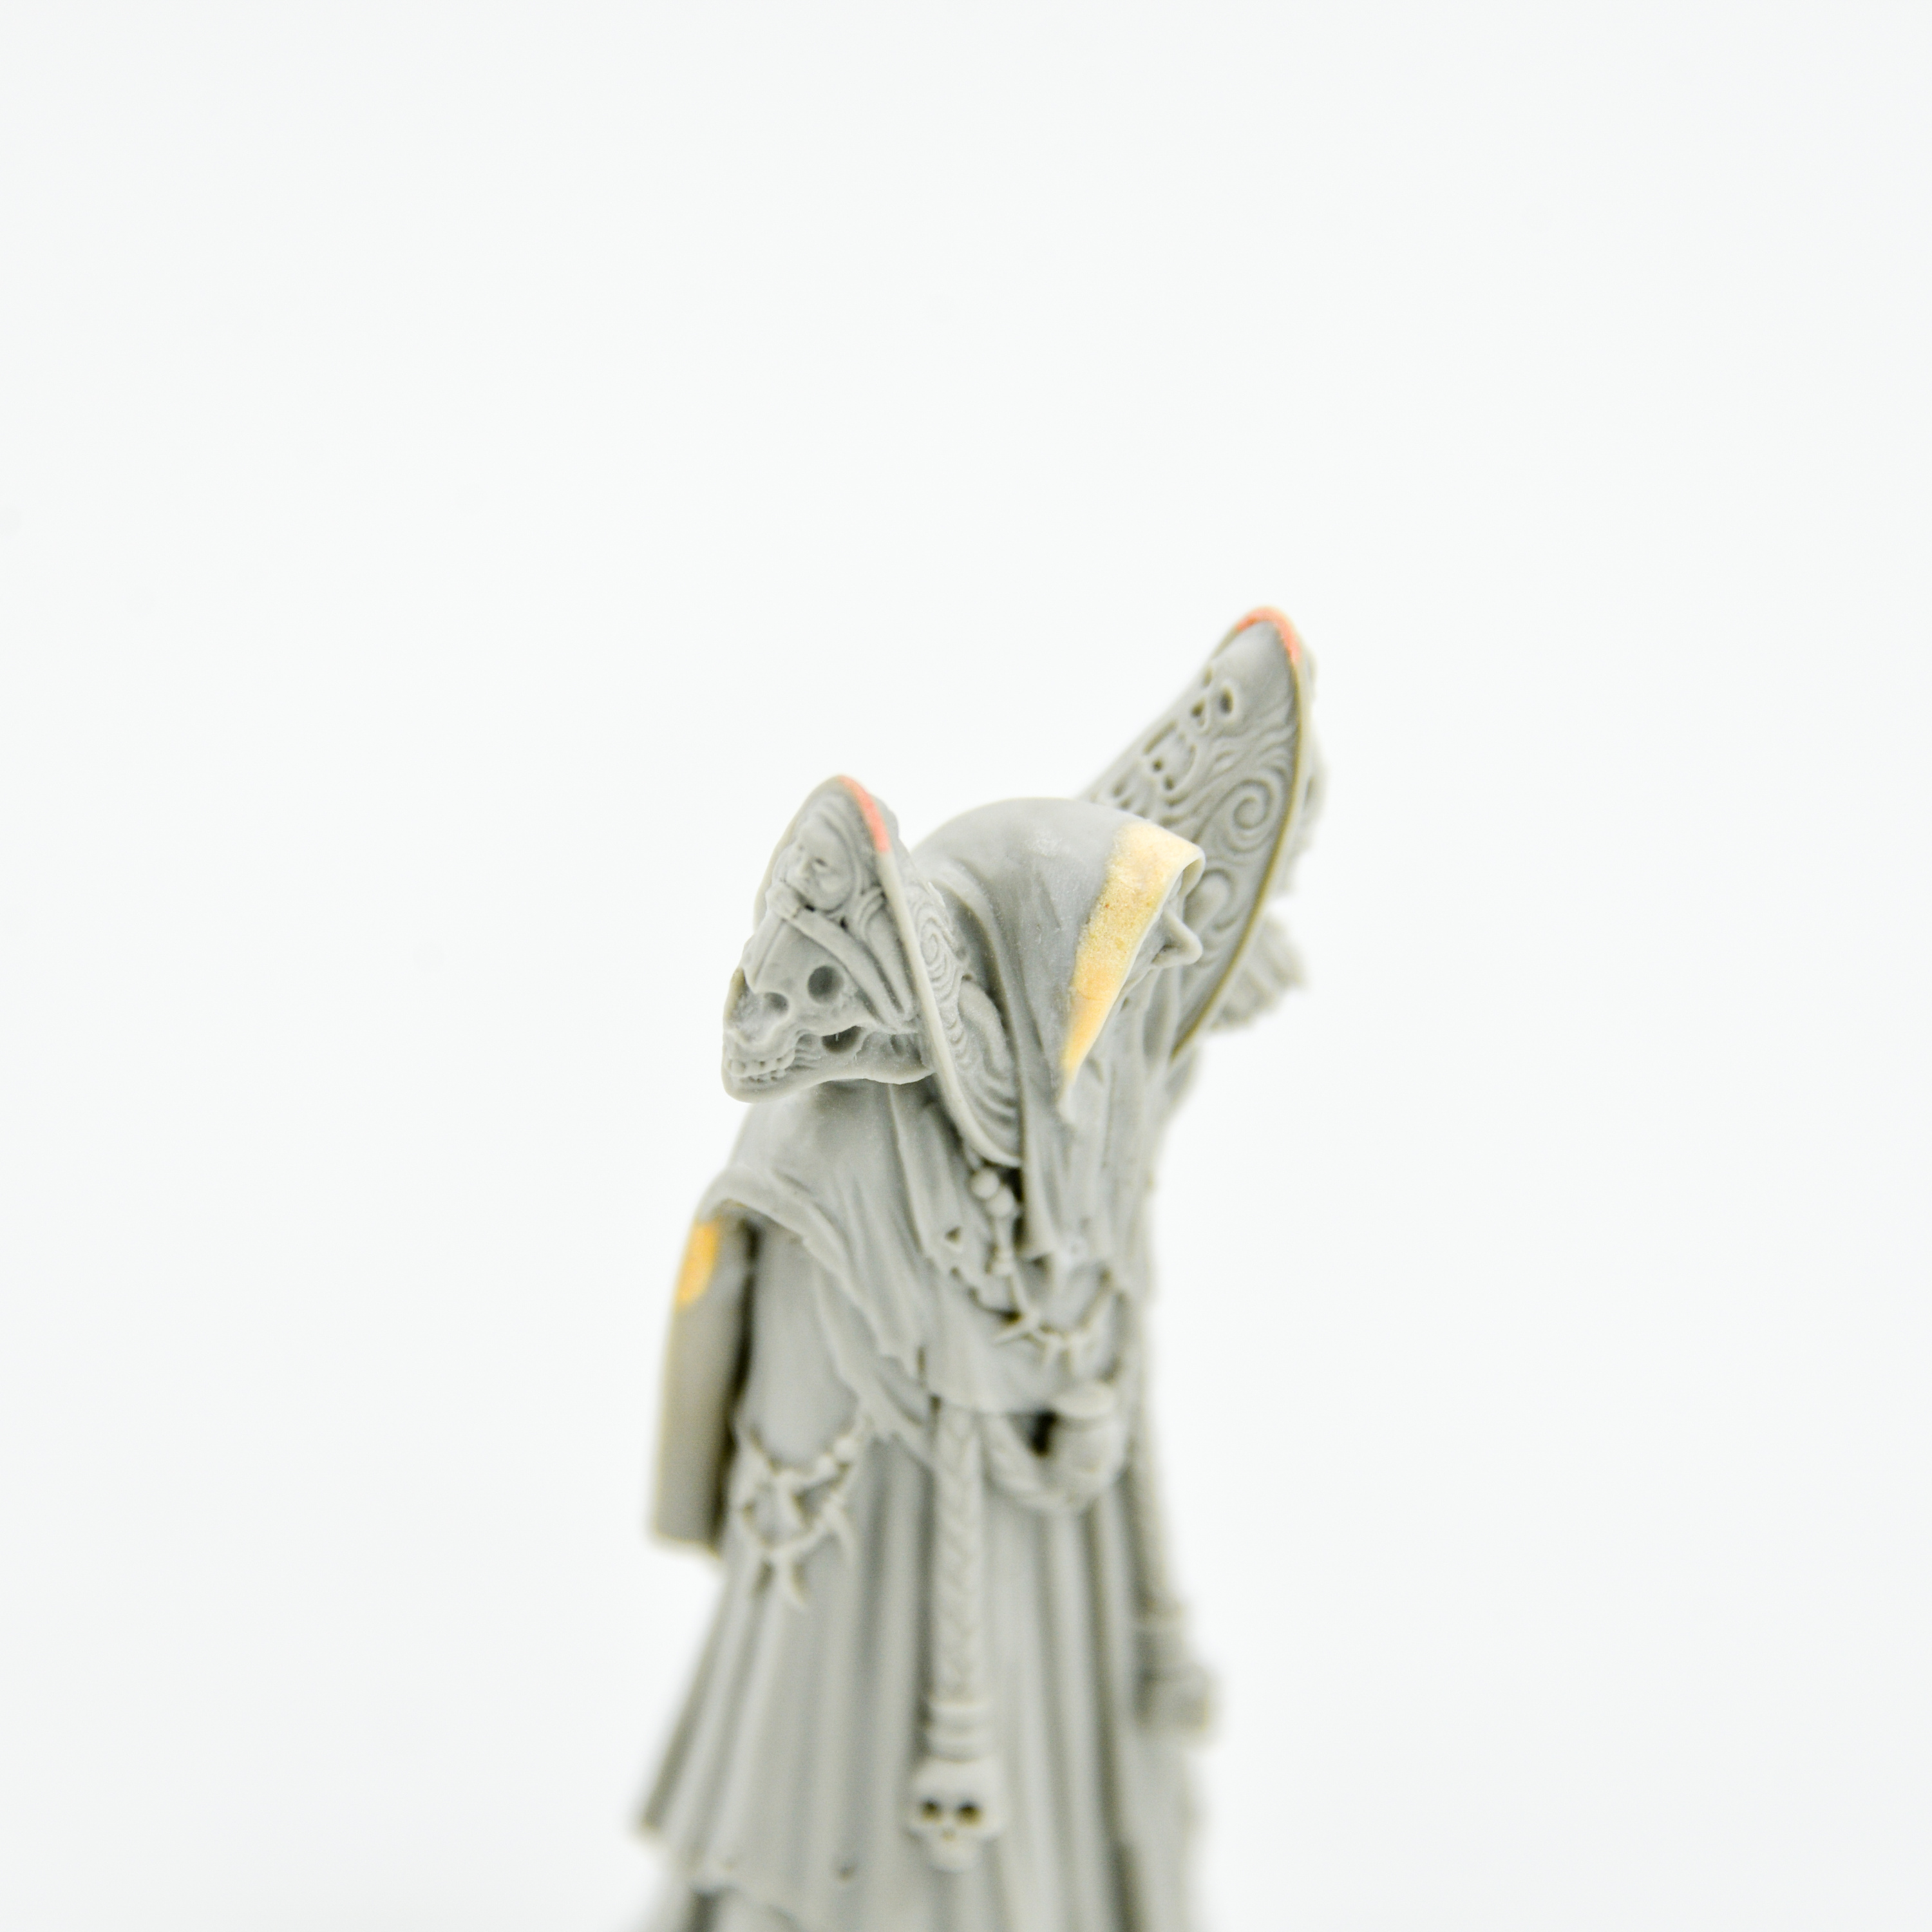
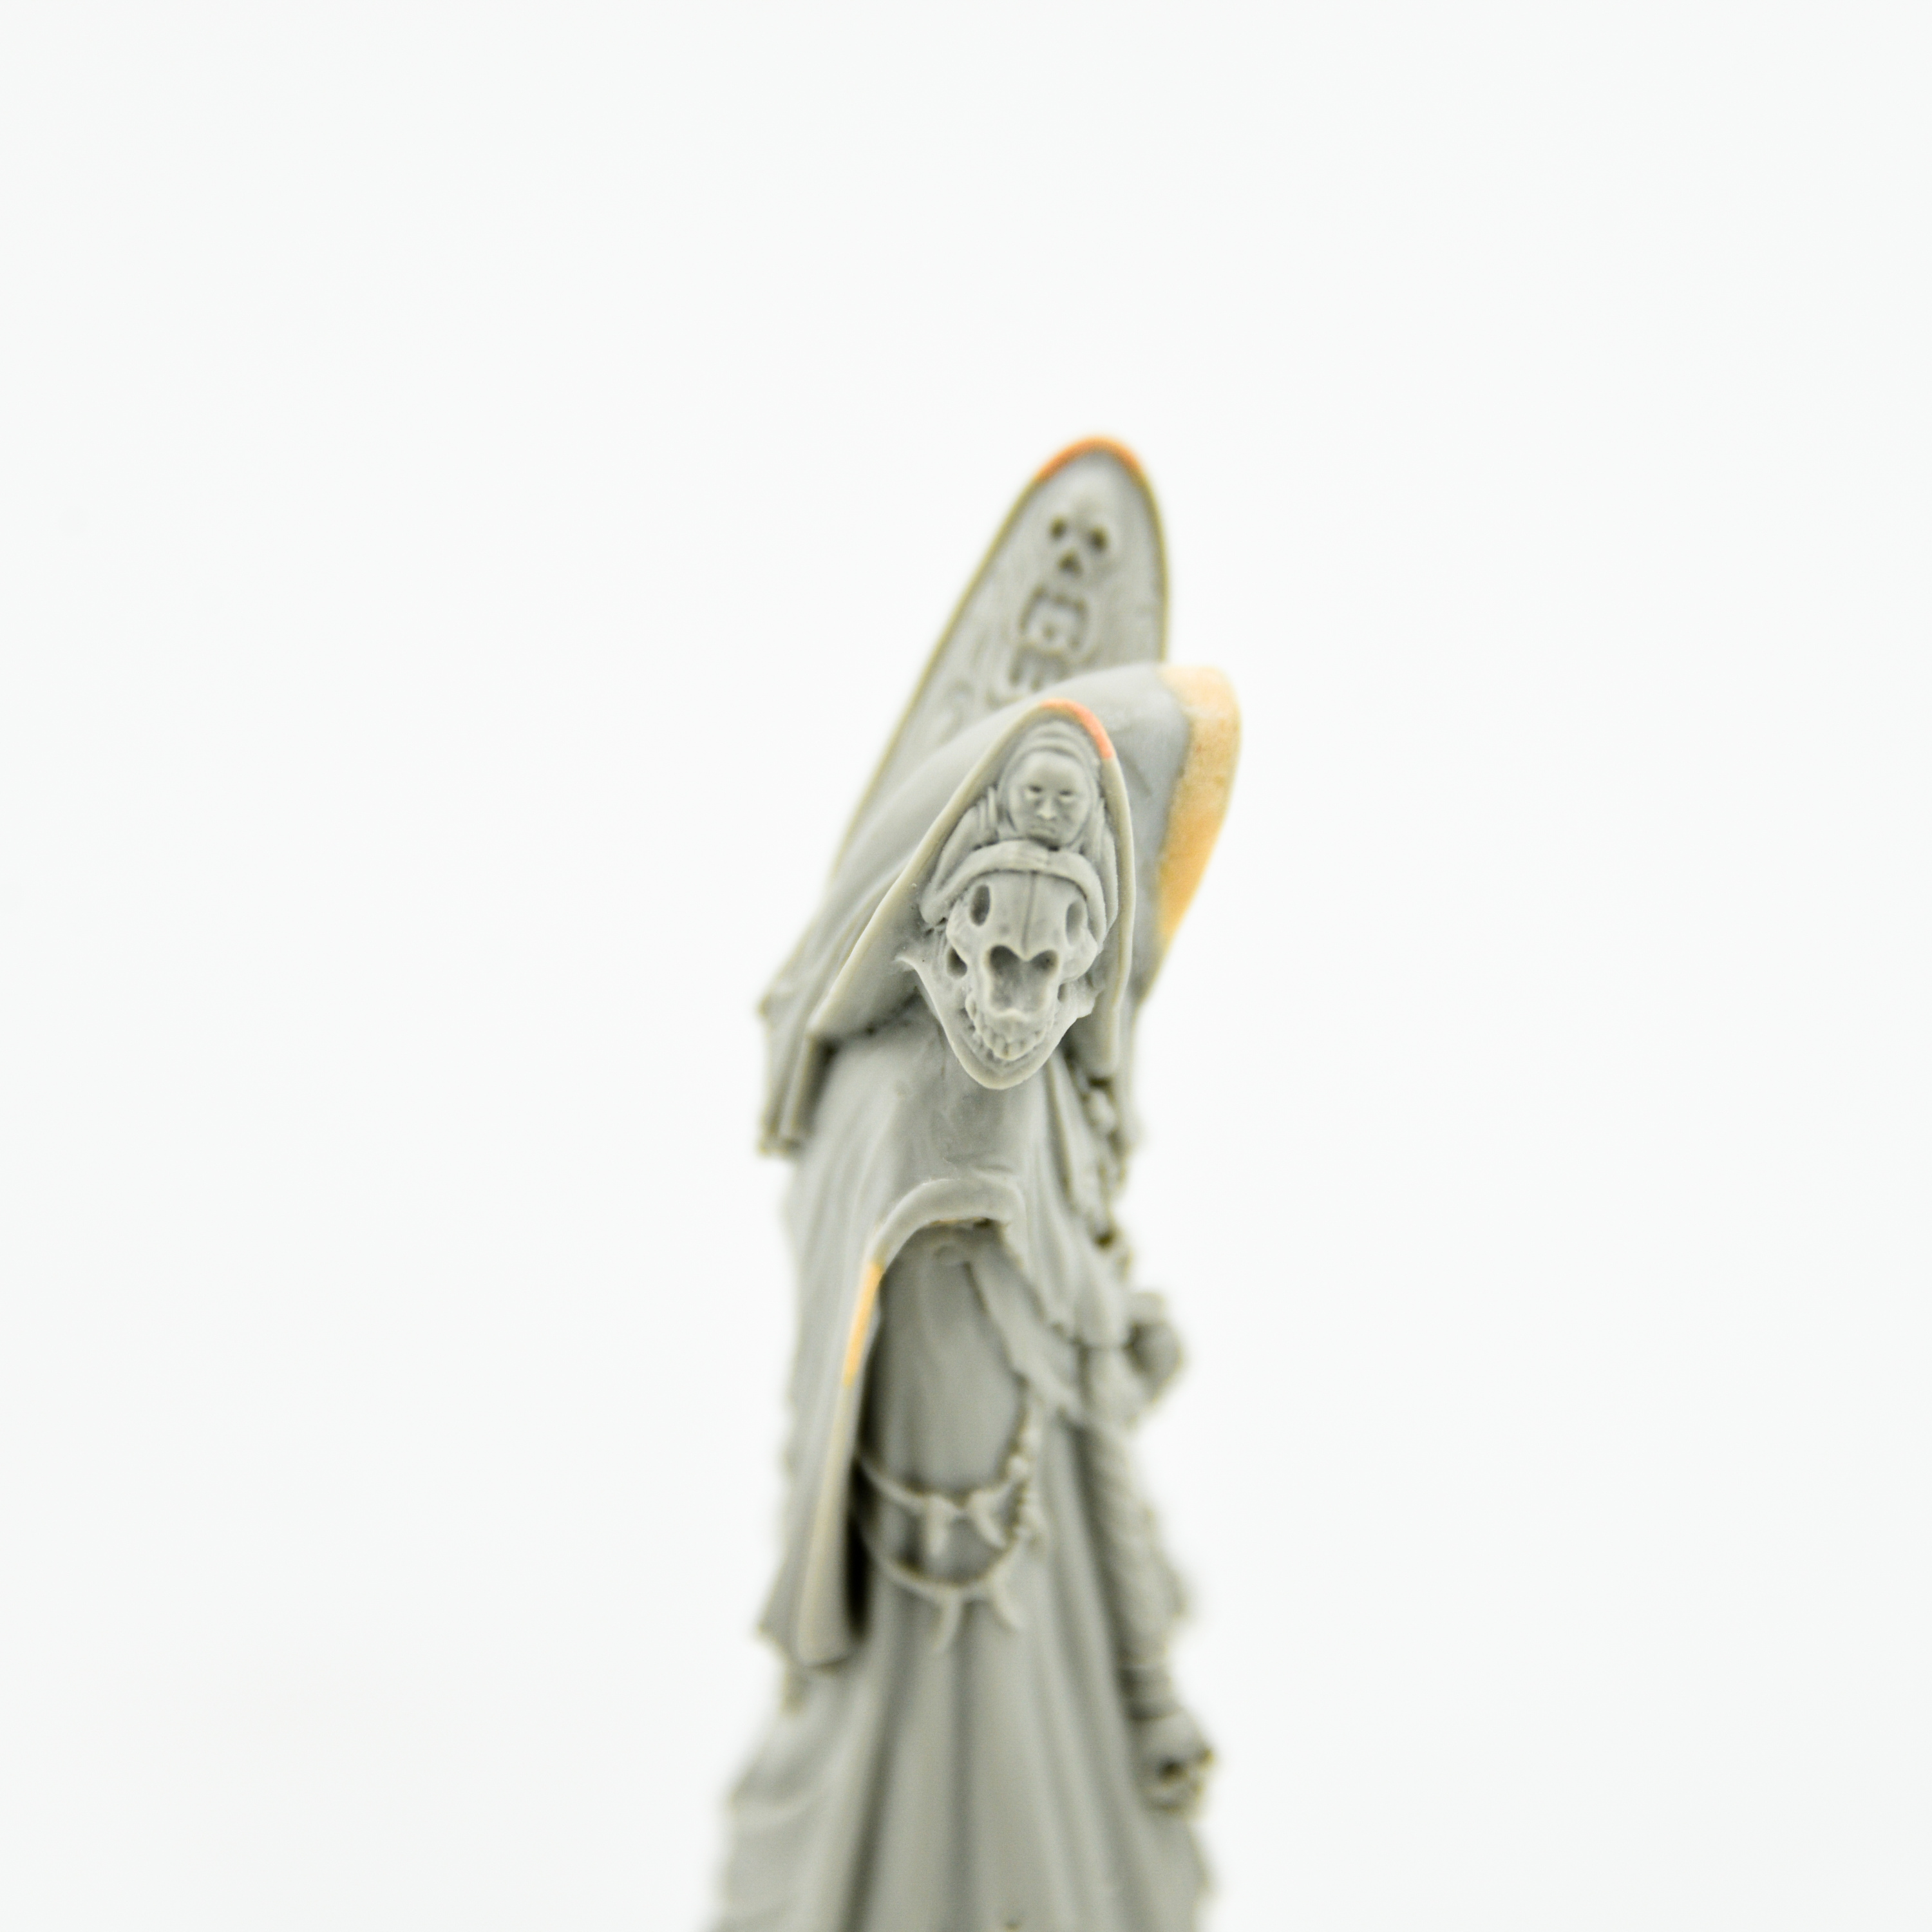
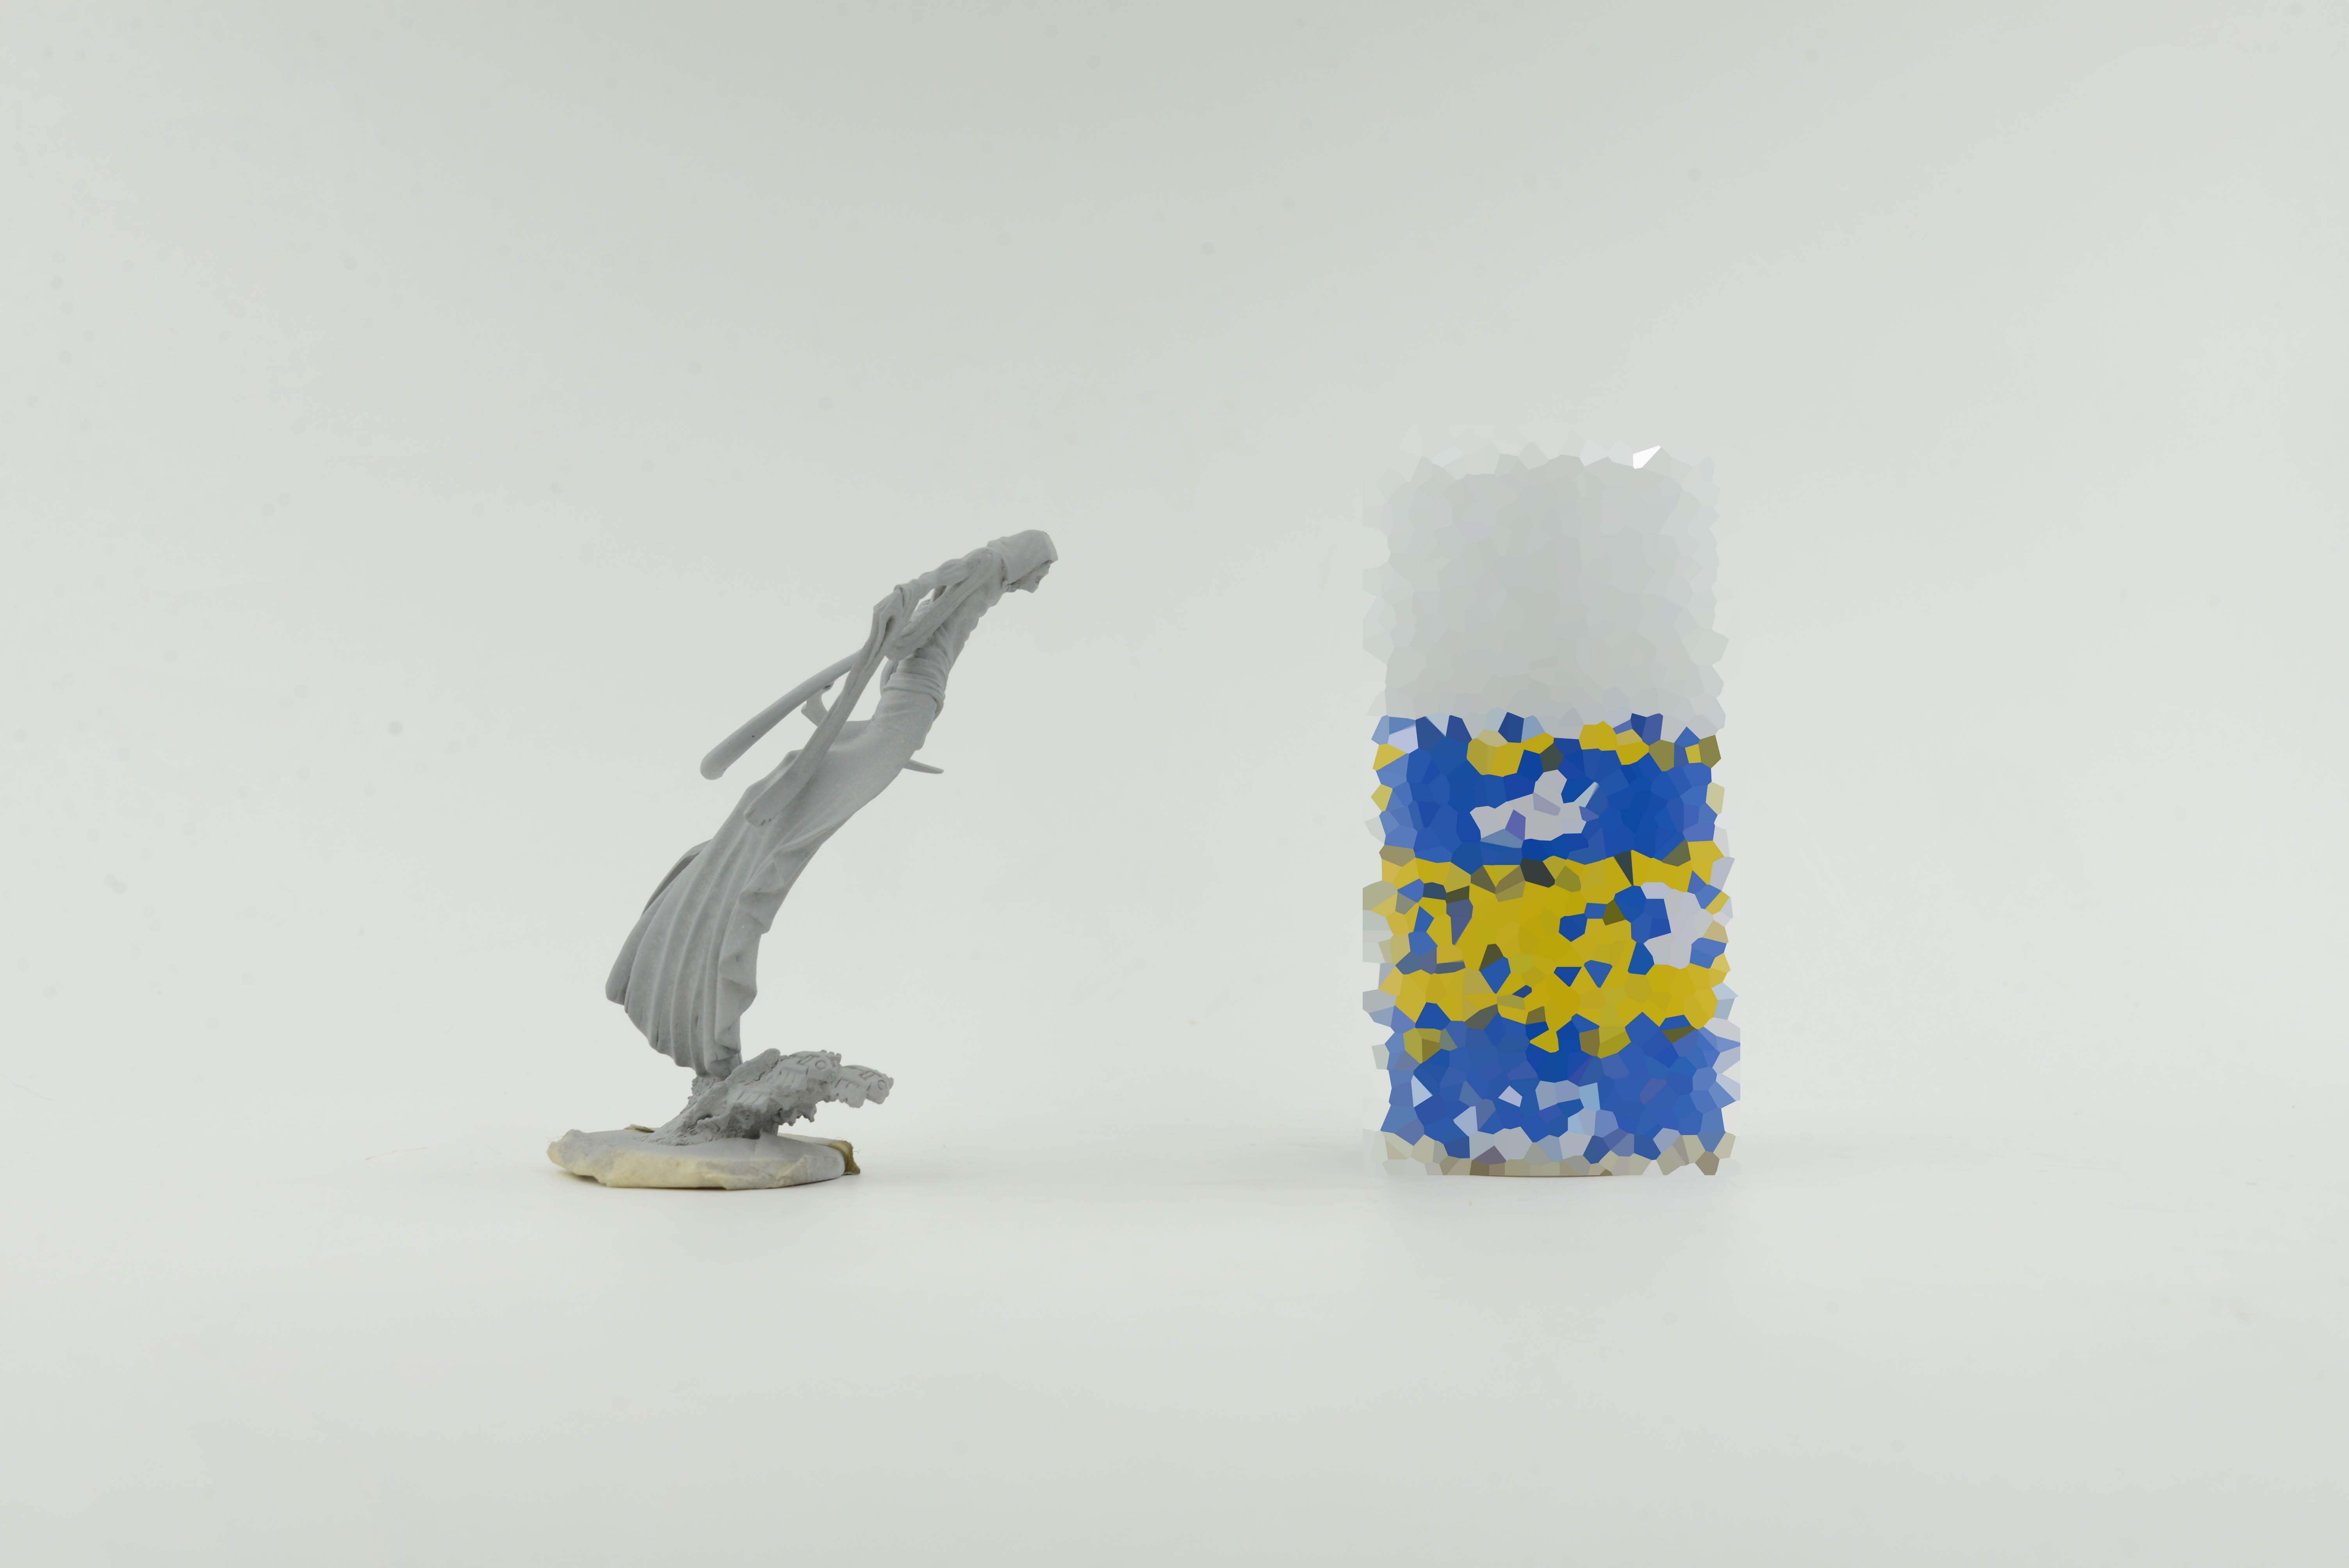
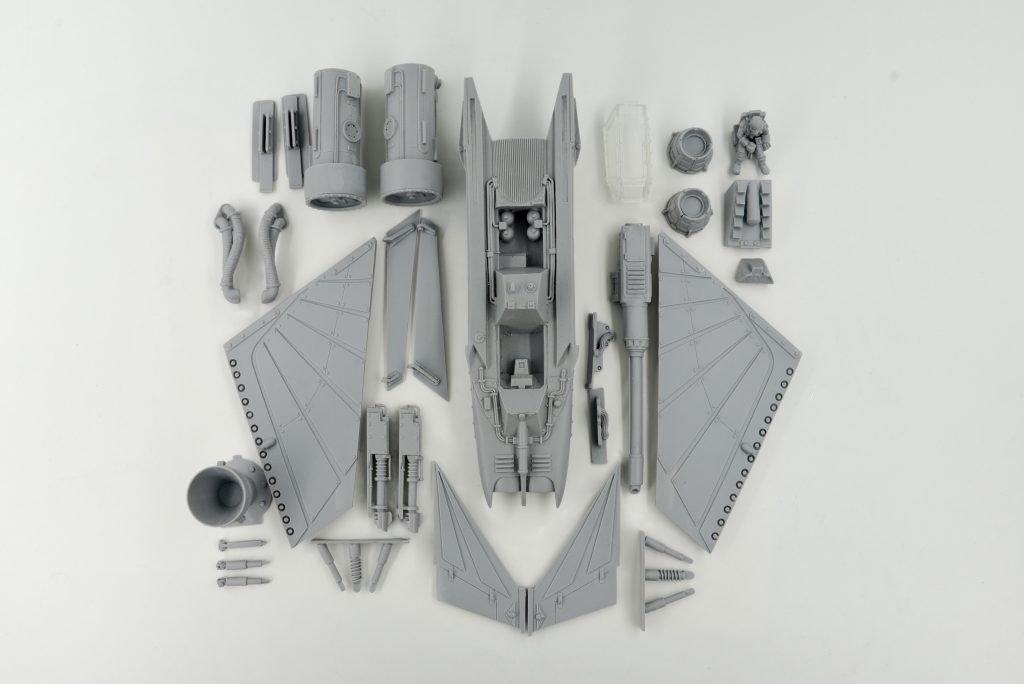
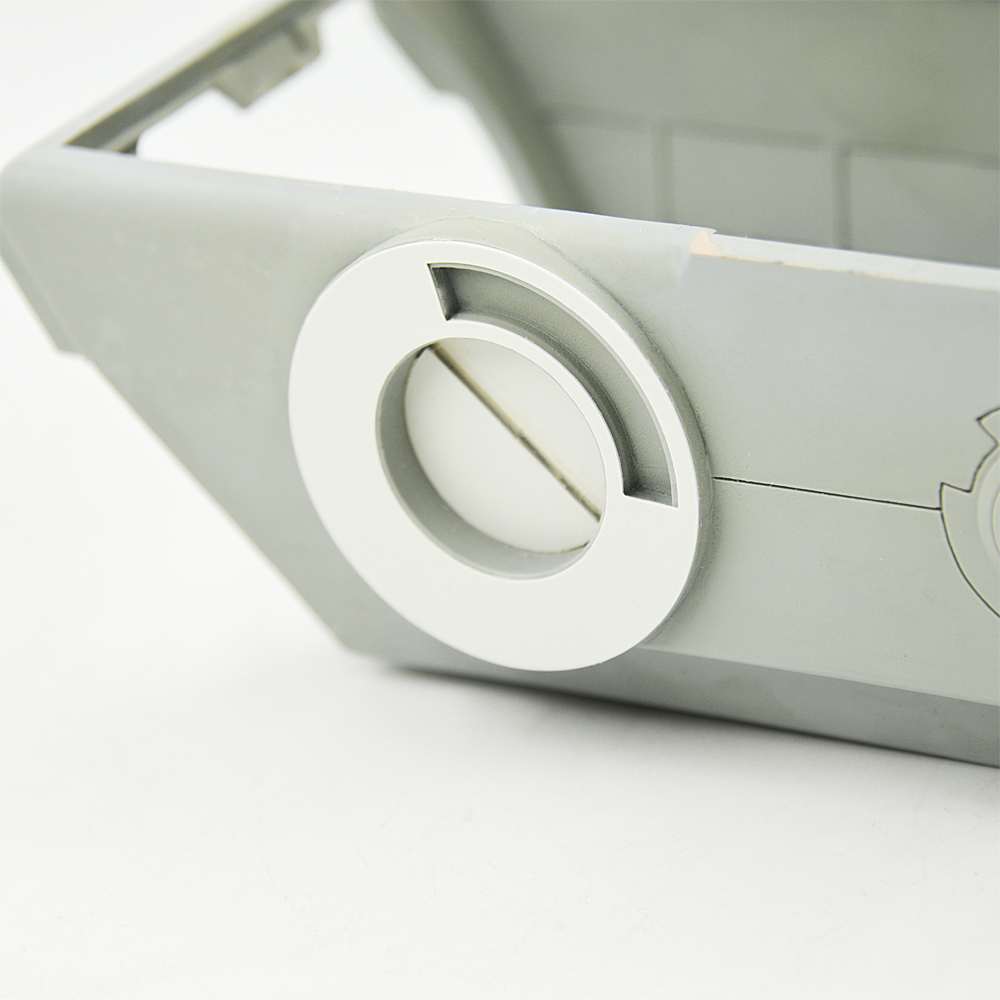
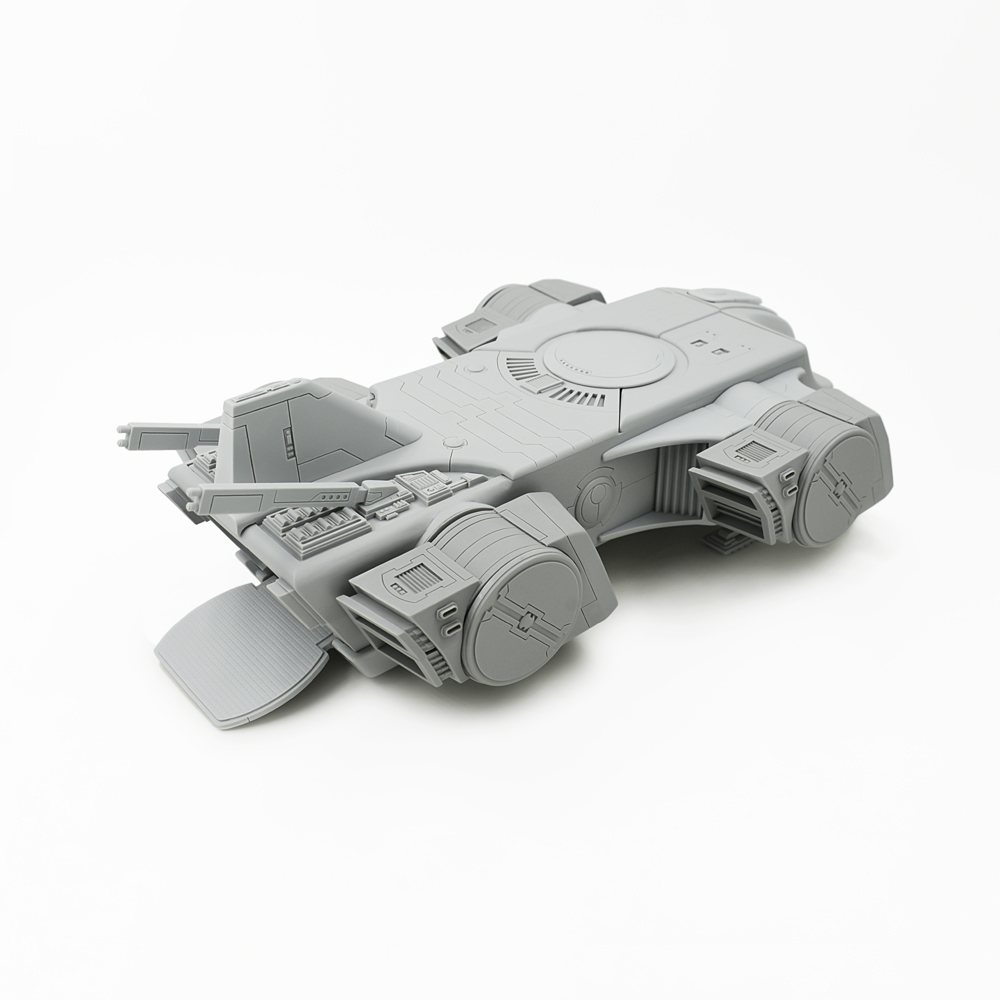
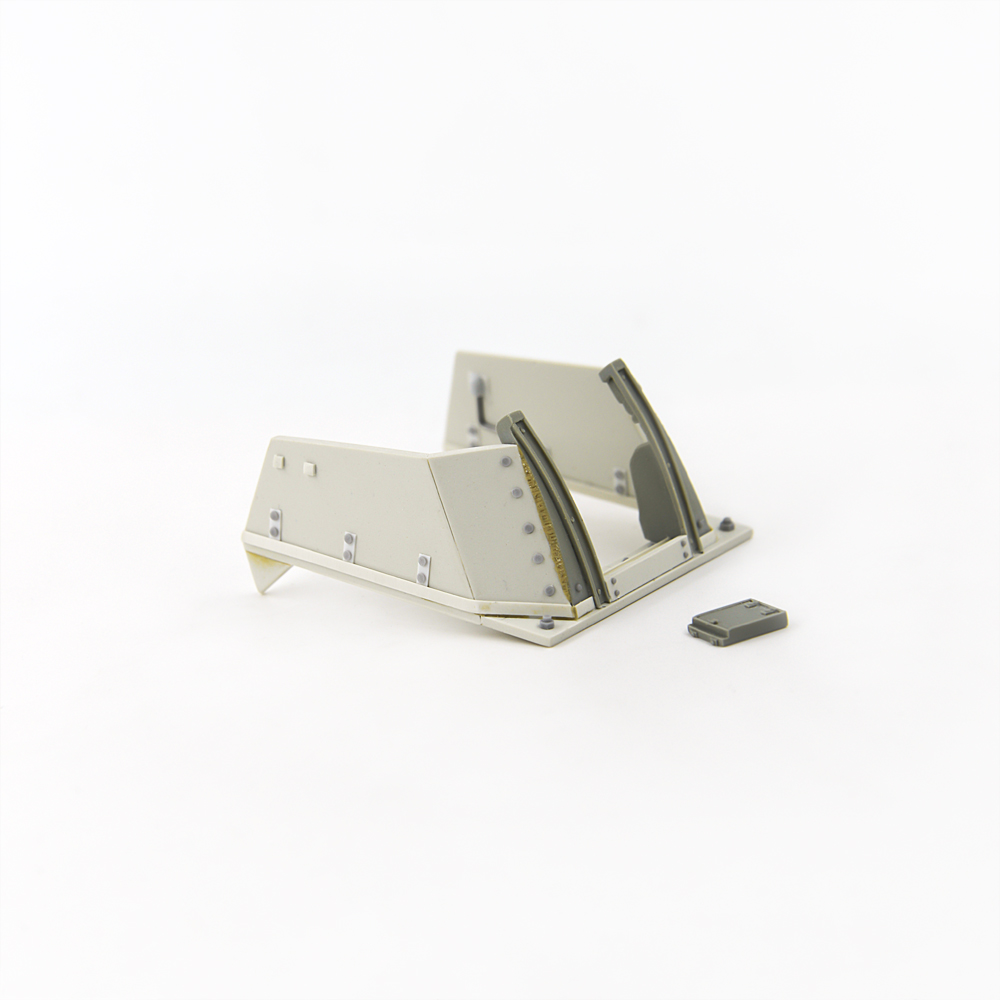
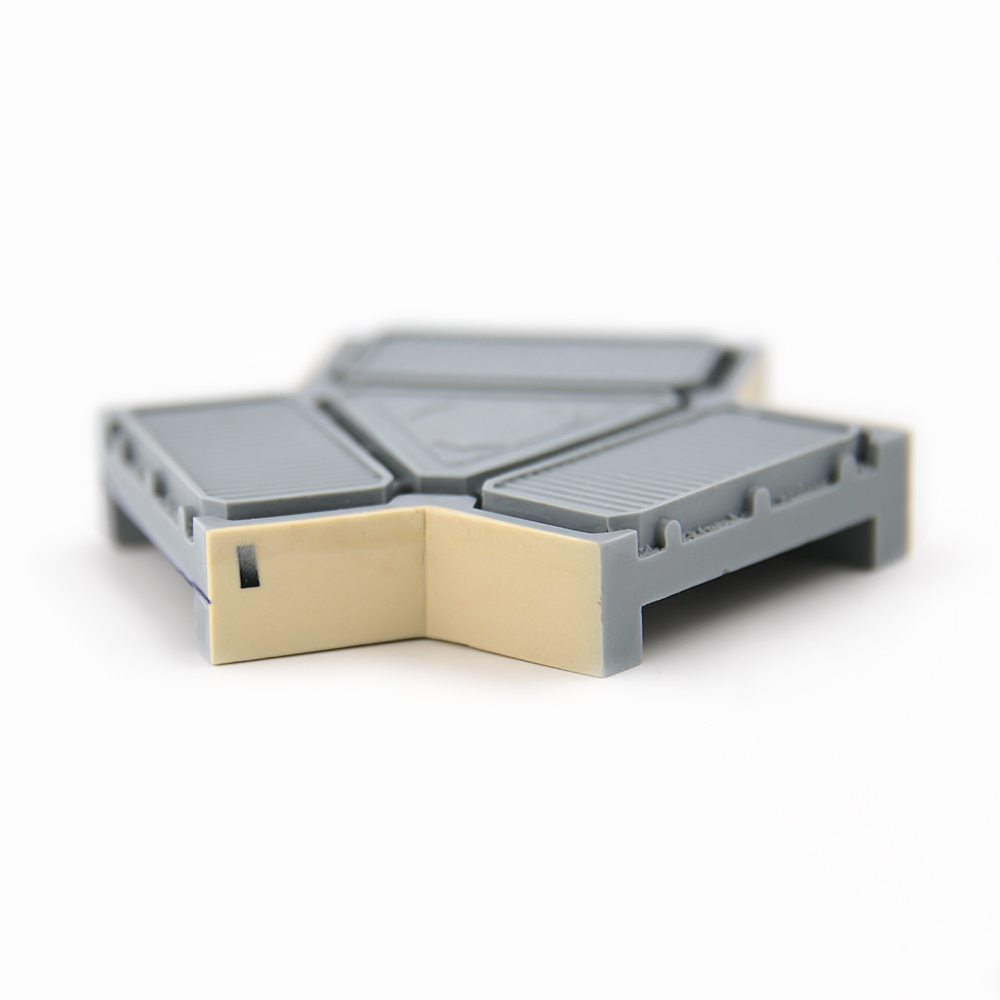
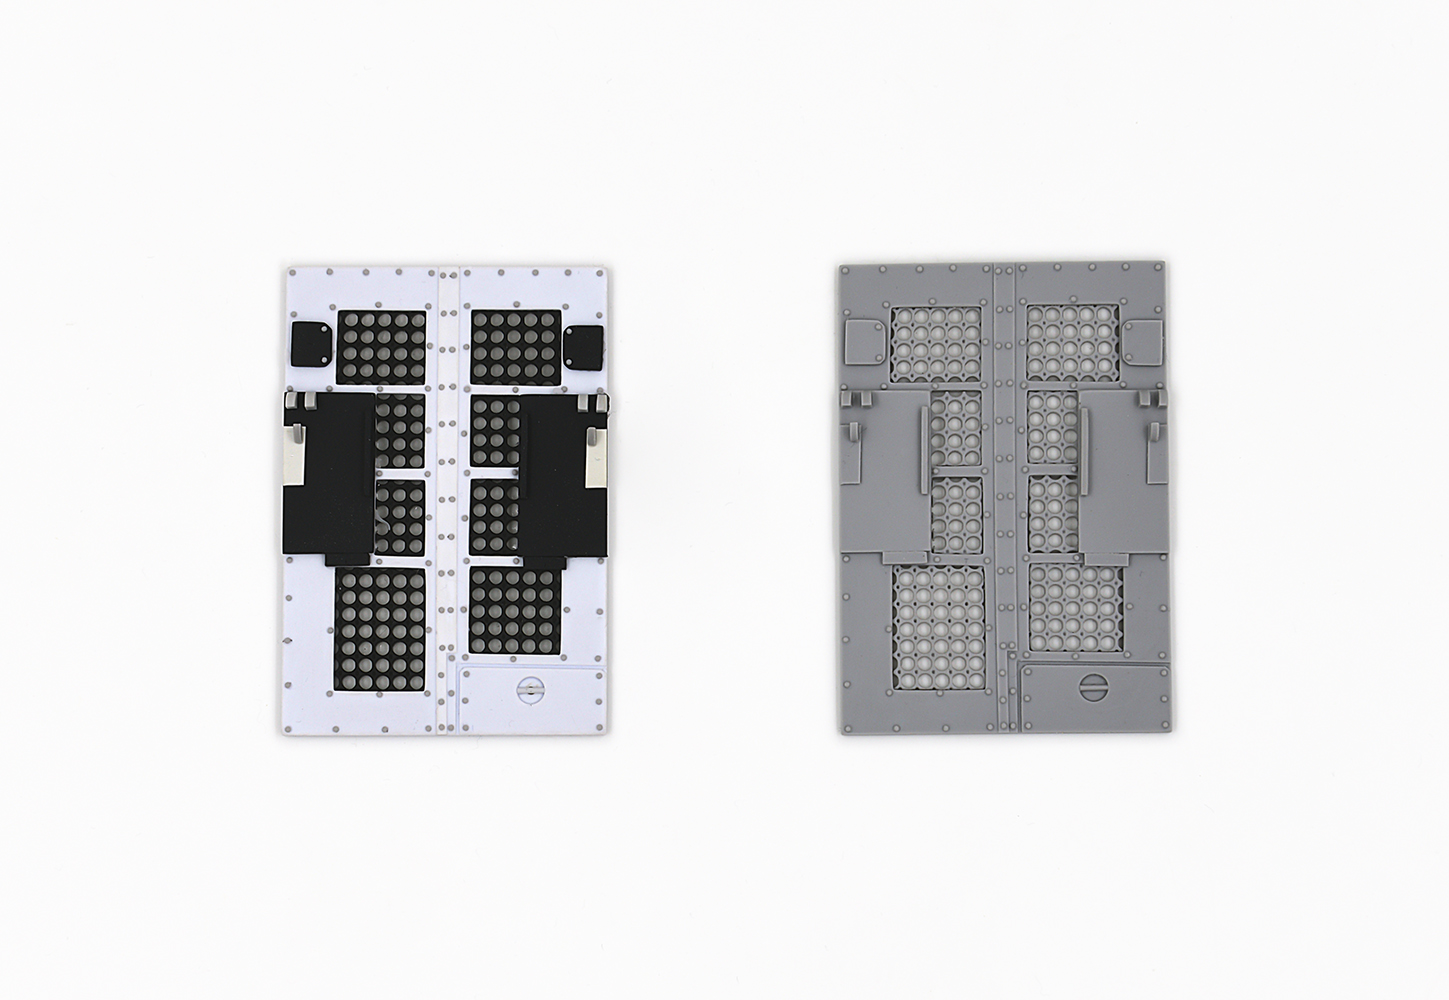
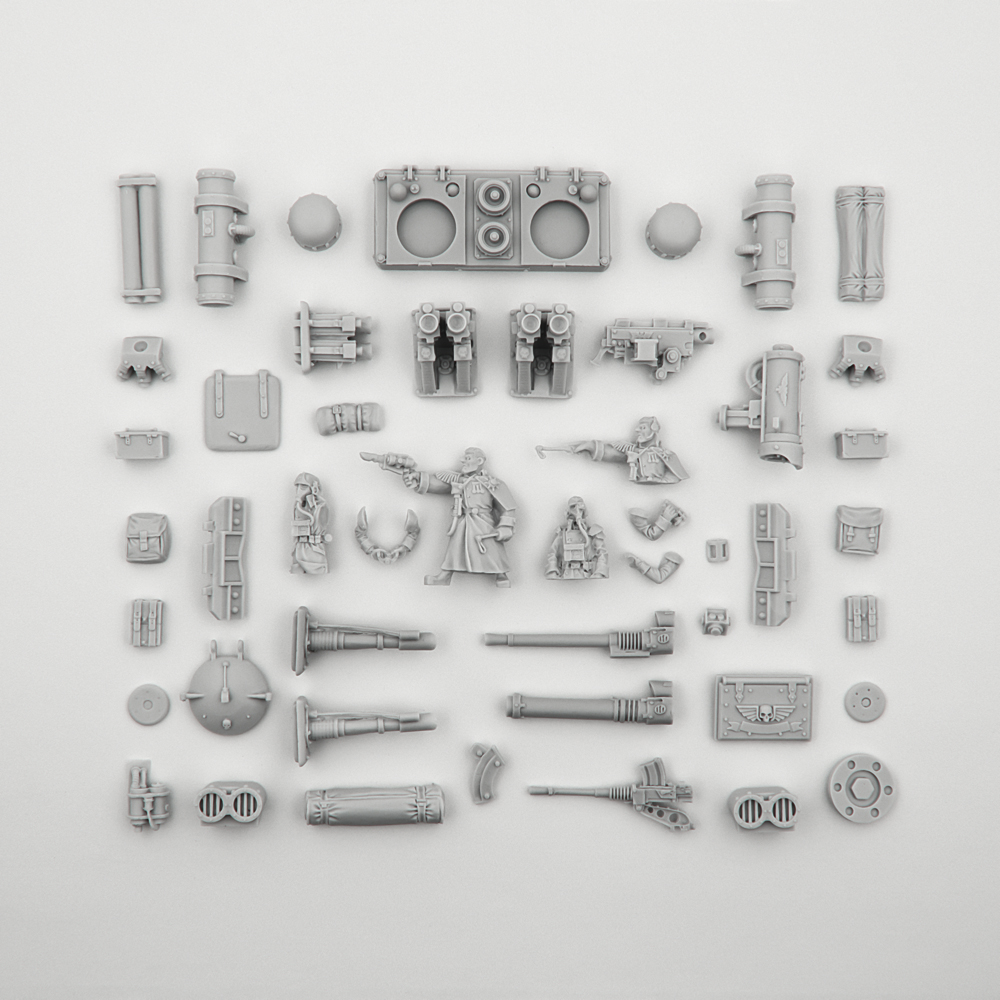
1) Nevertheless, we assume that for what we want to do, the original is as close to the ideal as possible. Here’s what the original Gryphon looks like on spare parts (Click on the picture to enlarge the image).
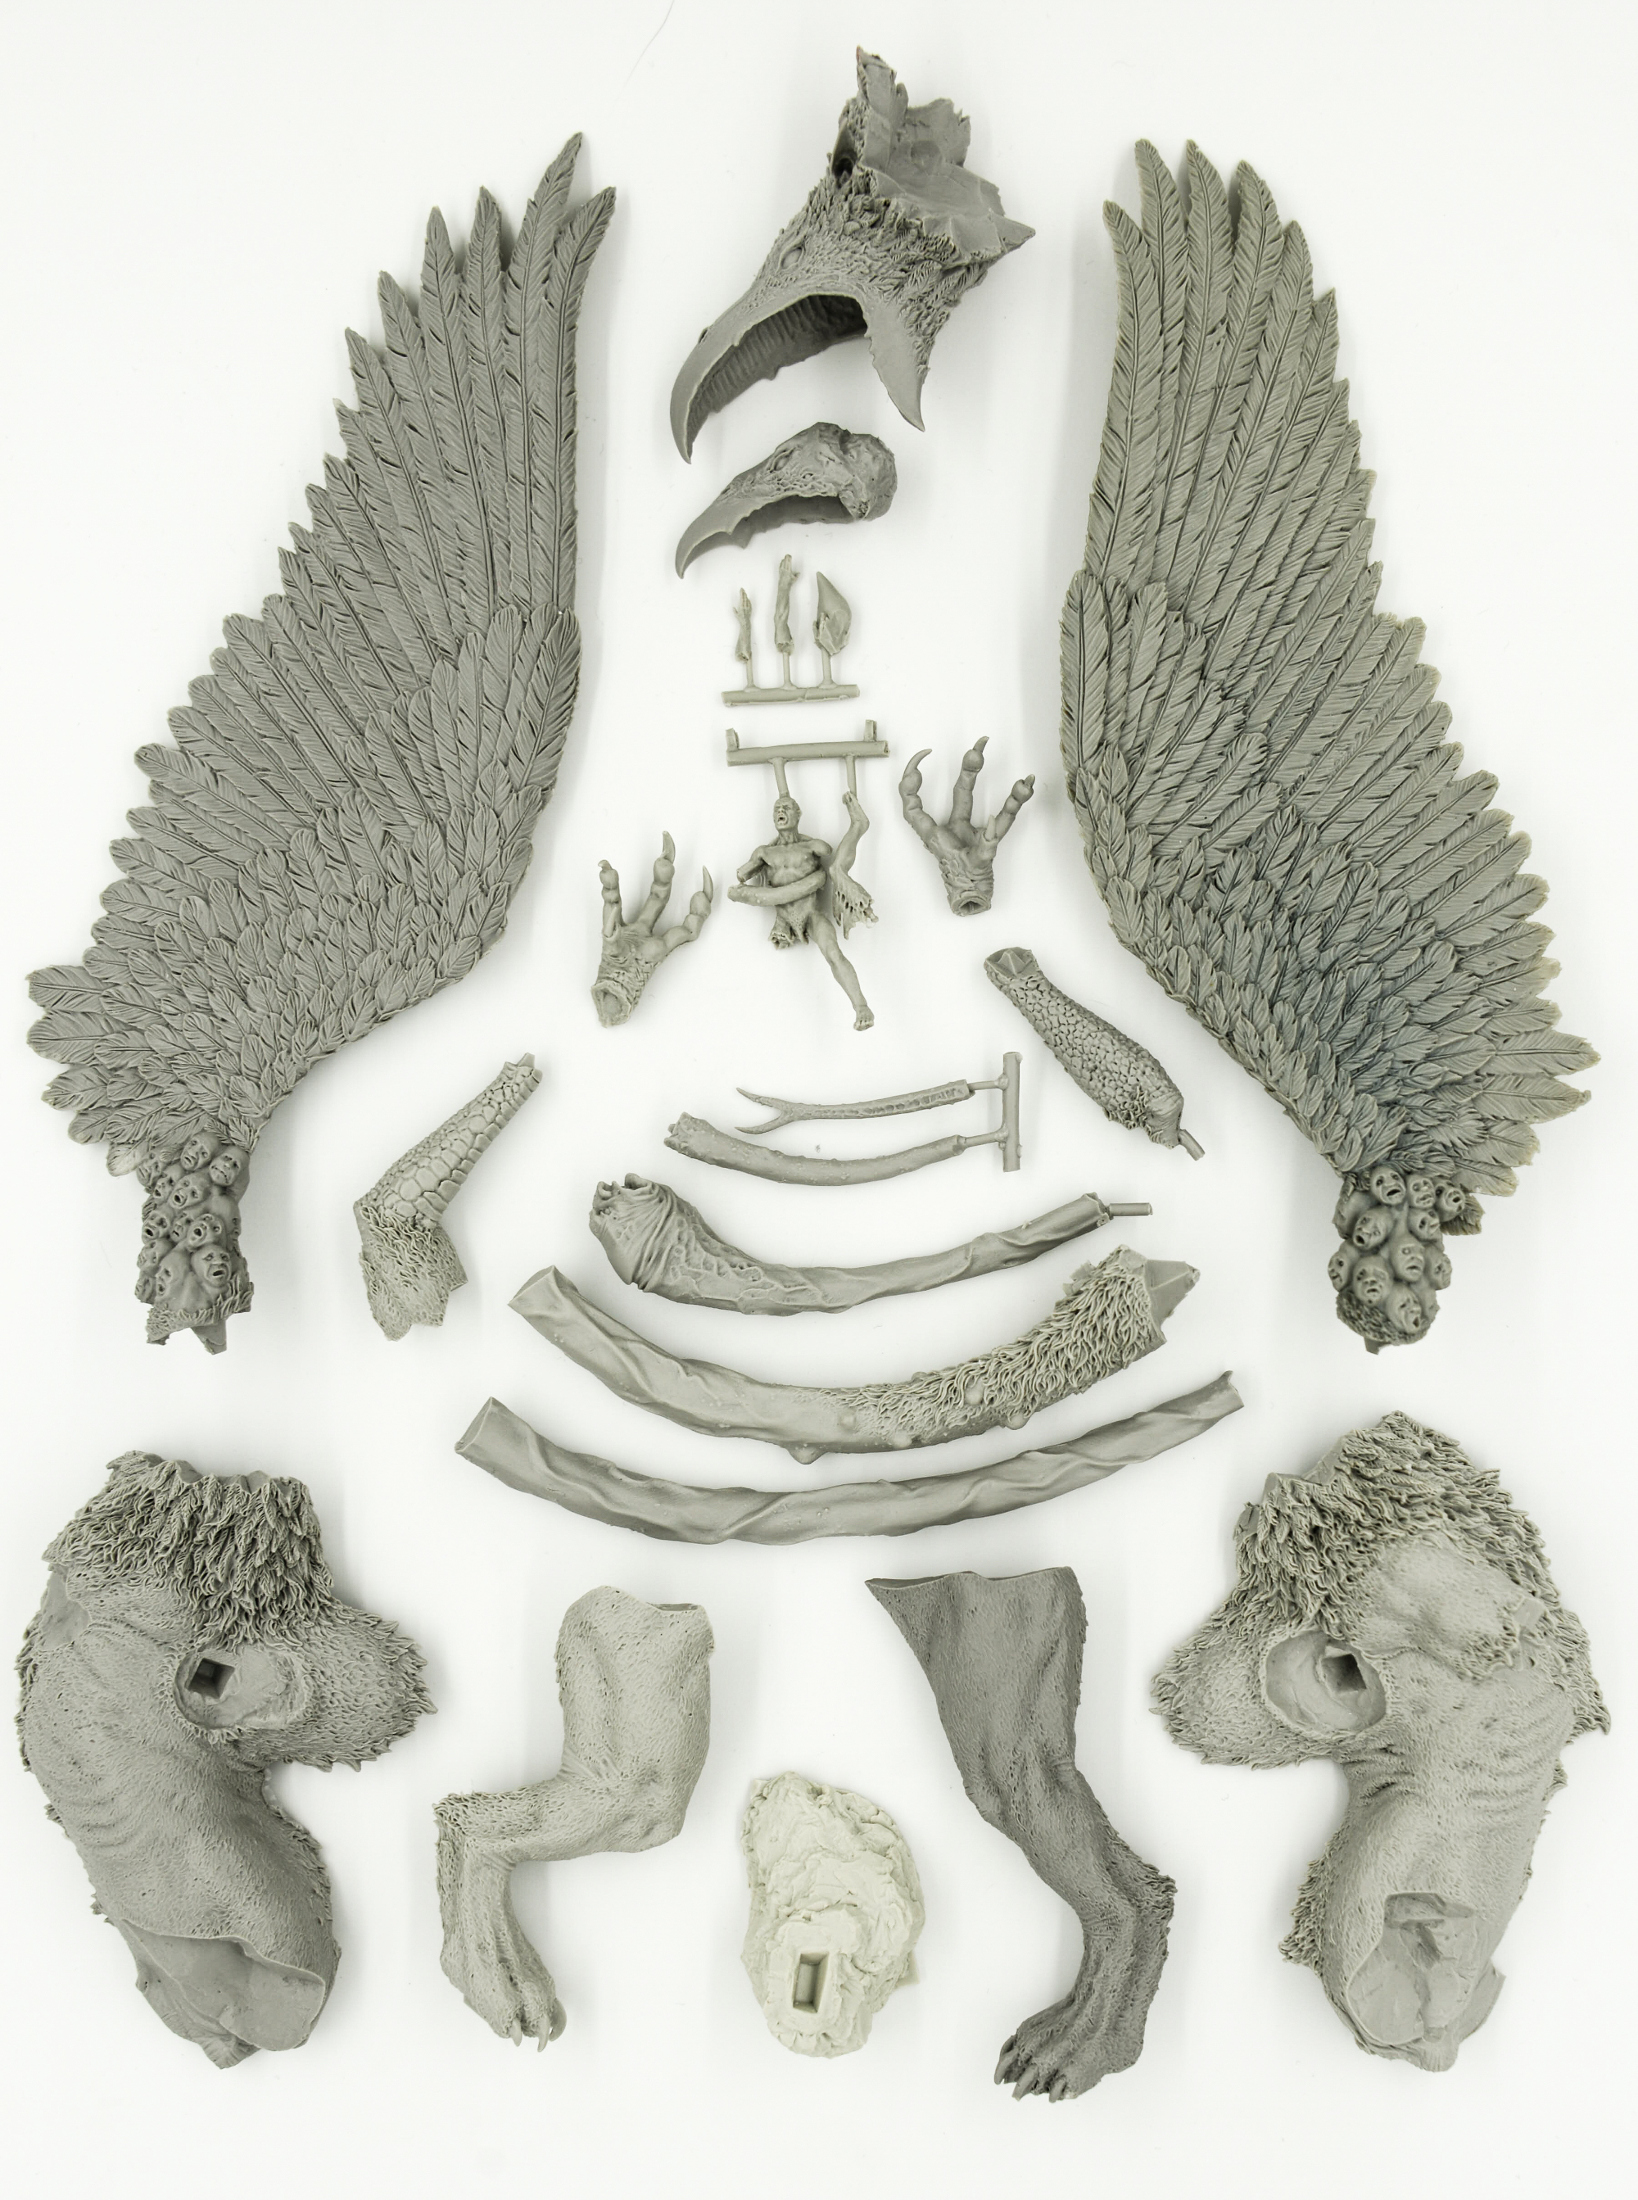
The gryphon photo on spare parts
2) Remove the burr (this is a completely standard procedure familiar to all collectors and players).
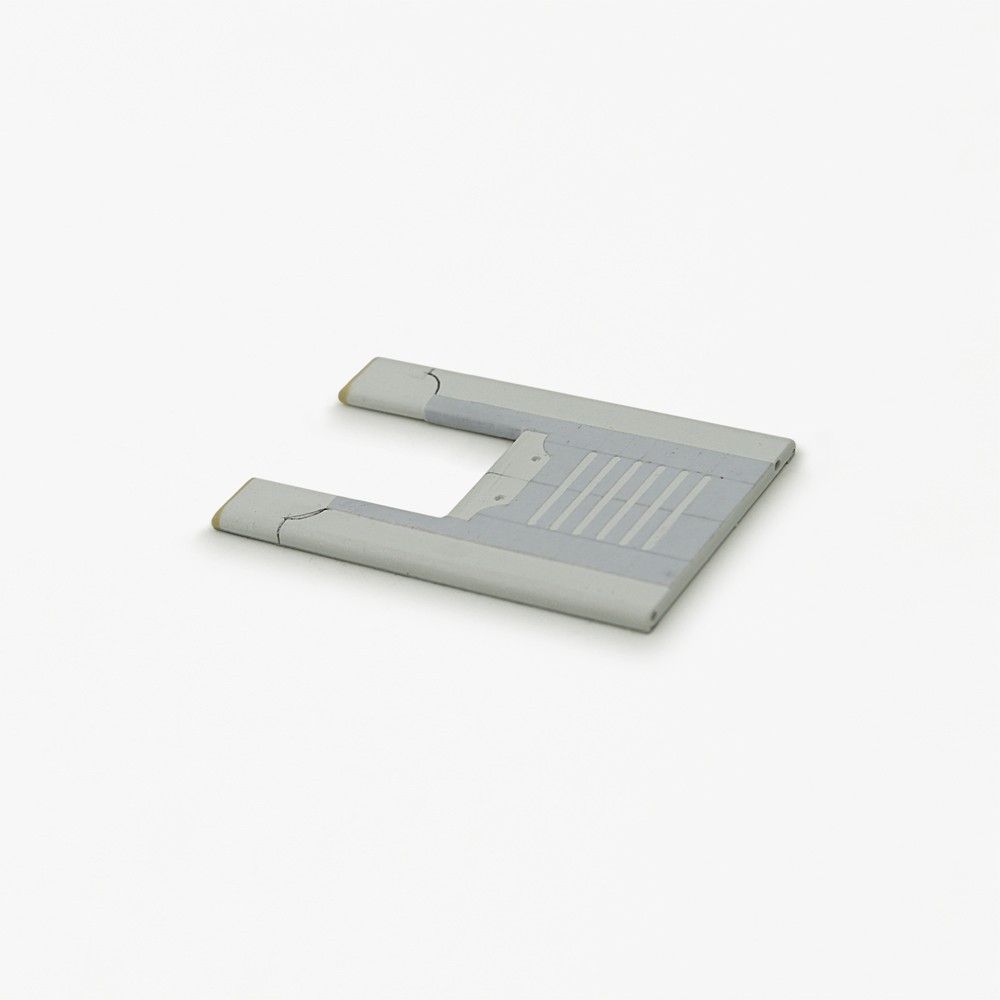
3) Further more difficult work: We need to remove the matrix displacements: the matrix shift photo. This procedure already requires some degree of skill from the person.
4) Straighten the deformed parts
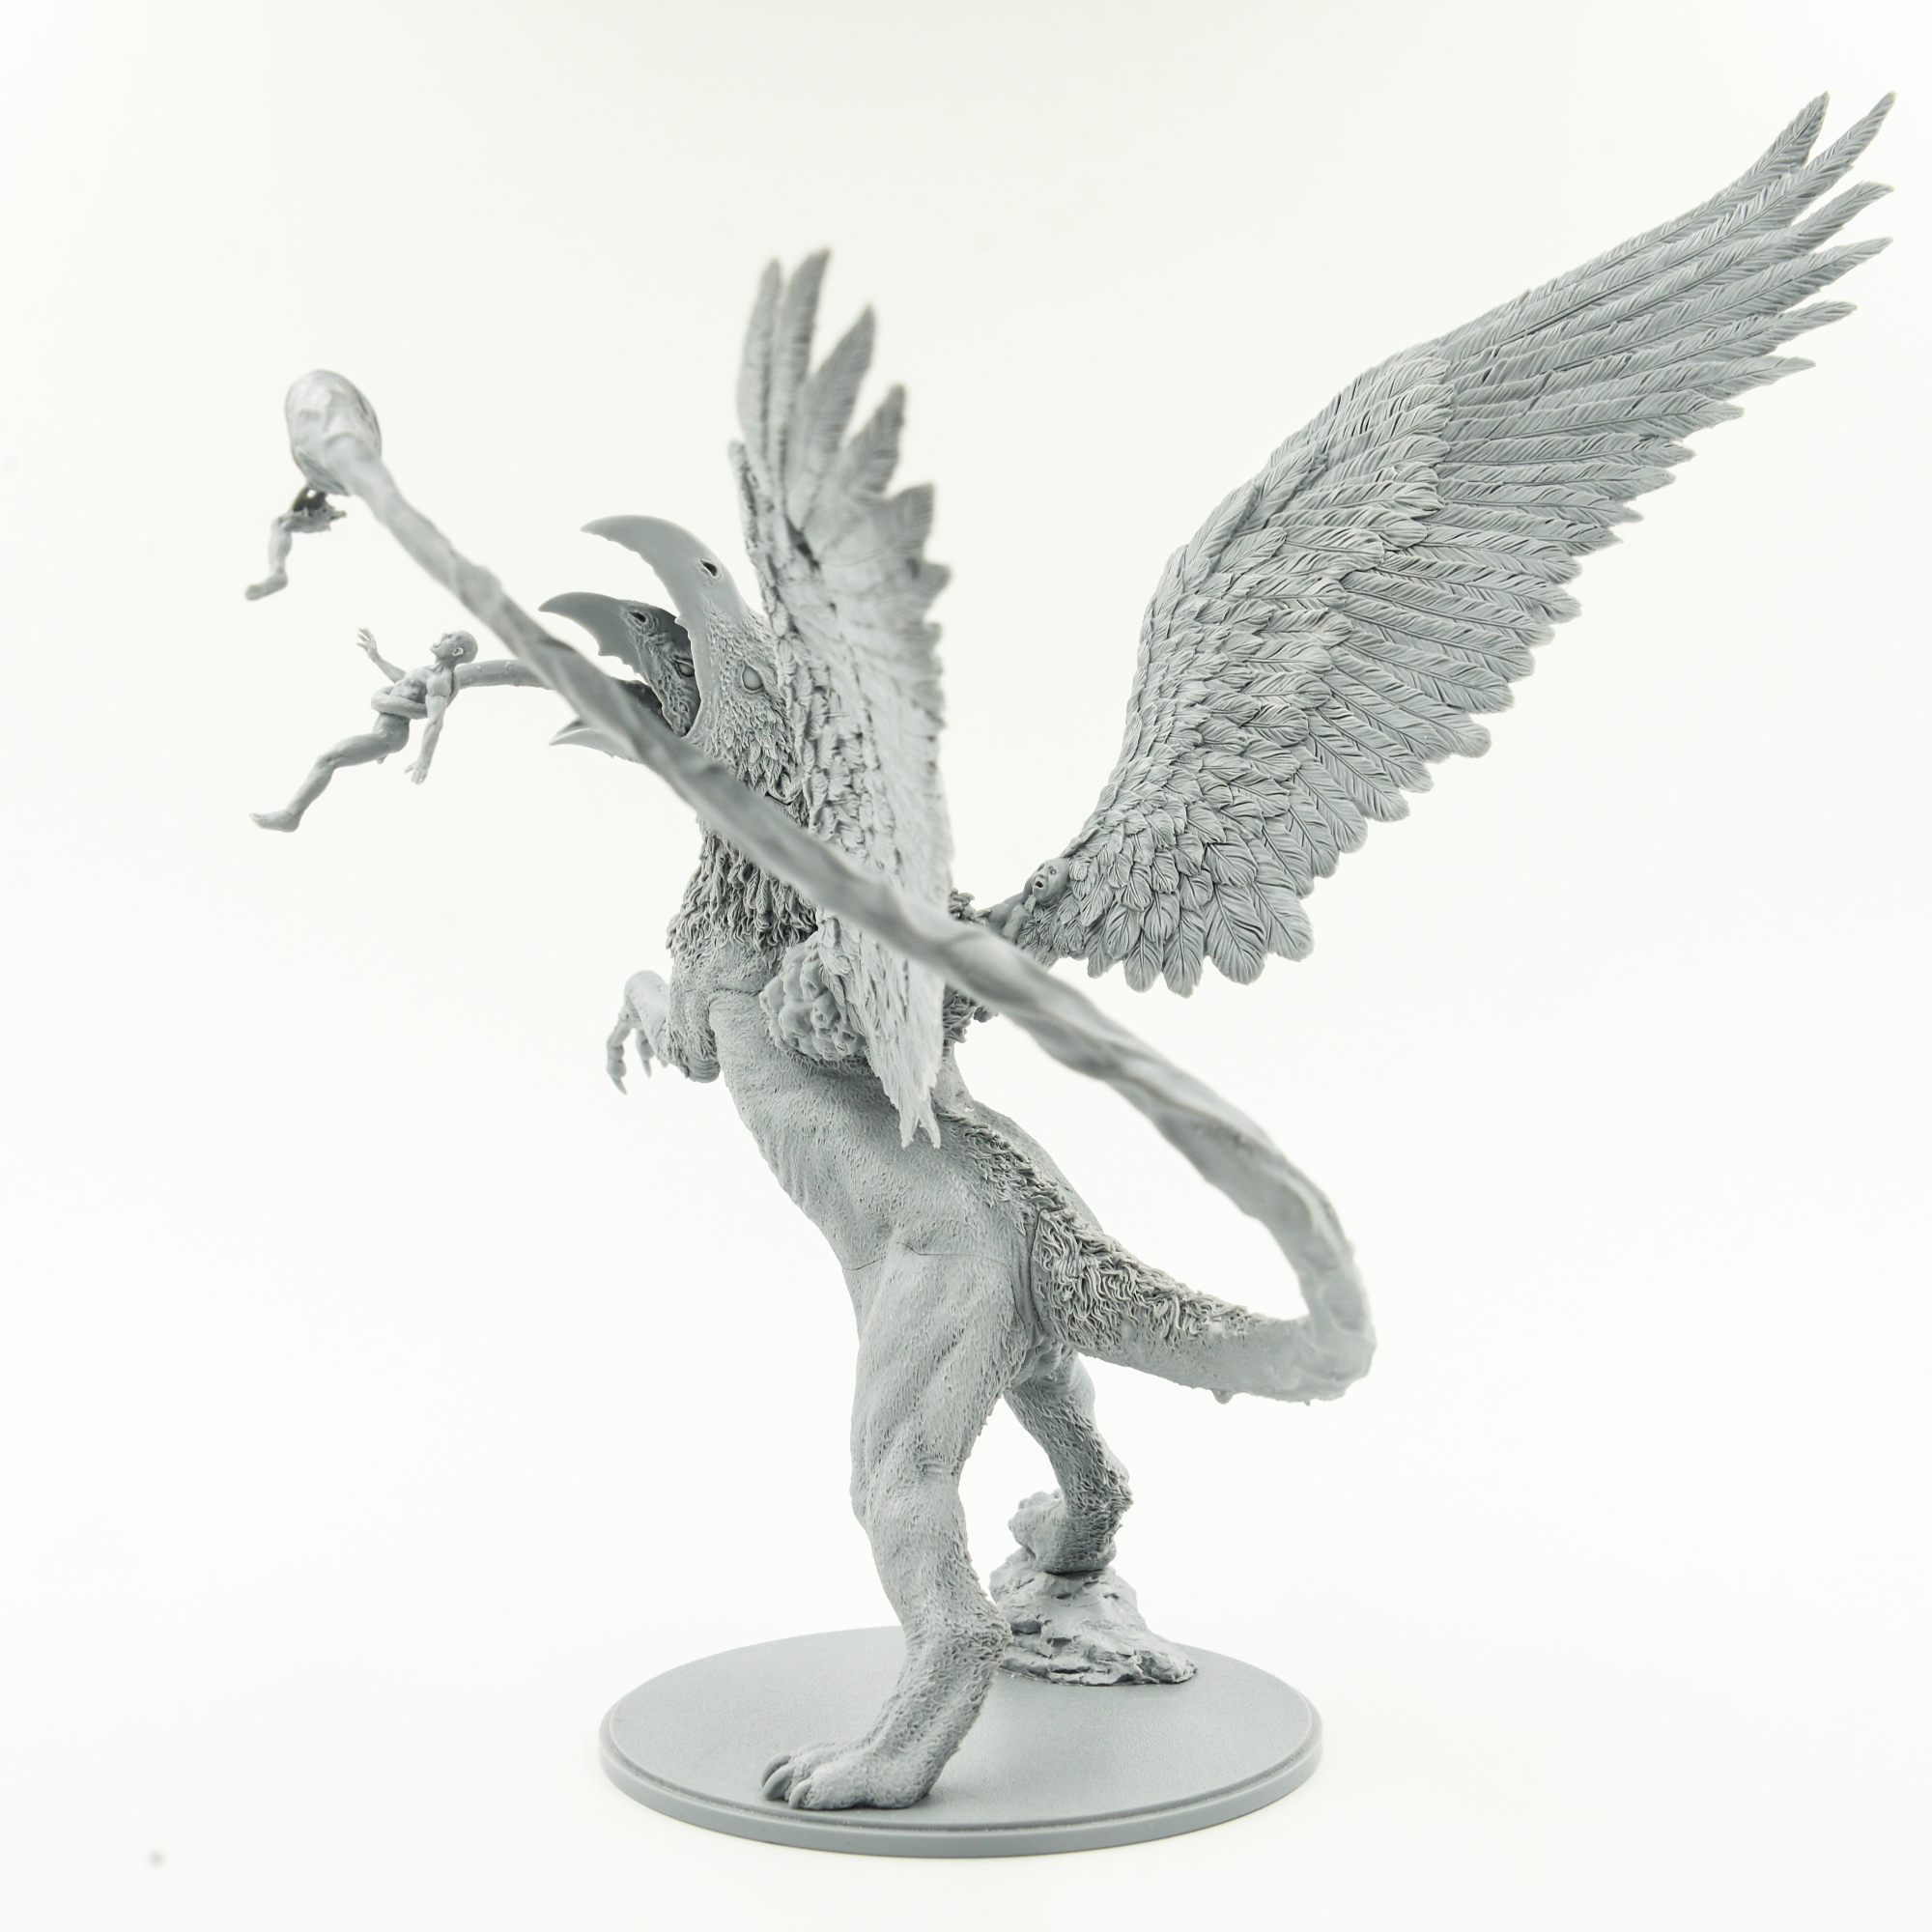
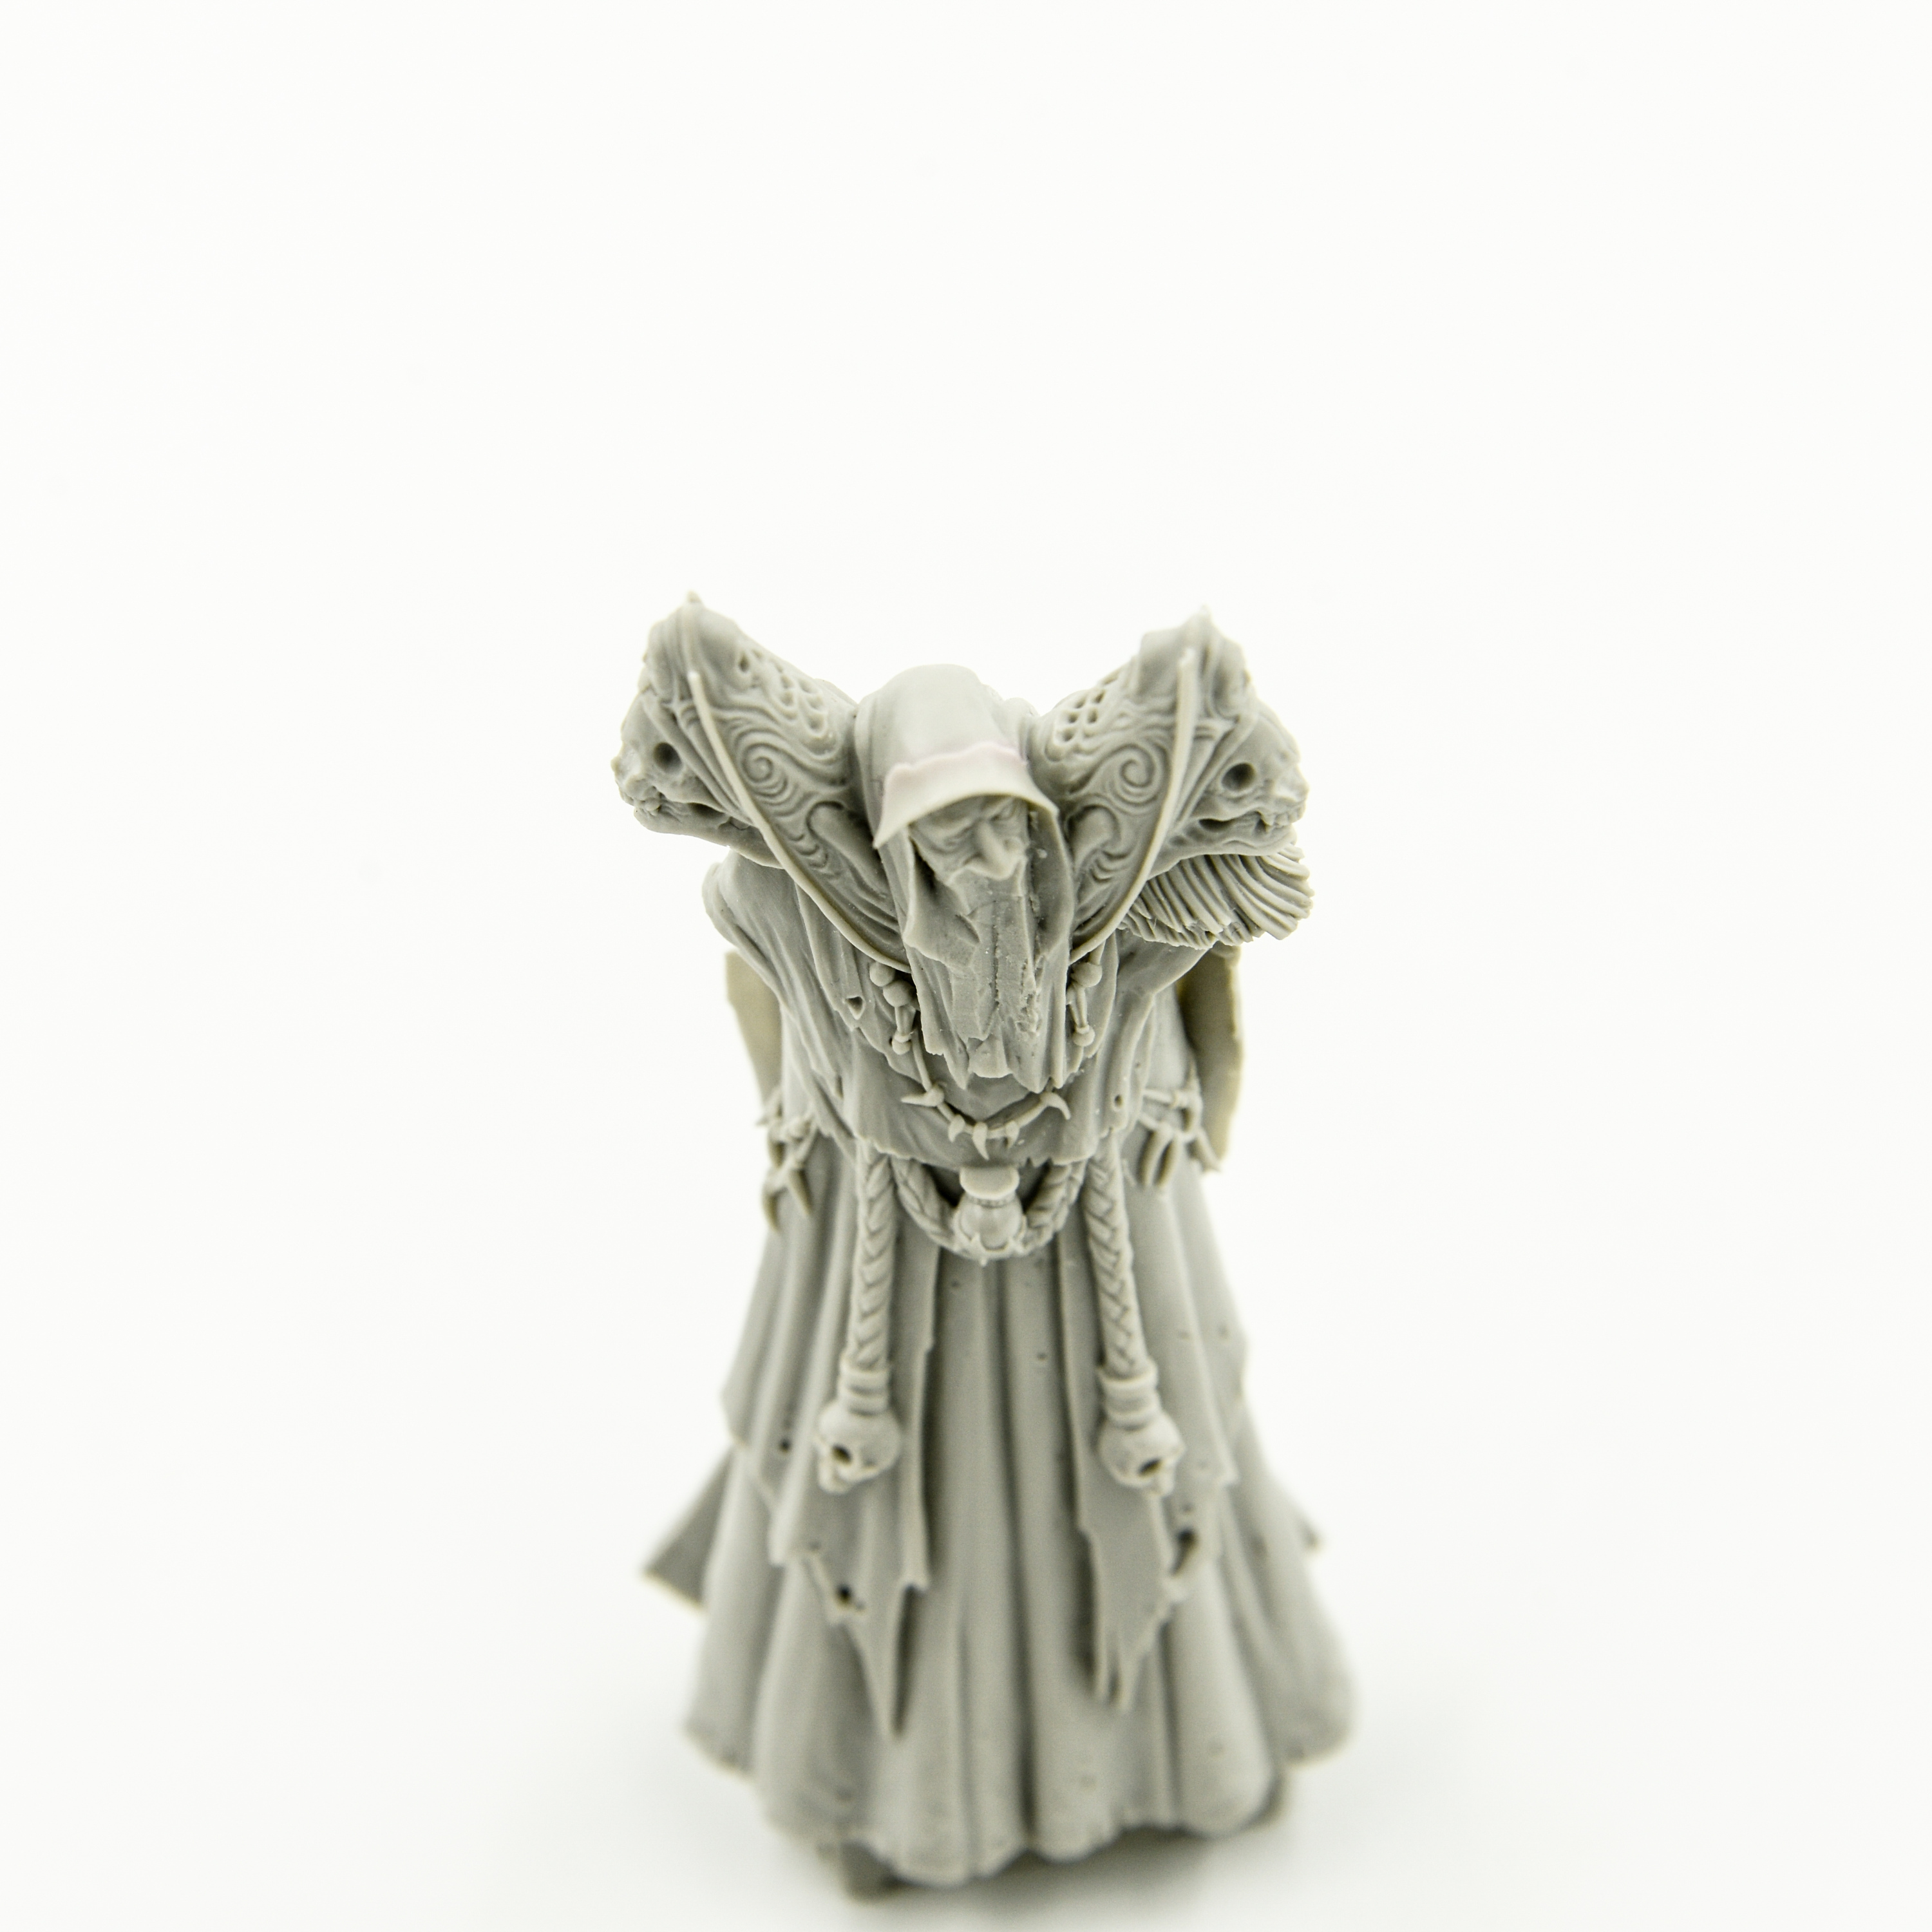
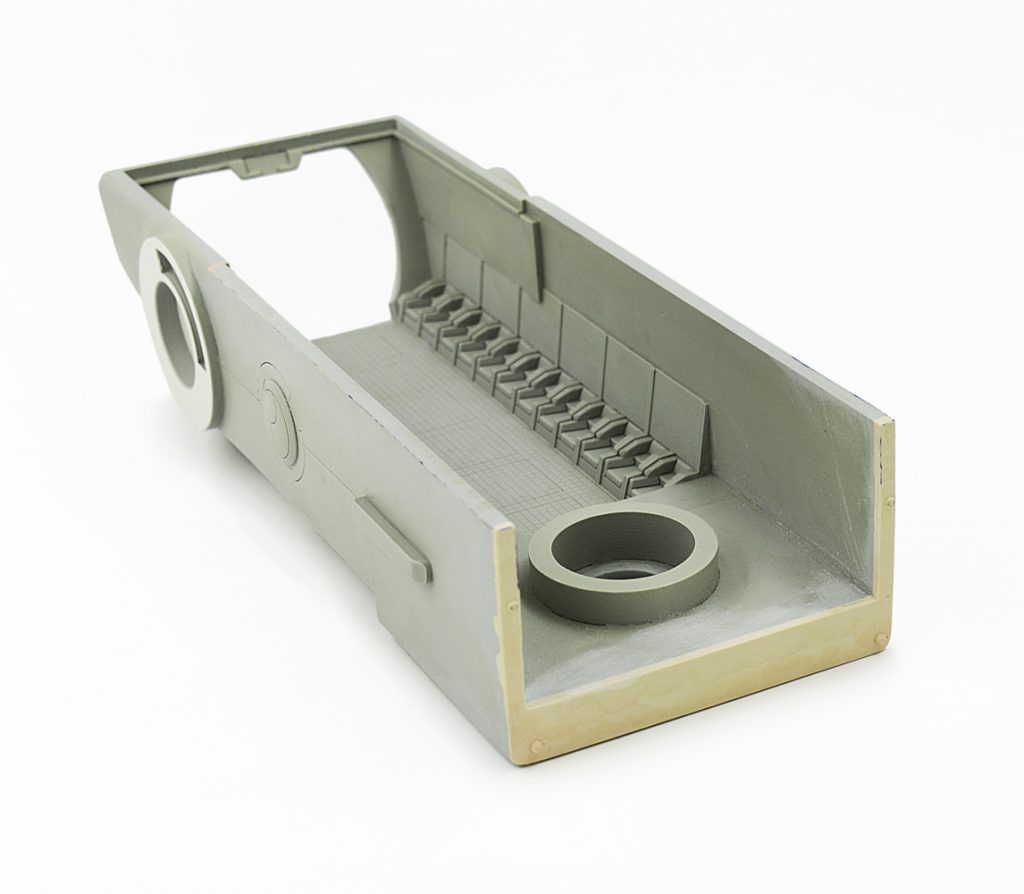
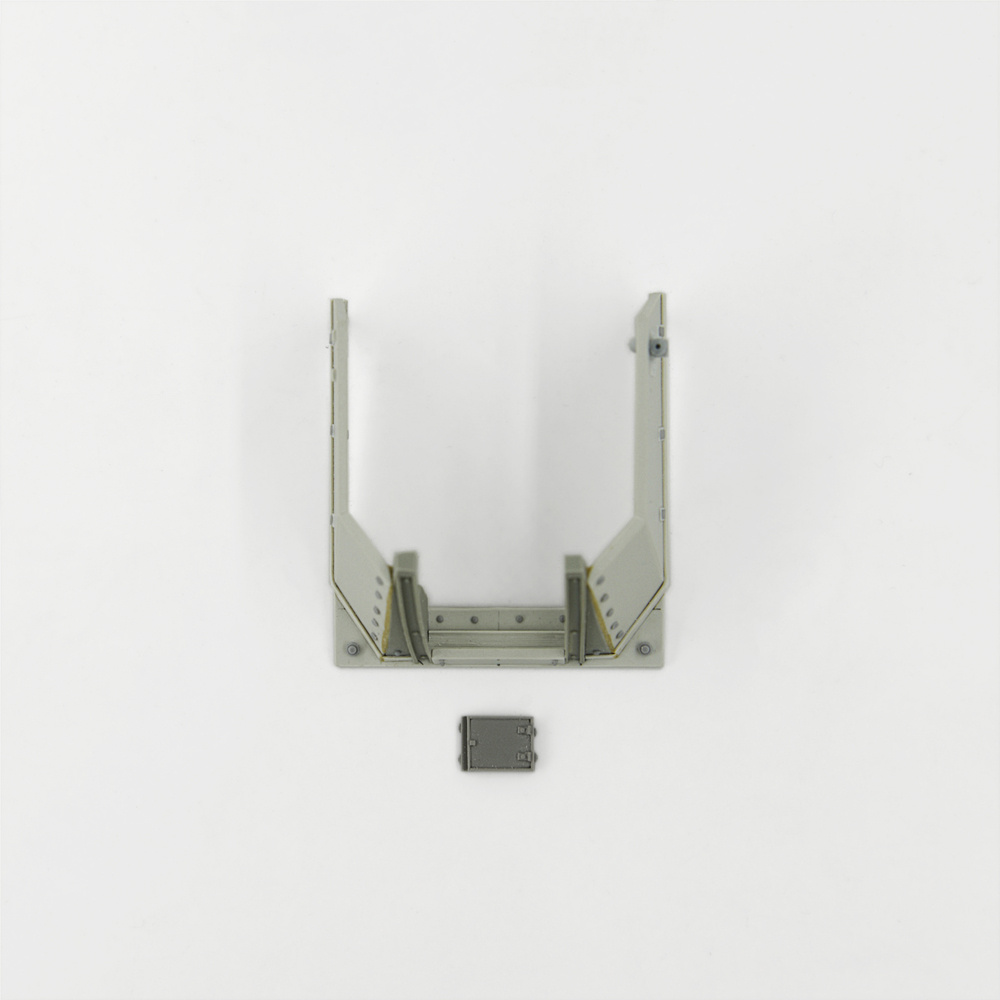
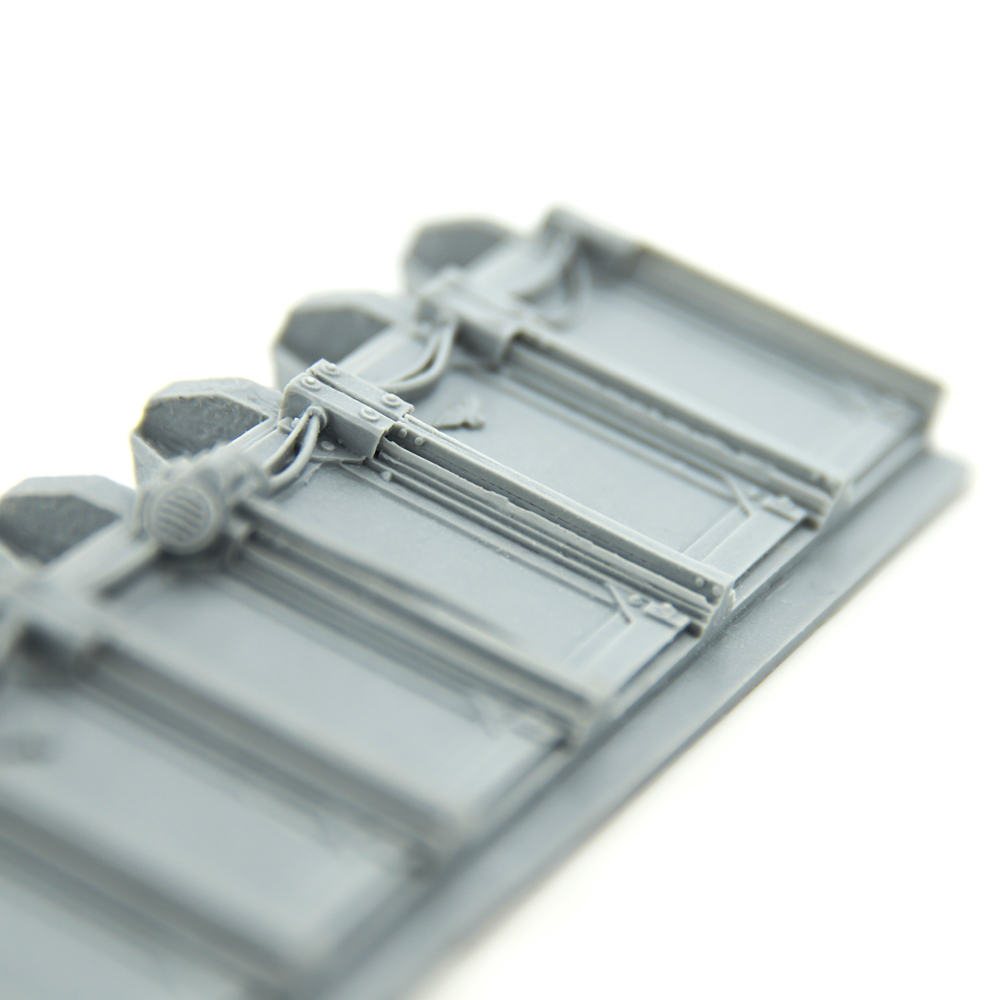
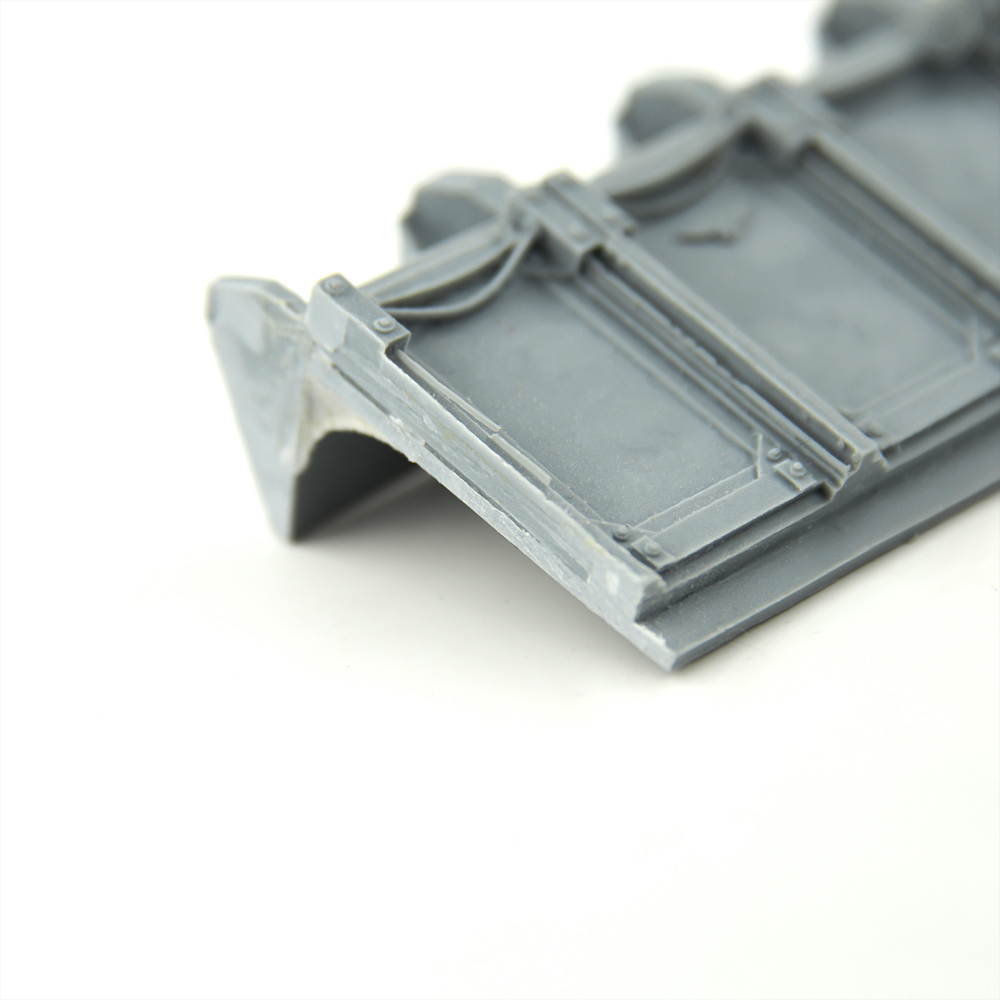
5) If after these procedures we decide to assemble a miniature, we will get here such interesting gaps in the areas of conjugation of parts: several photographs of a fully assembled miniature with slits (Click on the picture to enlarge the image):
 |
 |
 |
 |
 |
|
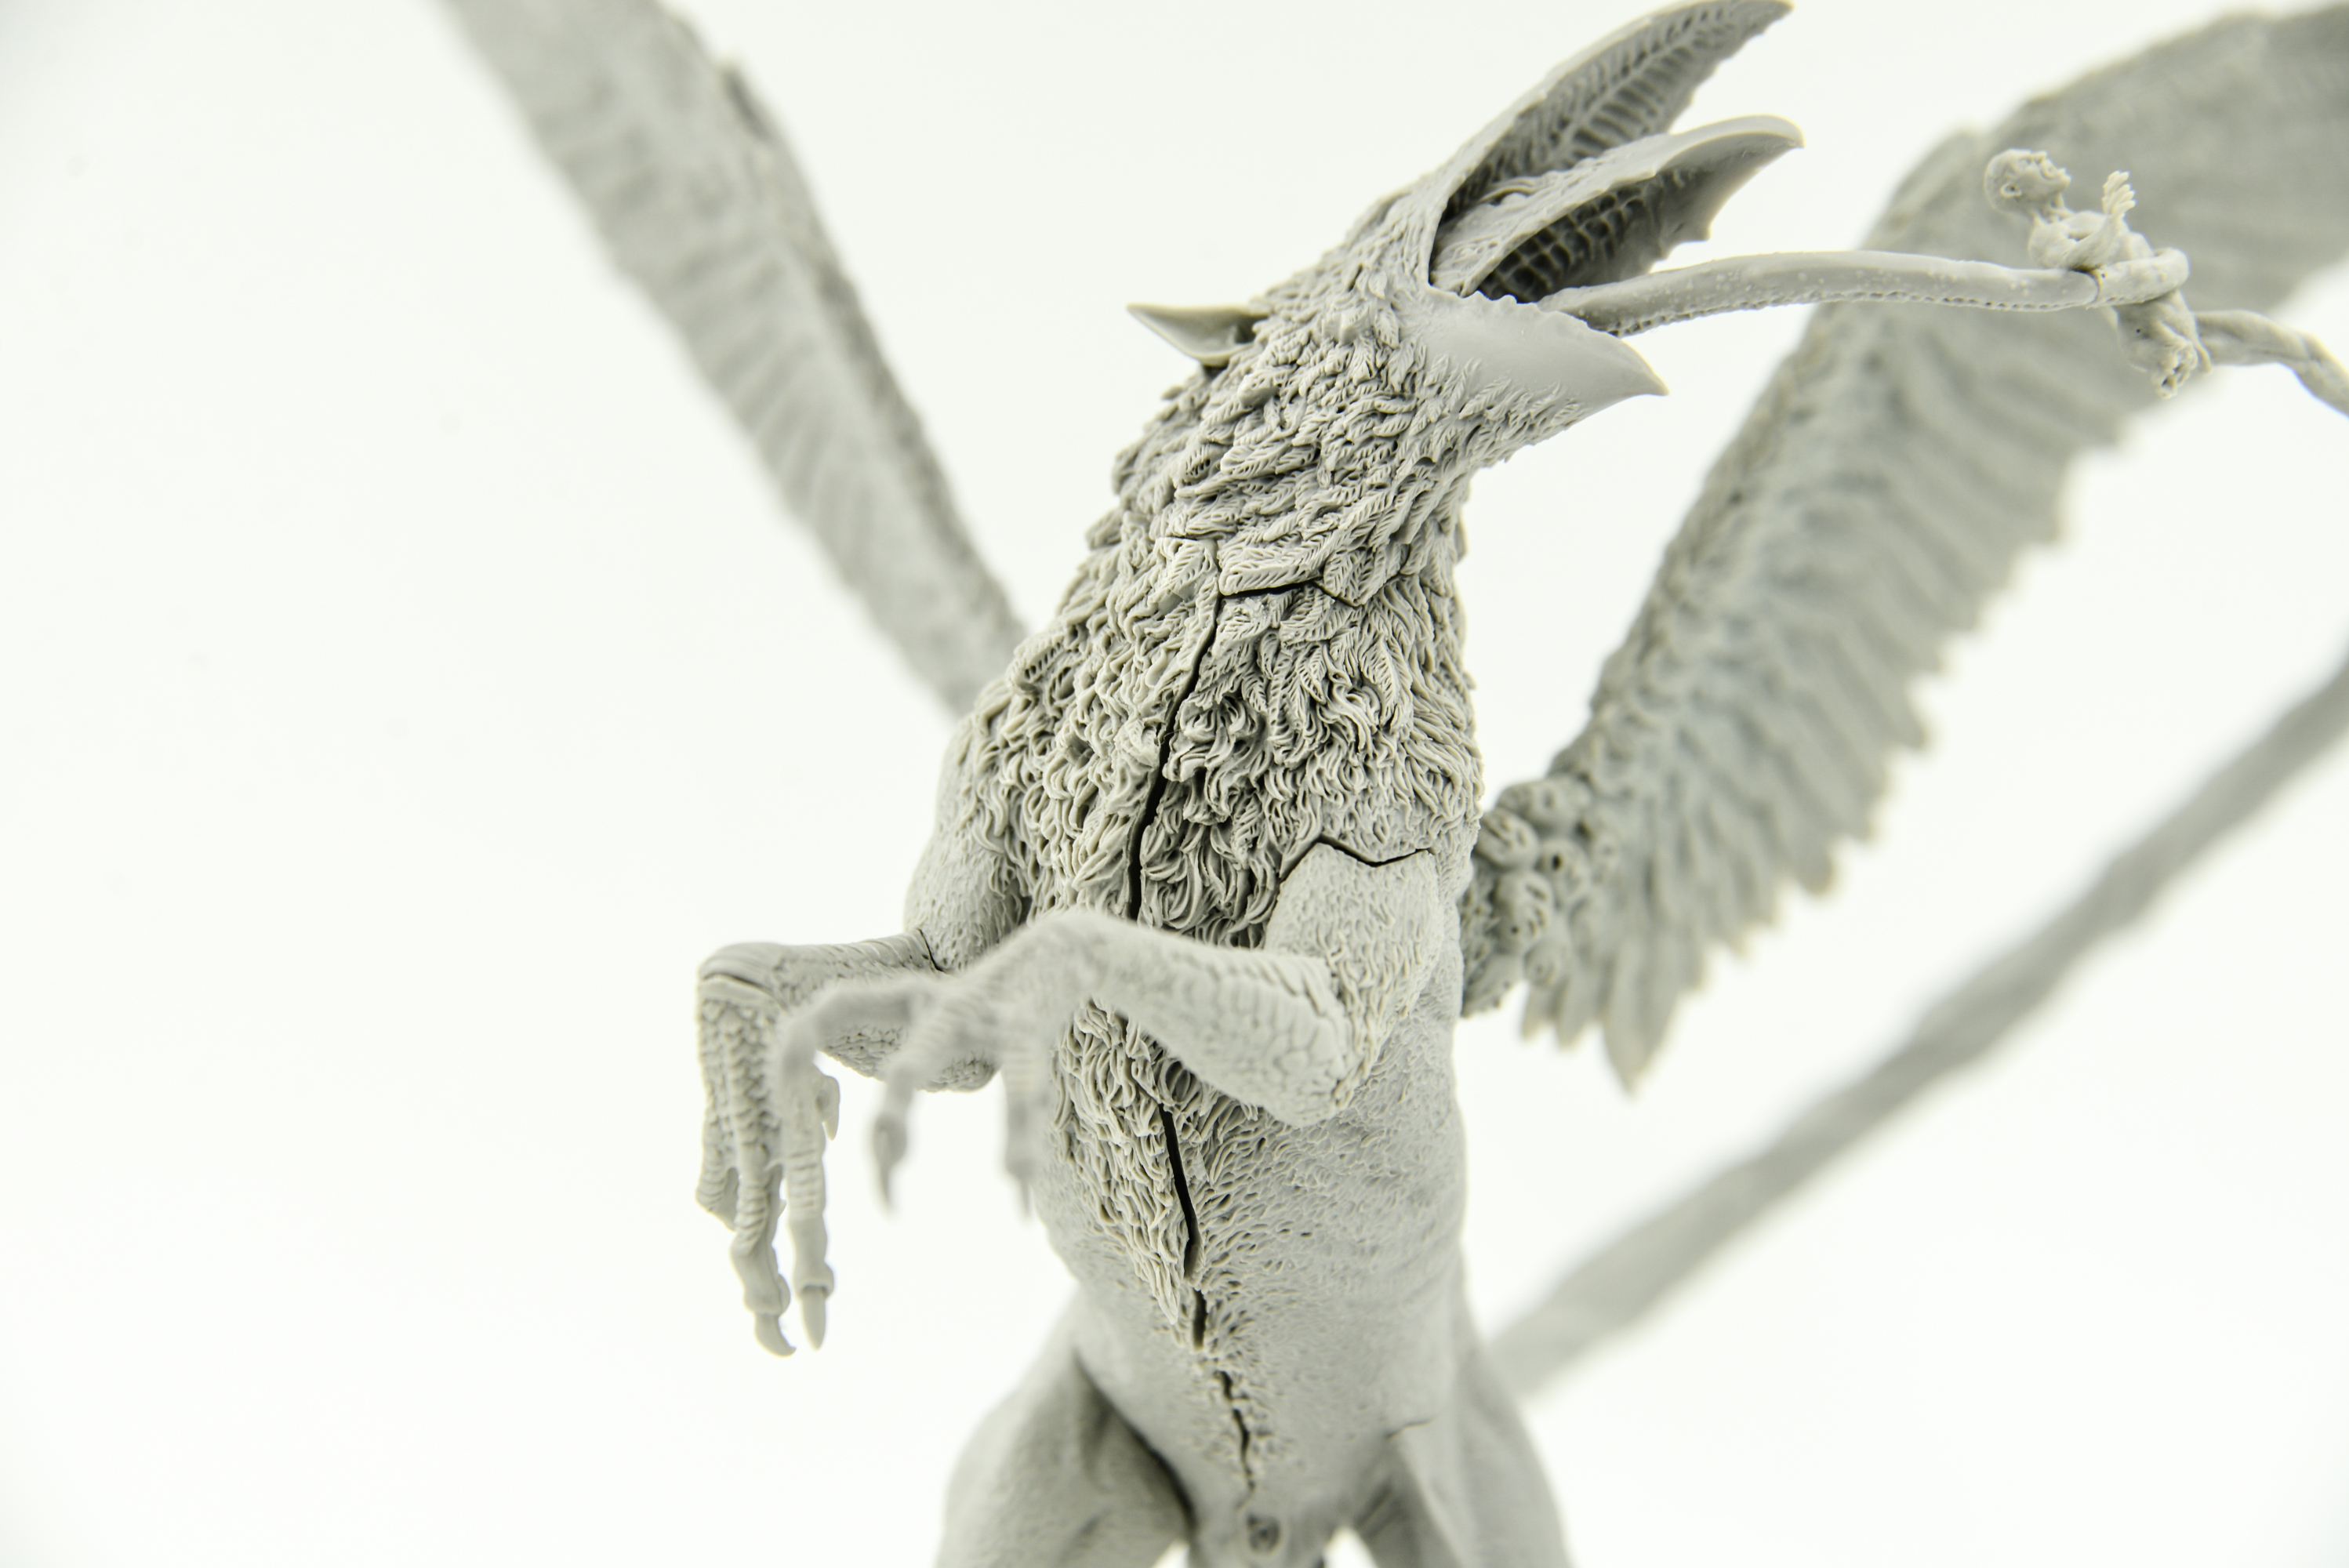
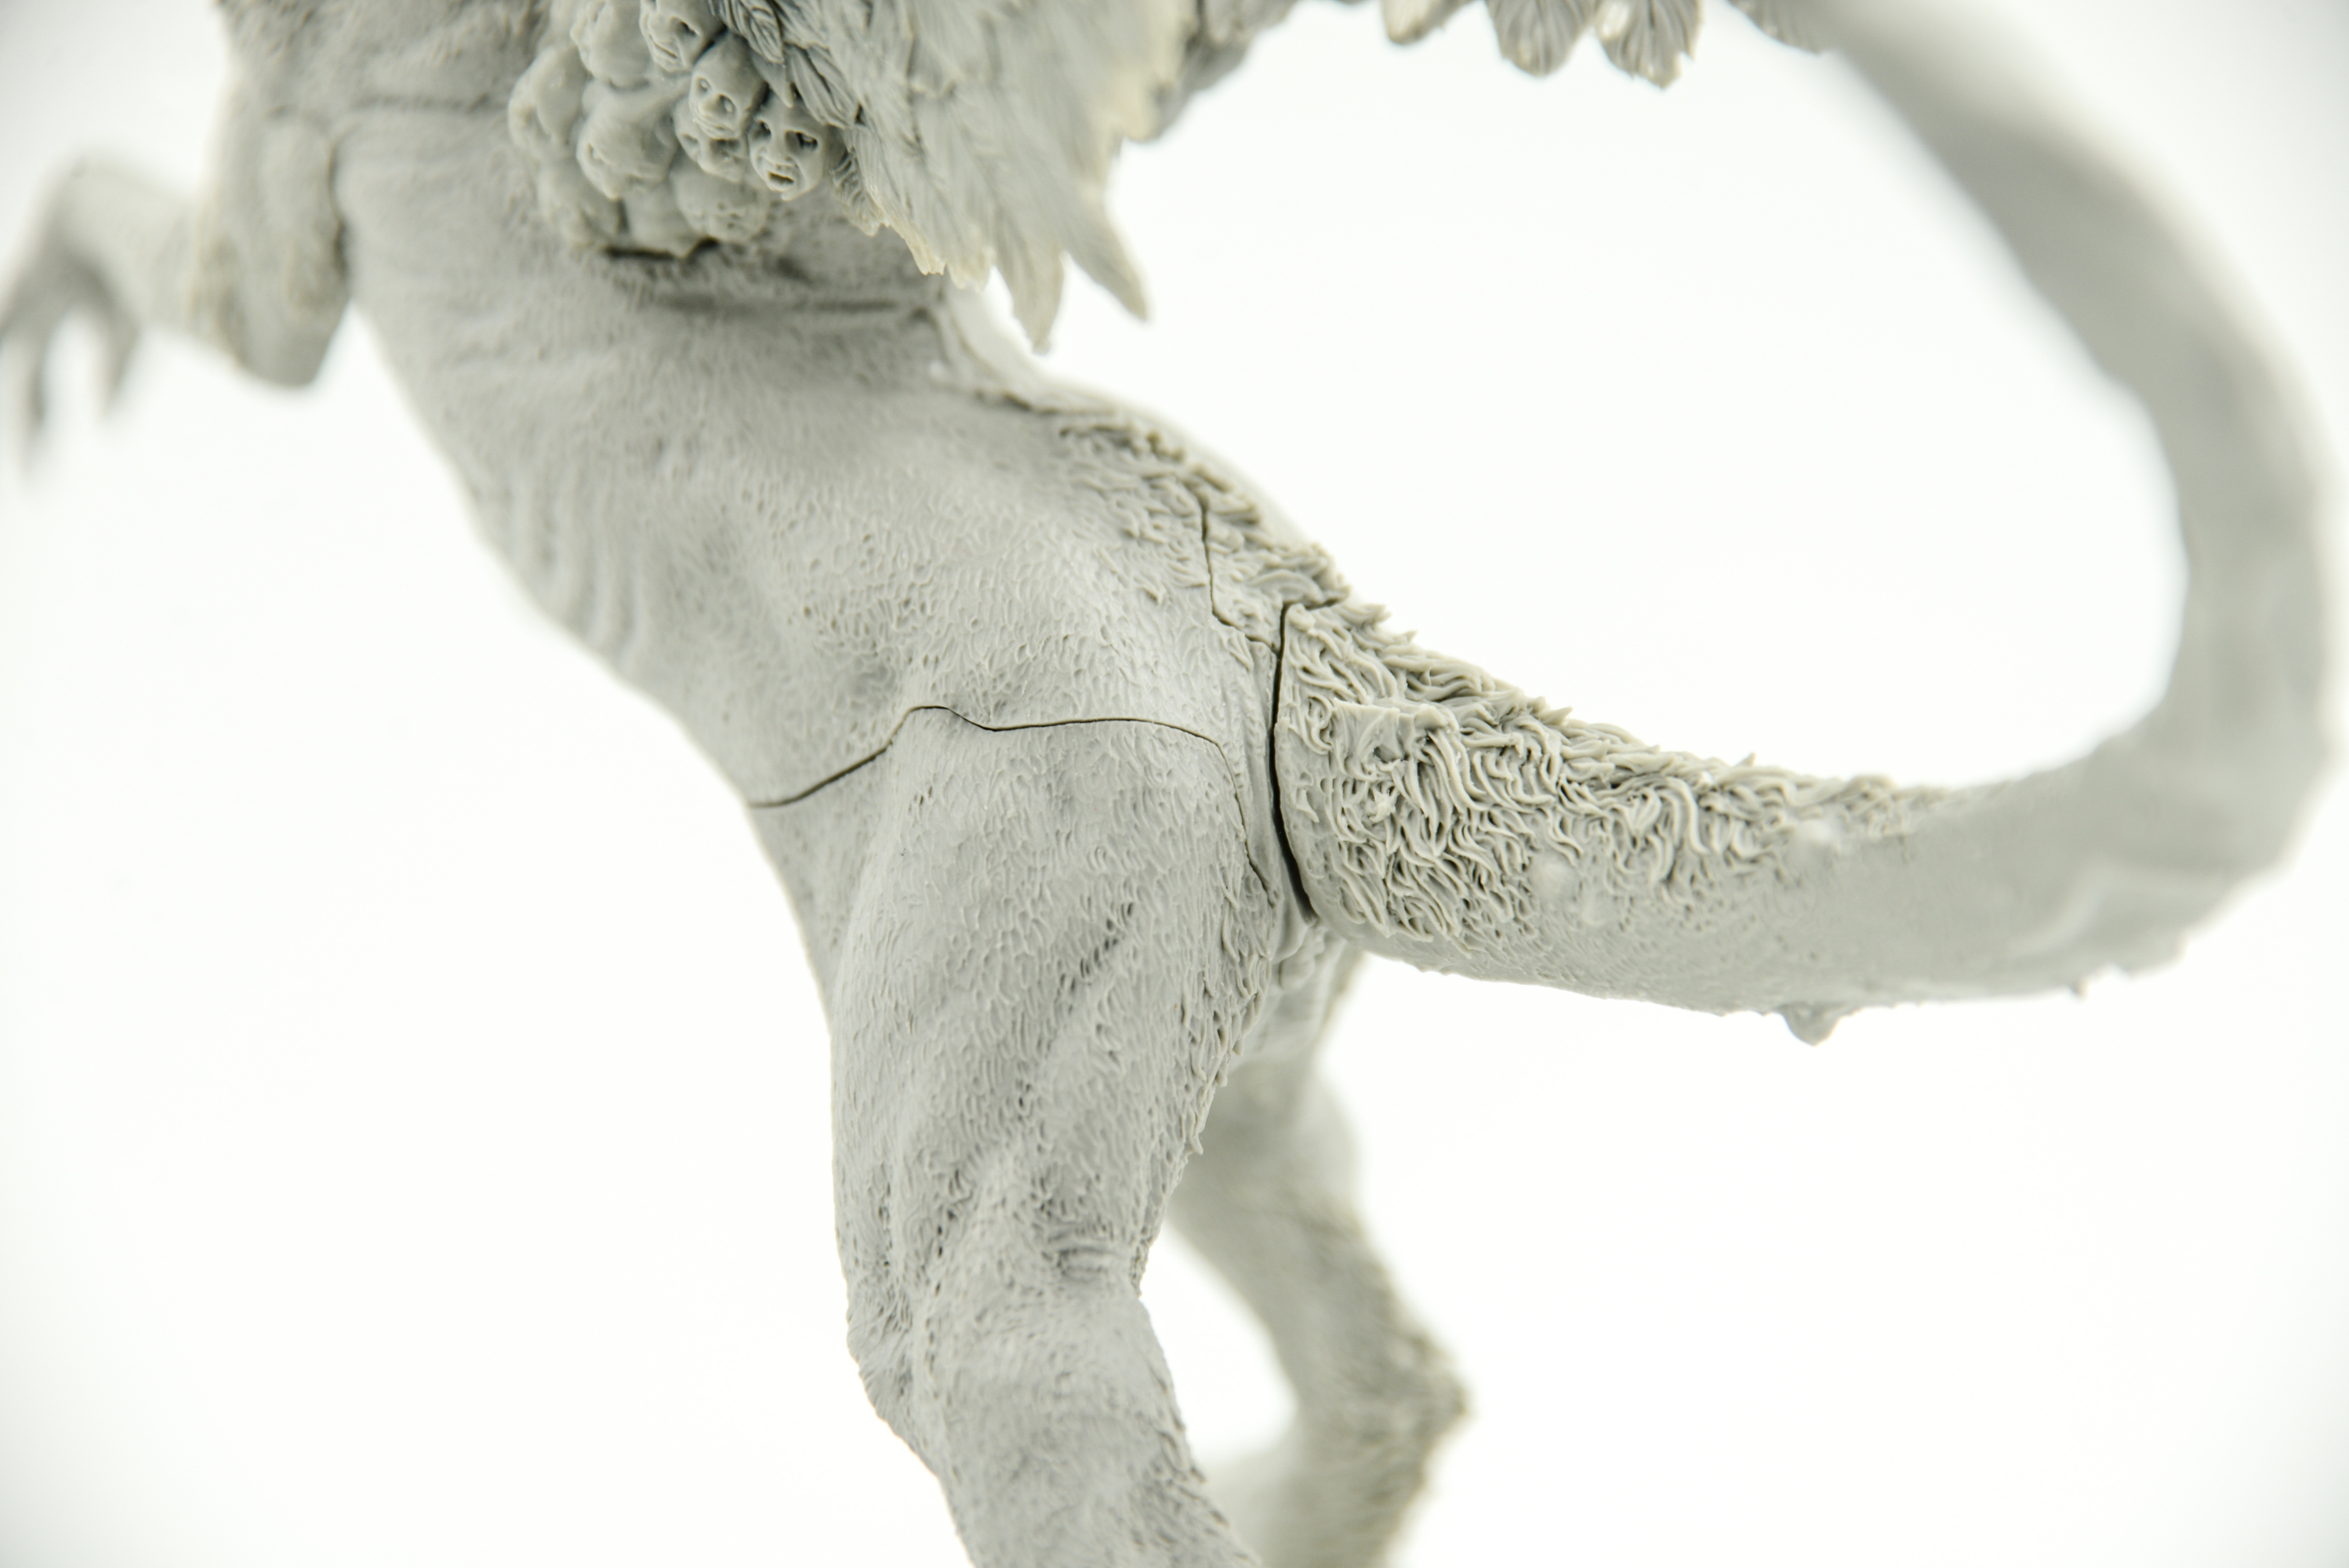
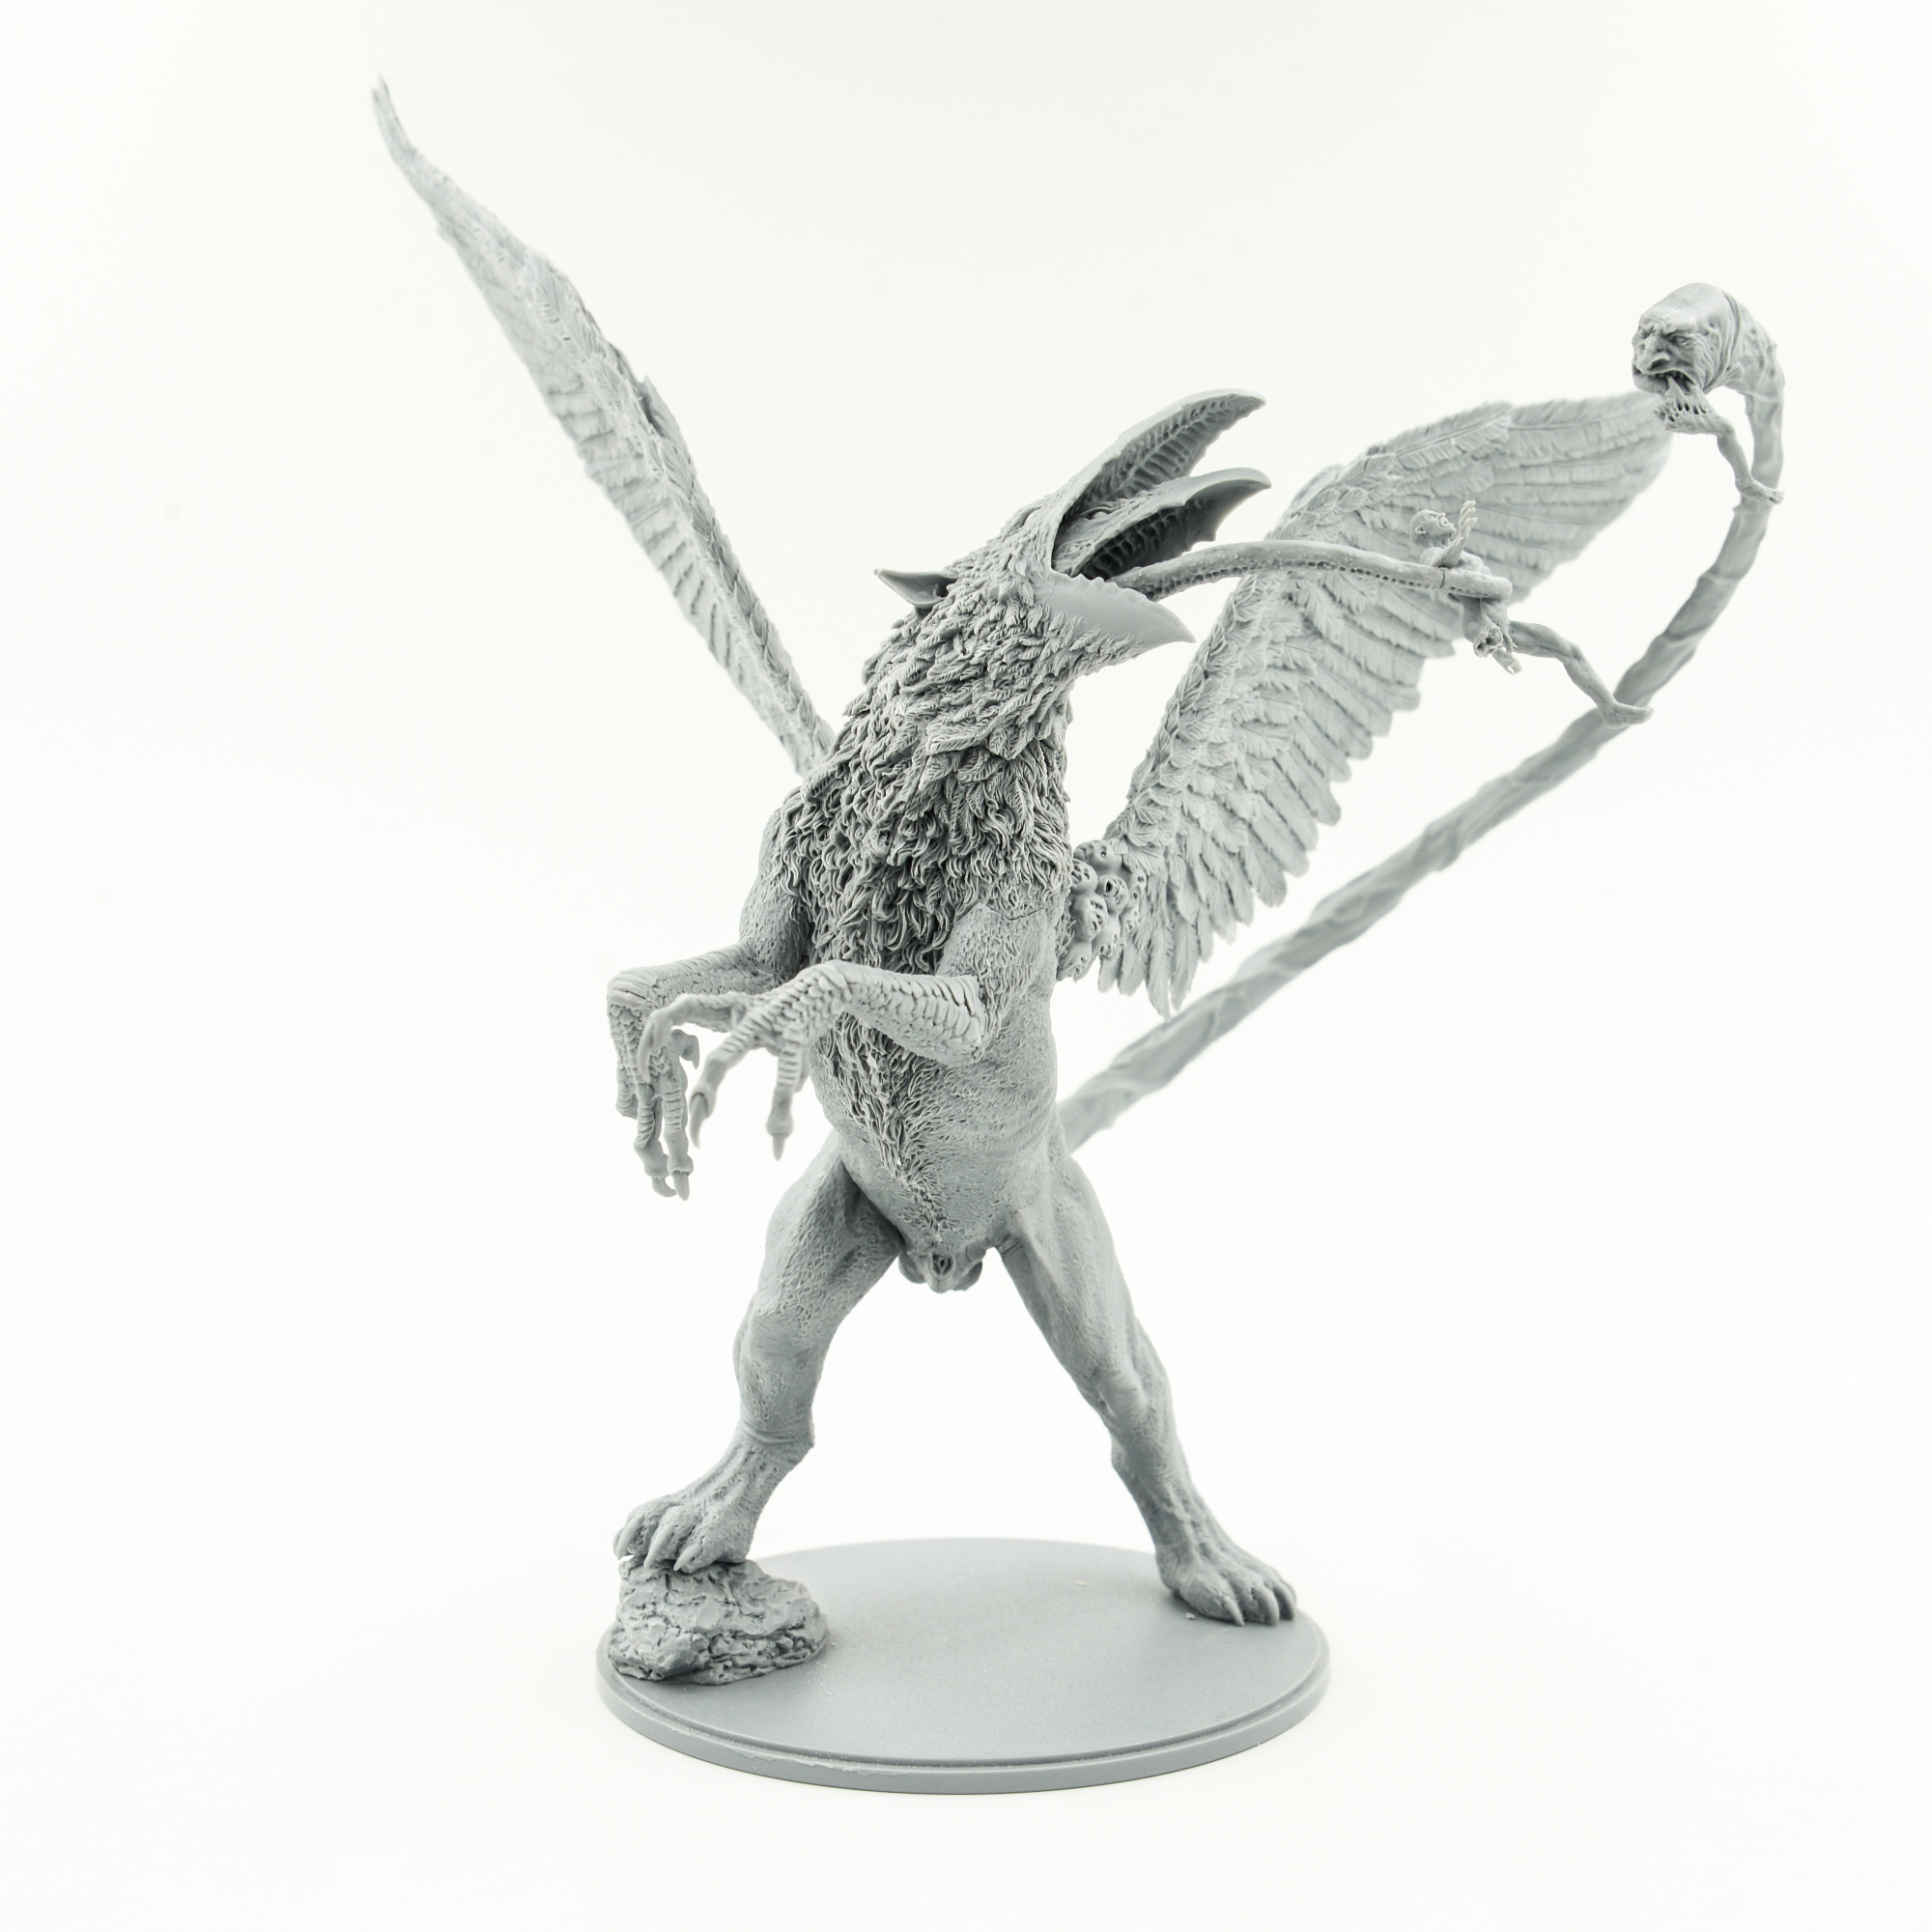
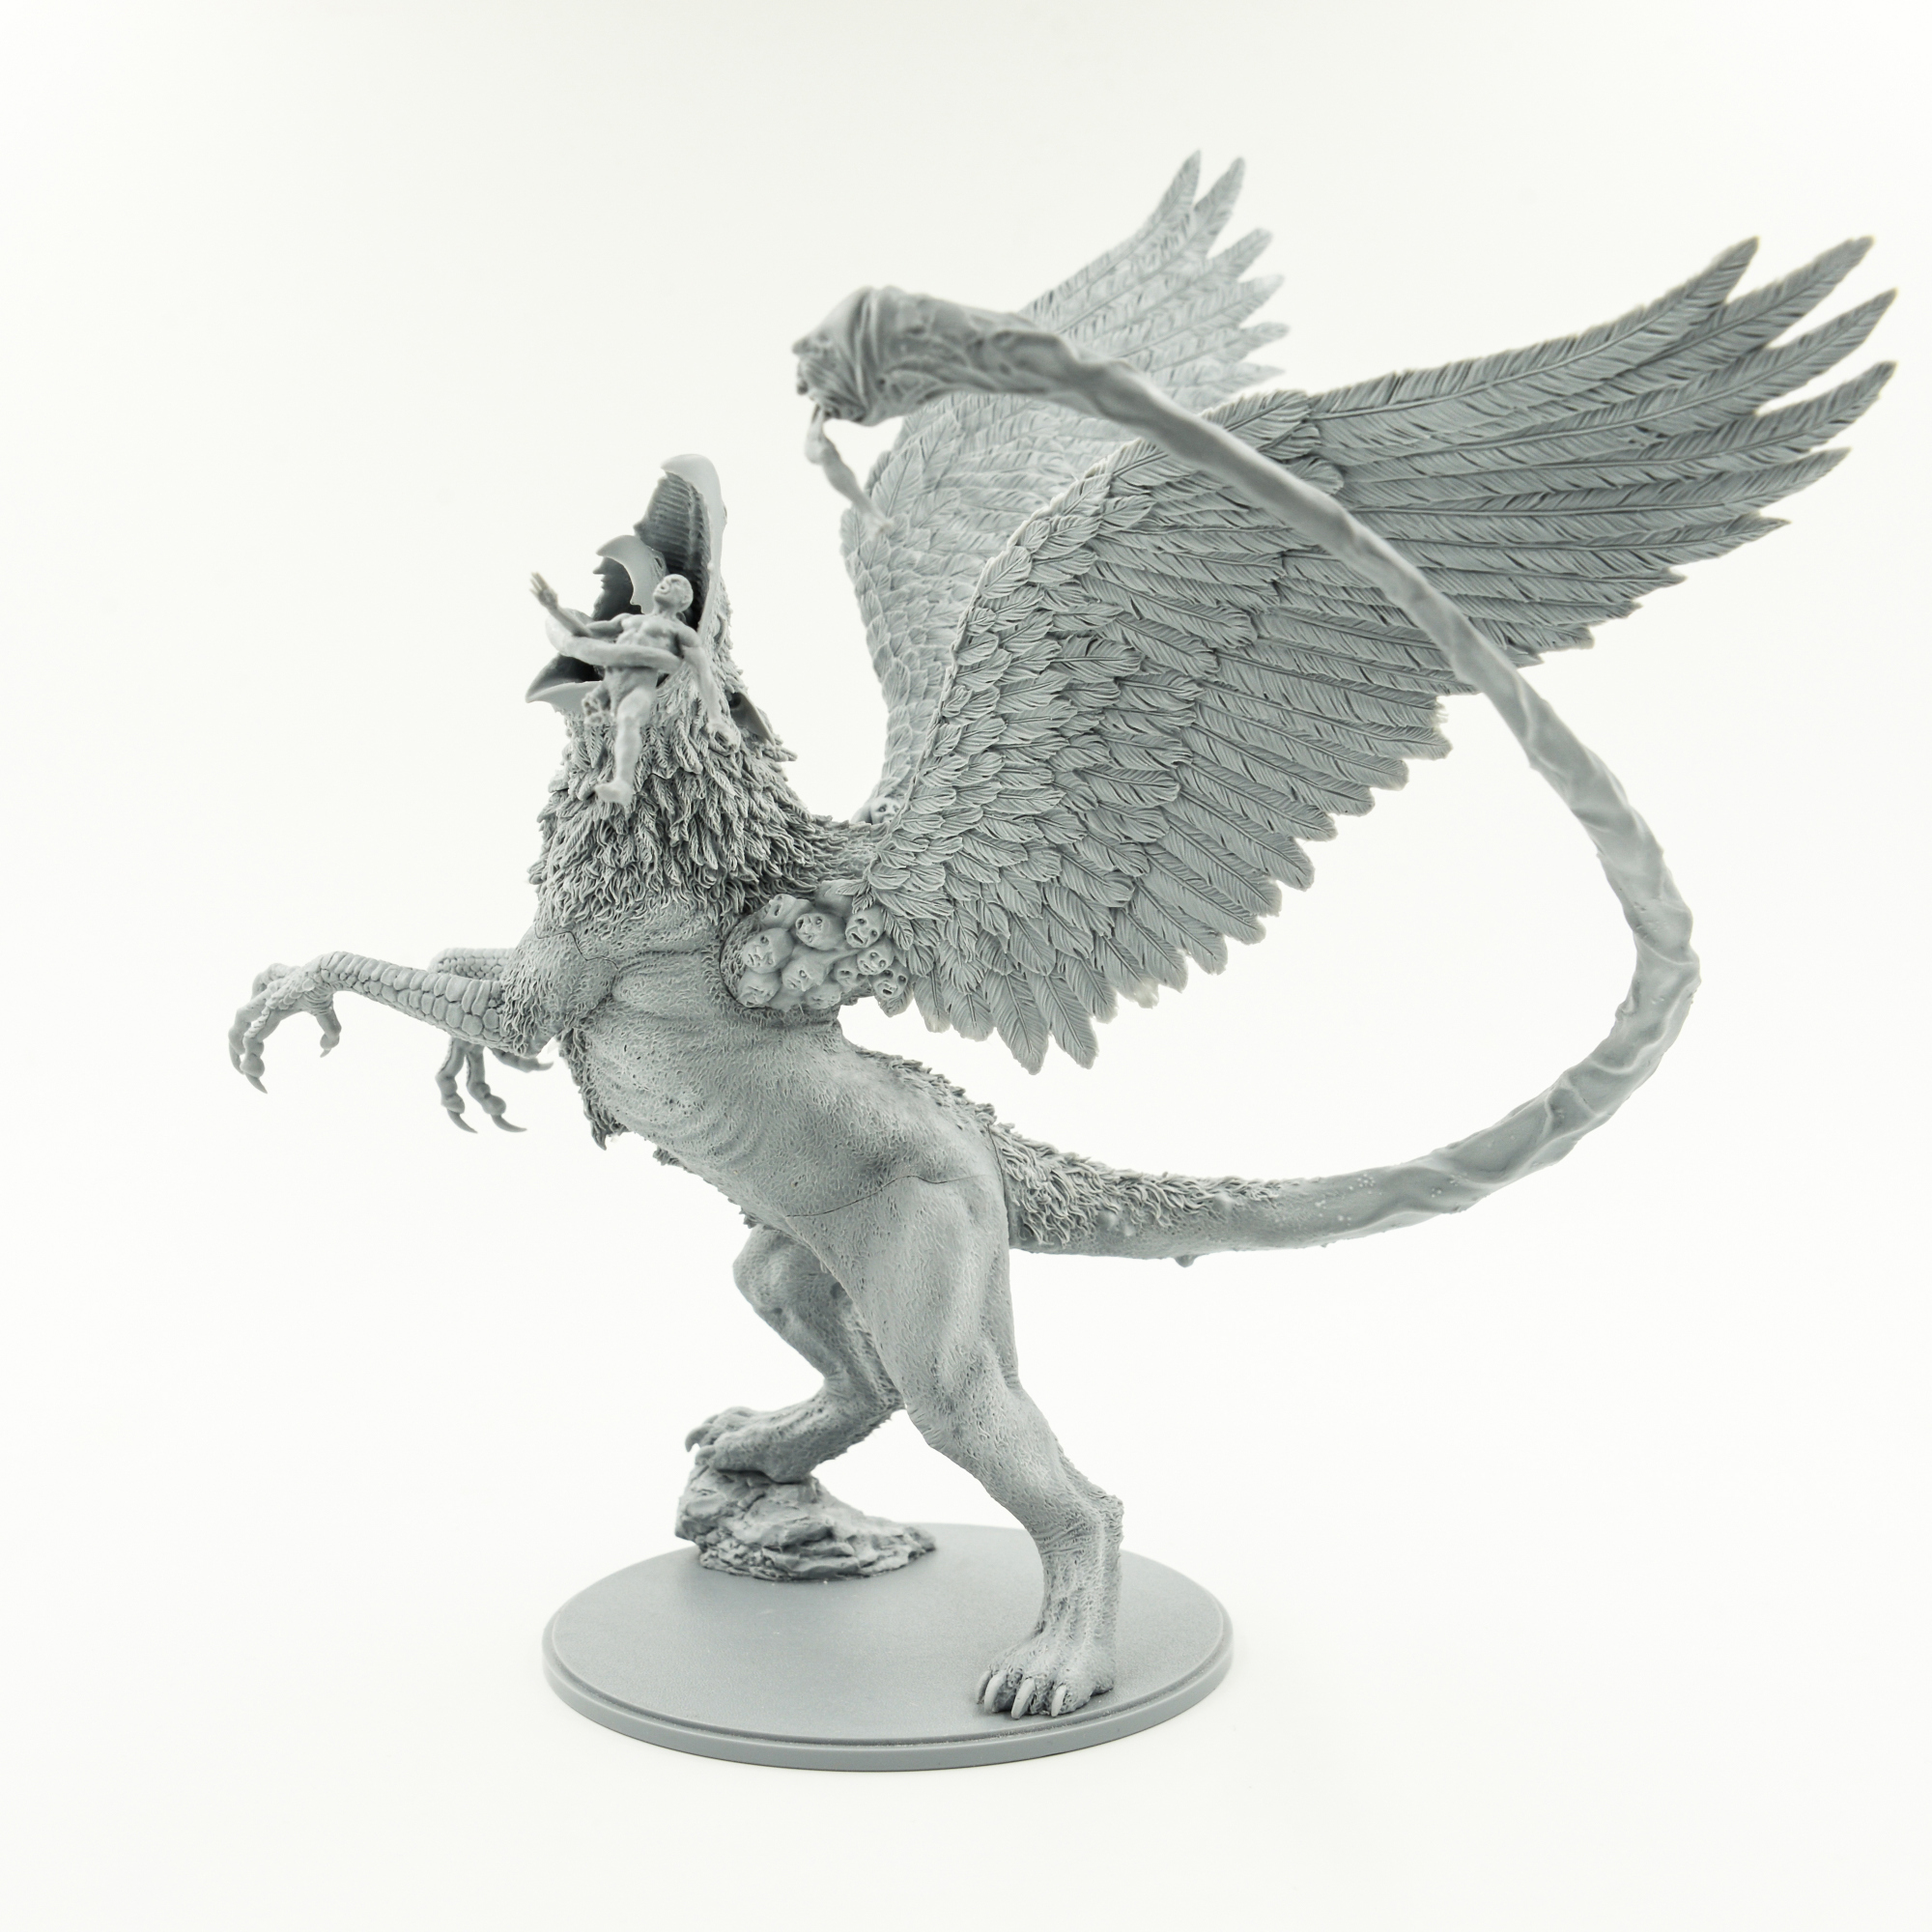
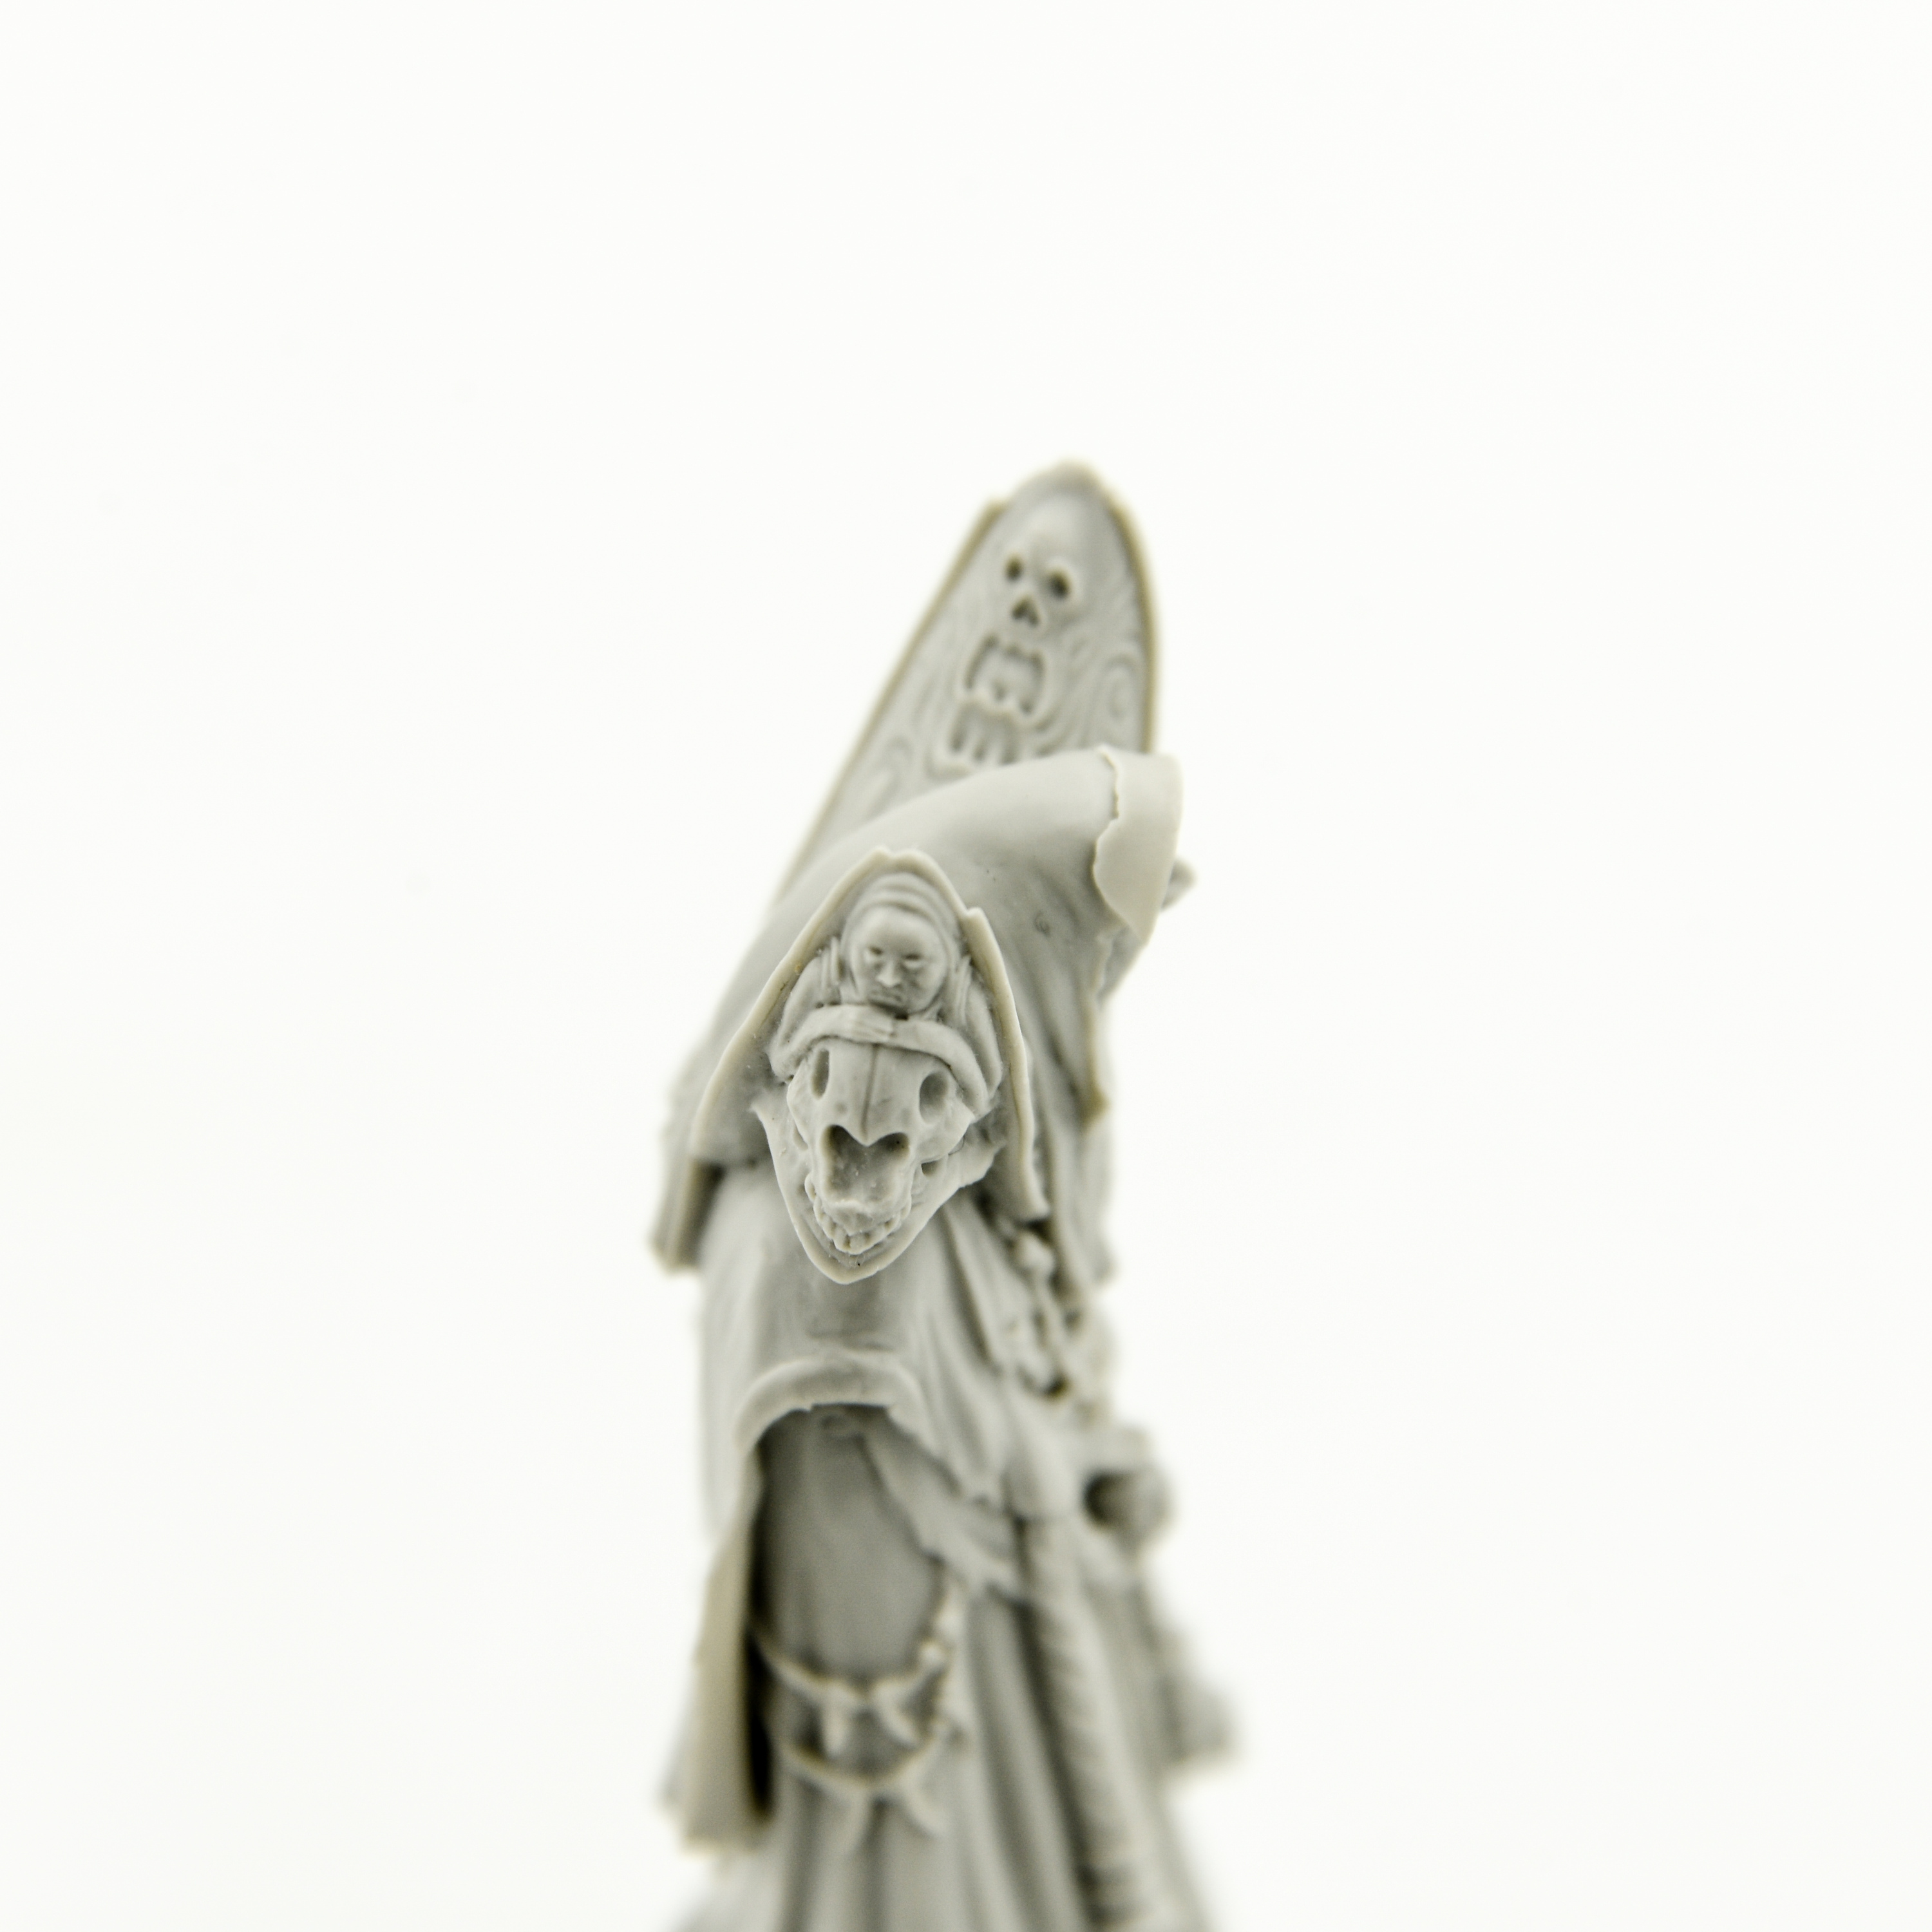
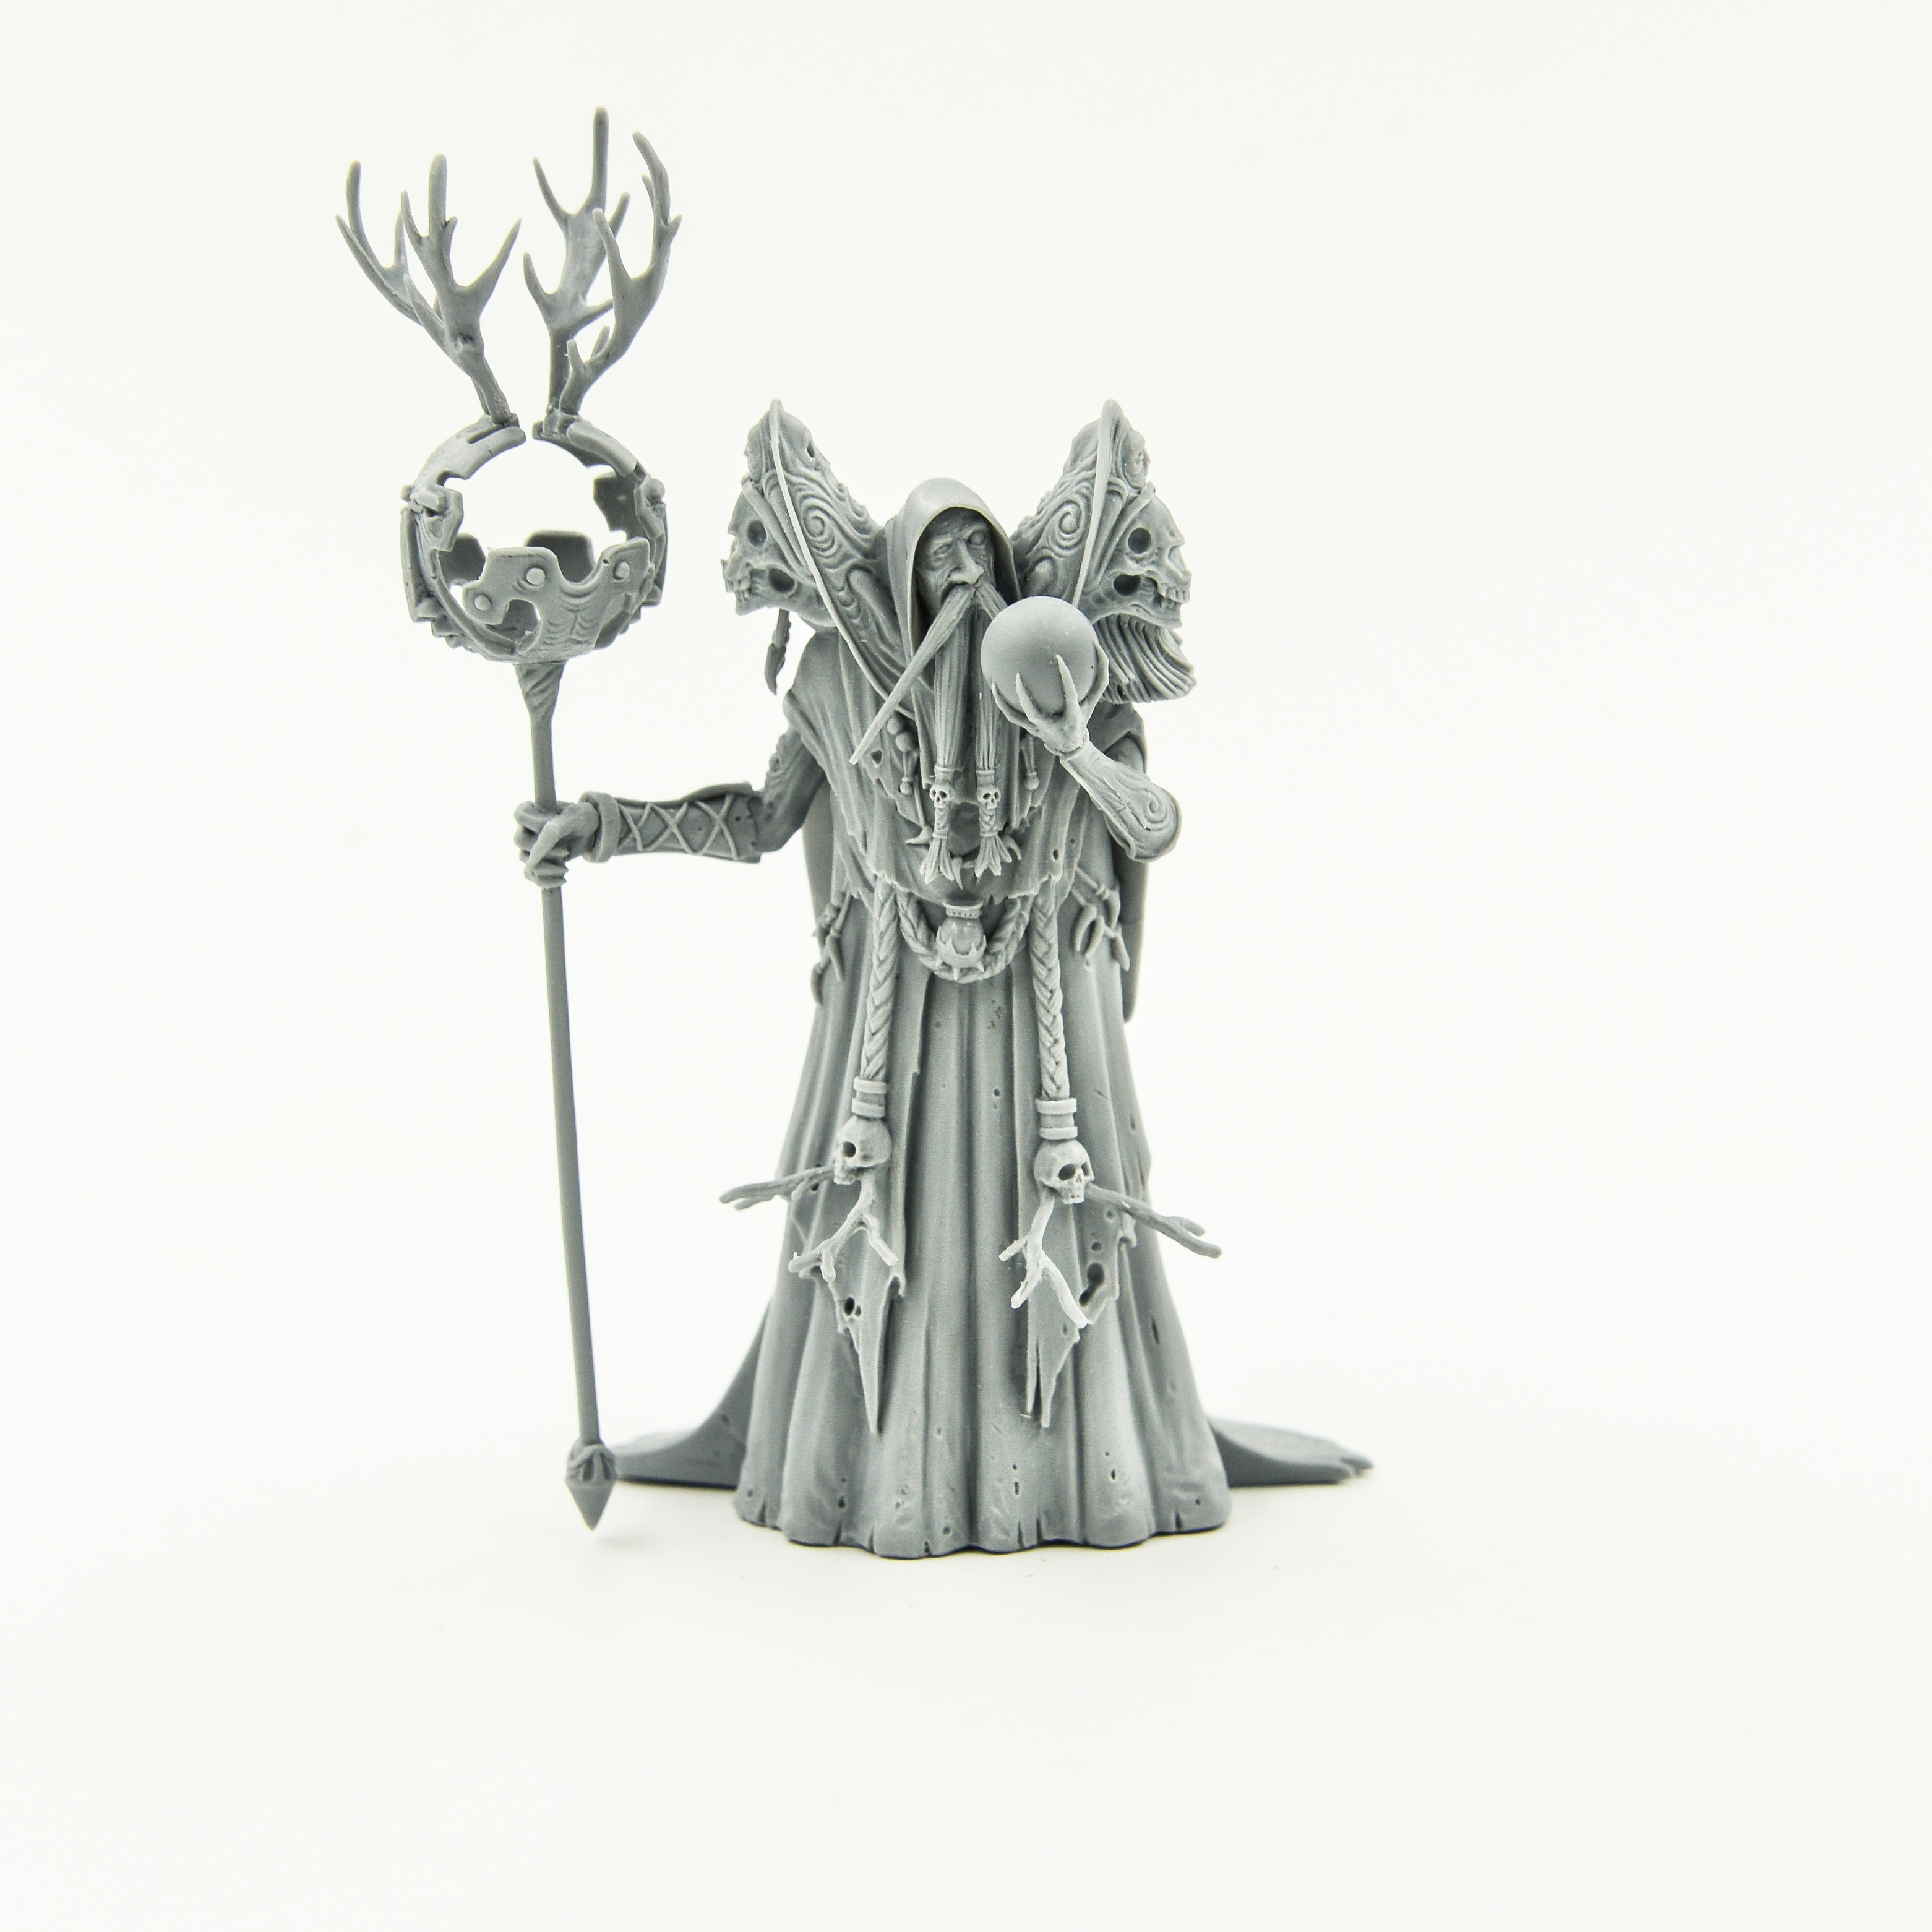
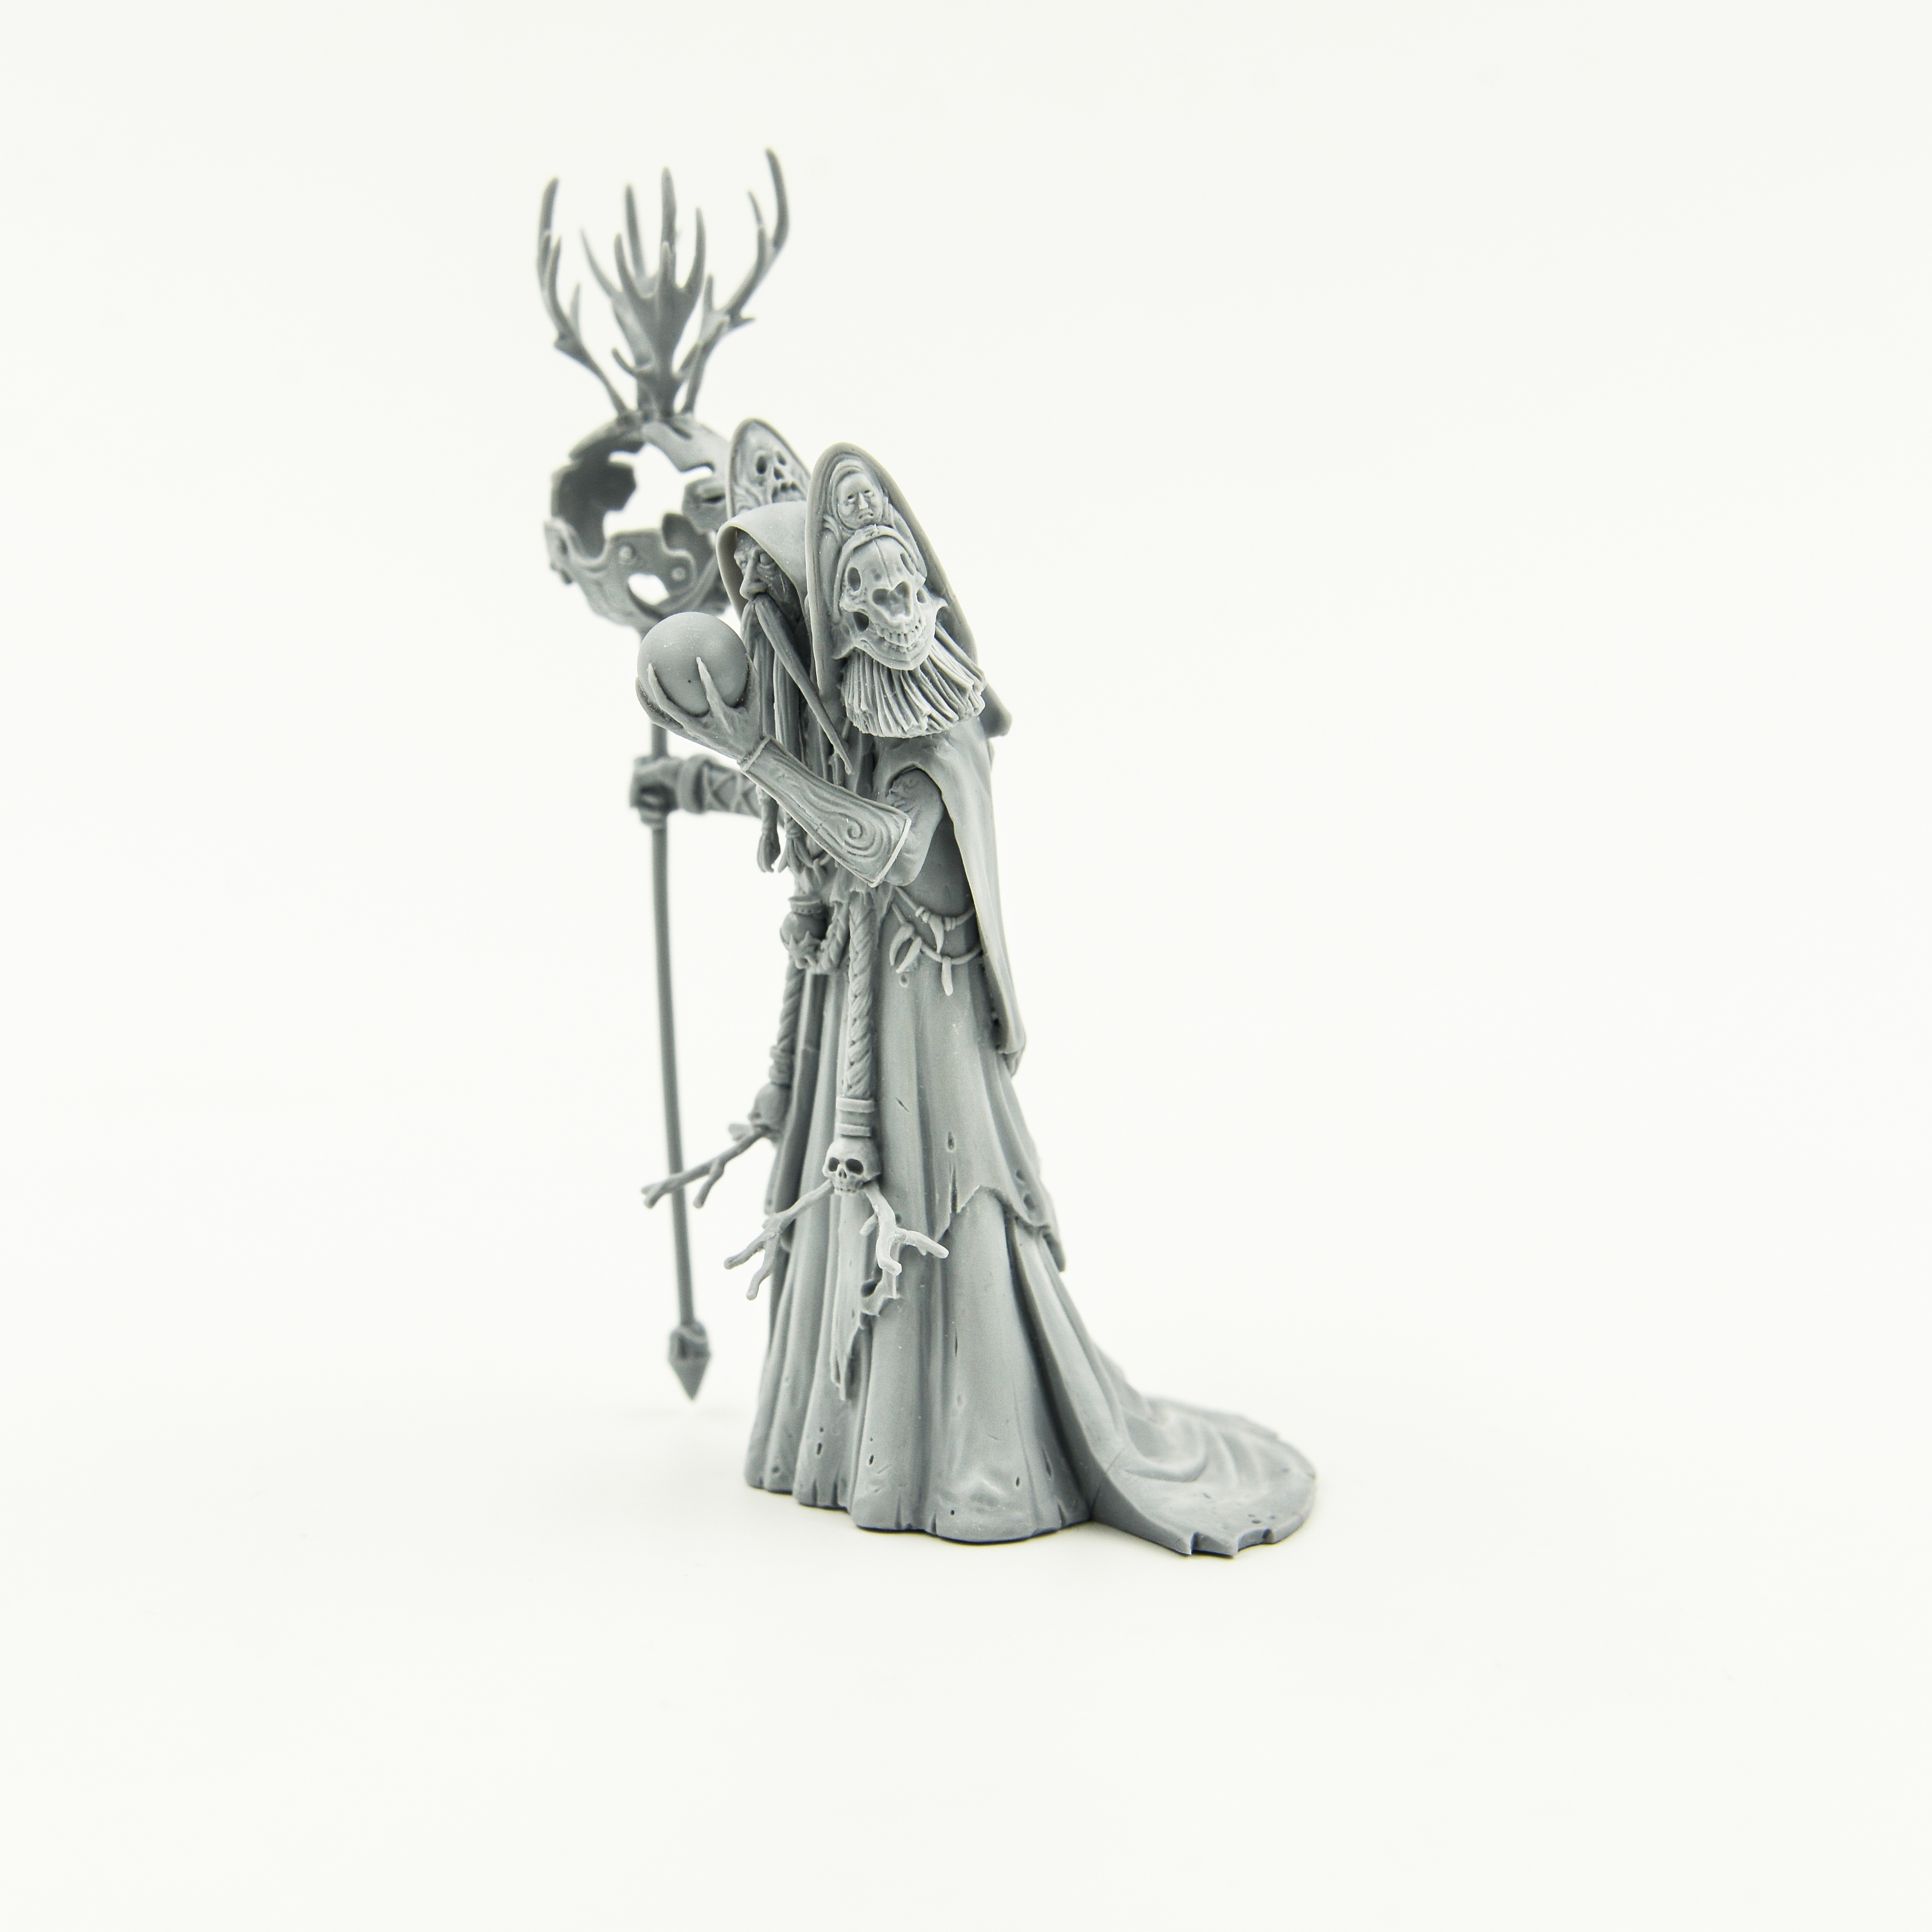
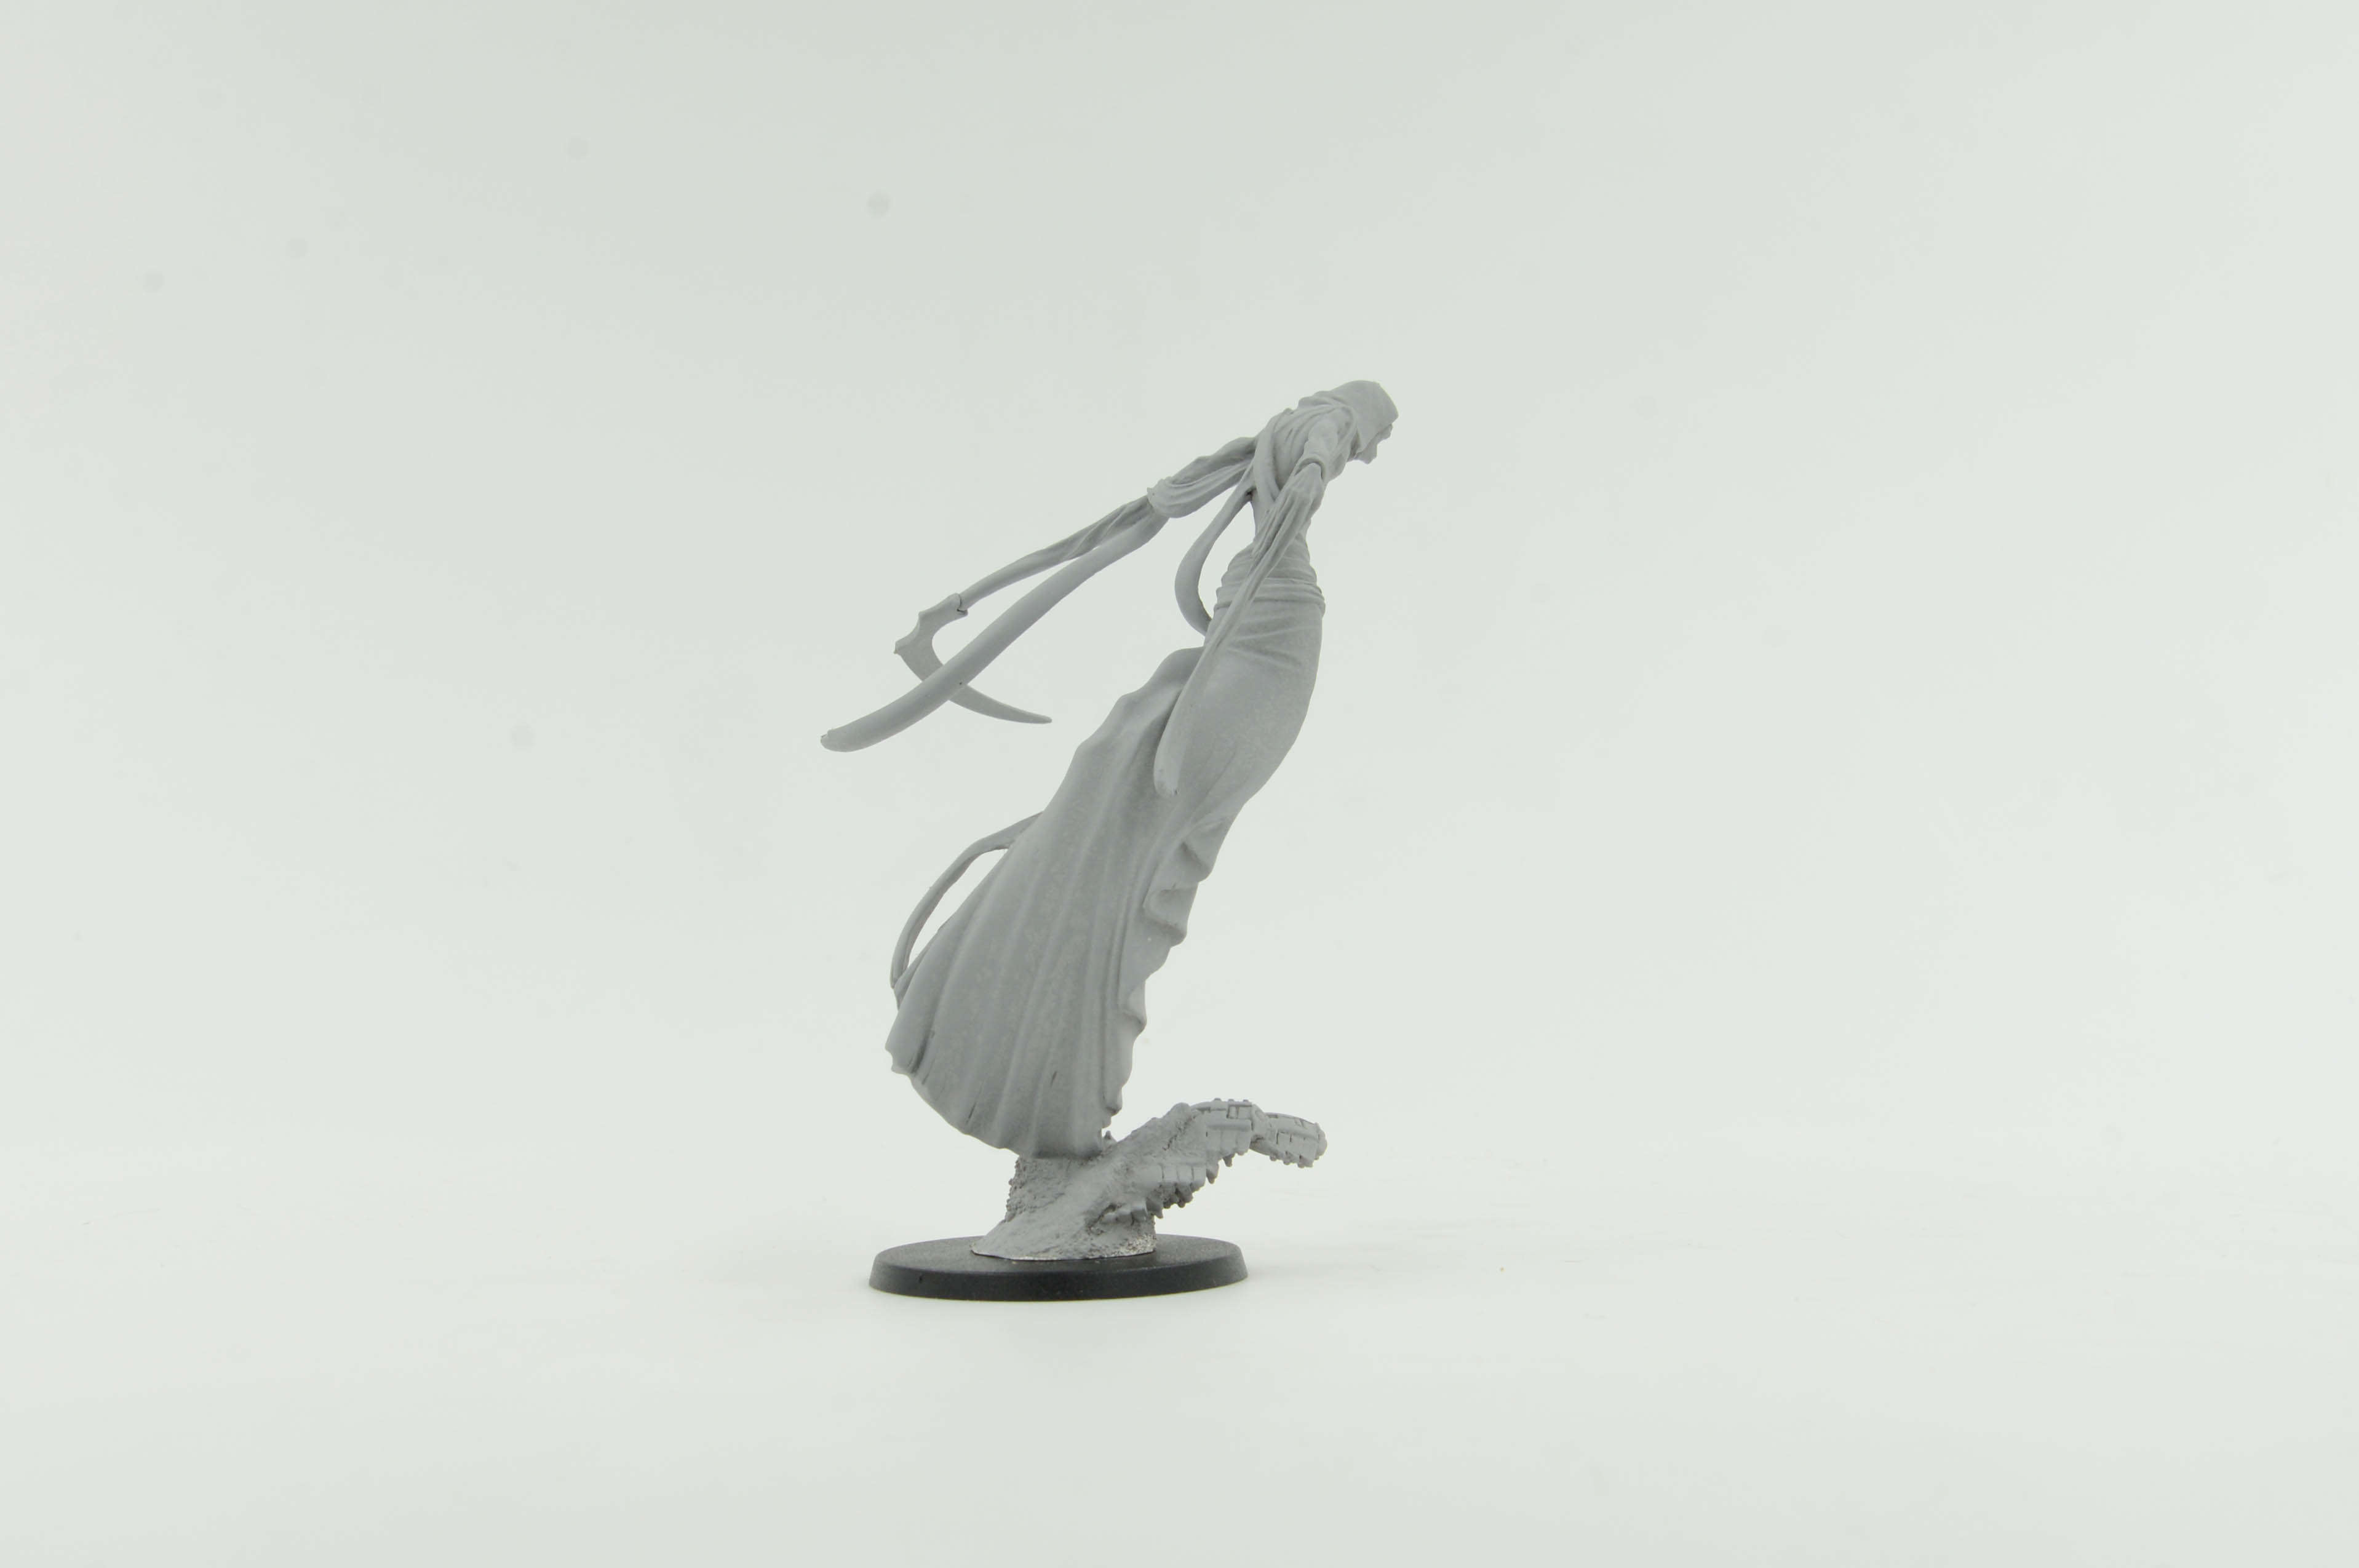
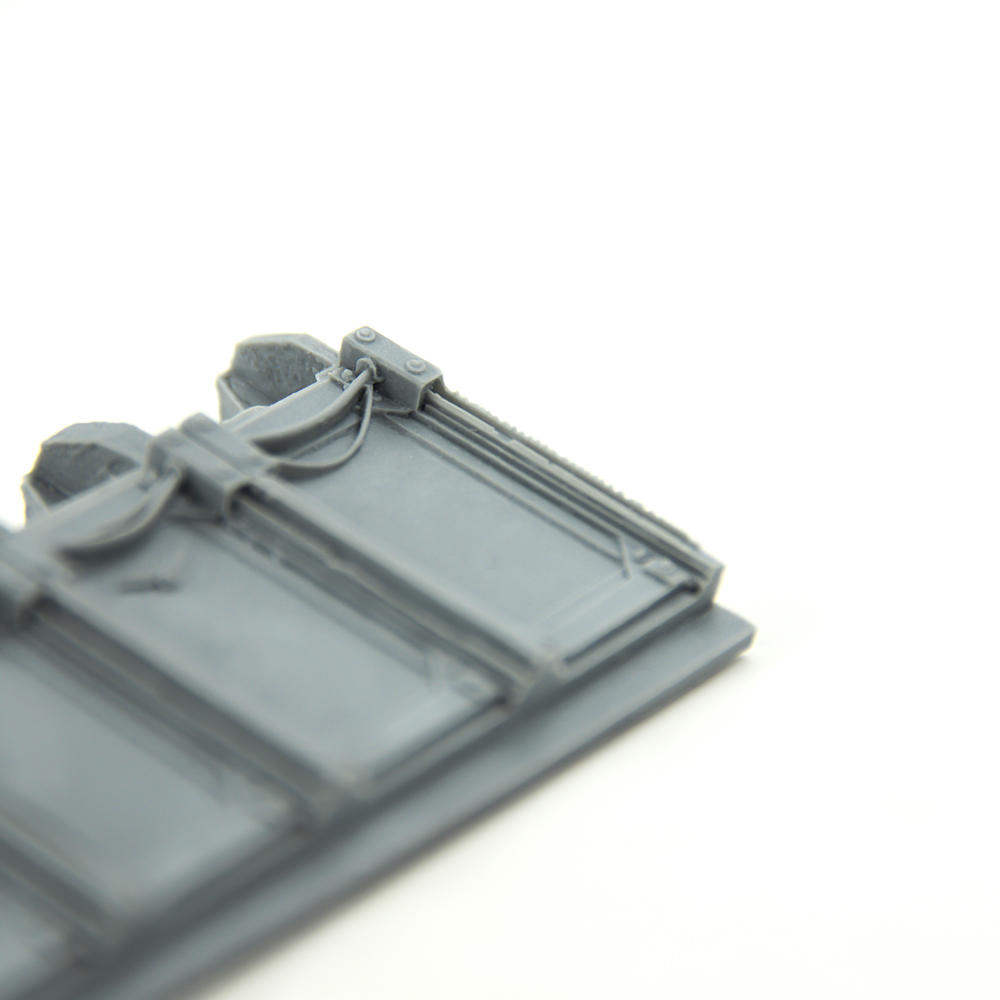
6) Our specialists carry out the procedure of perfect combination of surfaces with the help of putty and adjustments. This is the most difficult part of the work, since it requires high skill. Very often we have to literally sculpt again the missing pieces. That’s how Gryphon looks after our restoration work: photo conjugate parts (2-3 pcs) and the Gryphon himself close-up (Click on the picture to enlarge the image):
 |
 |
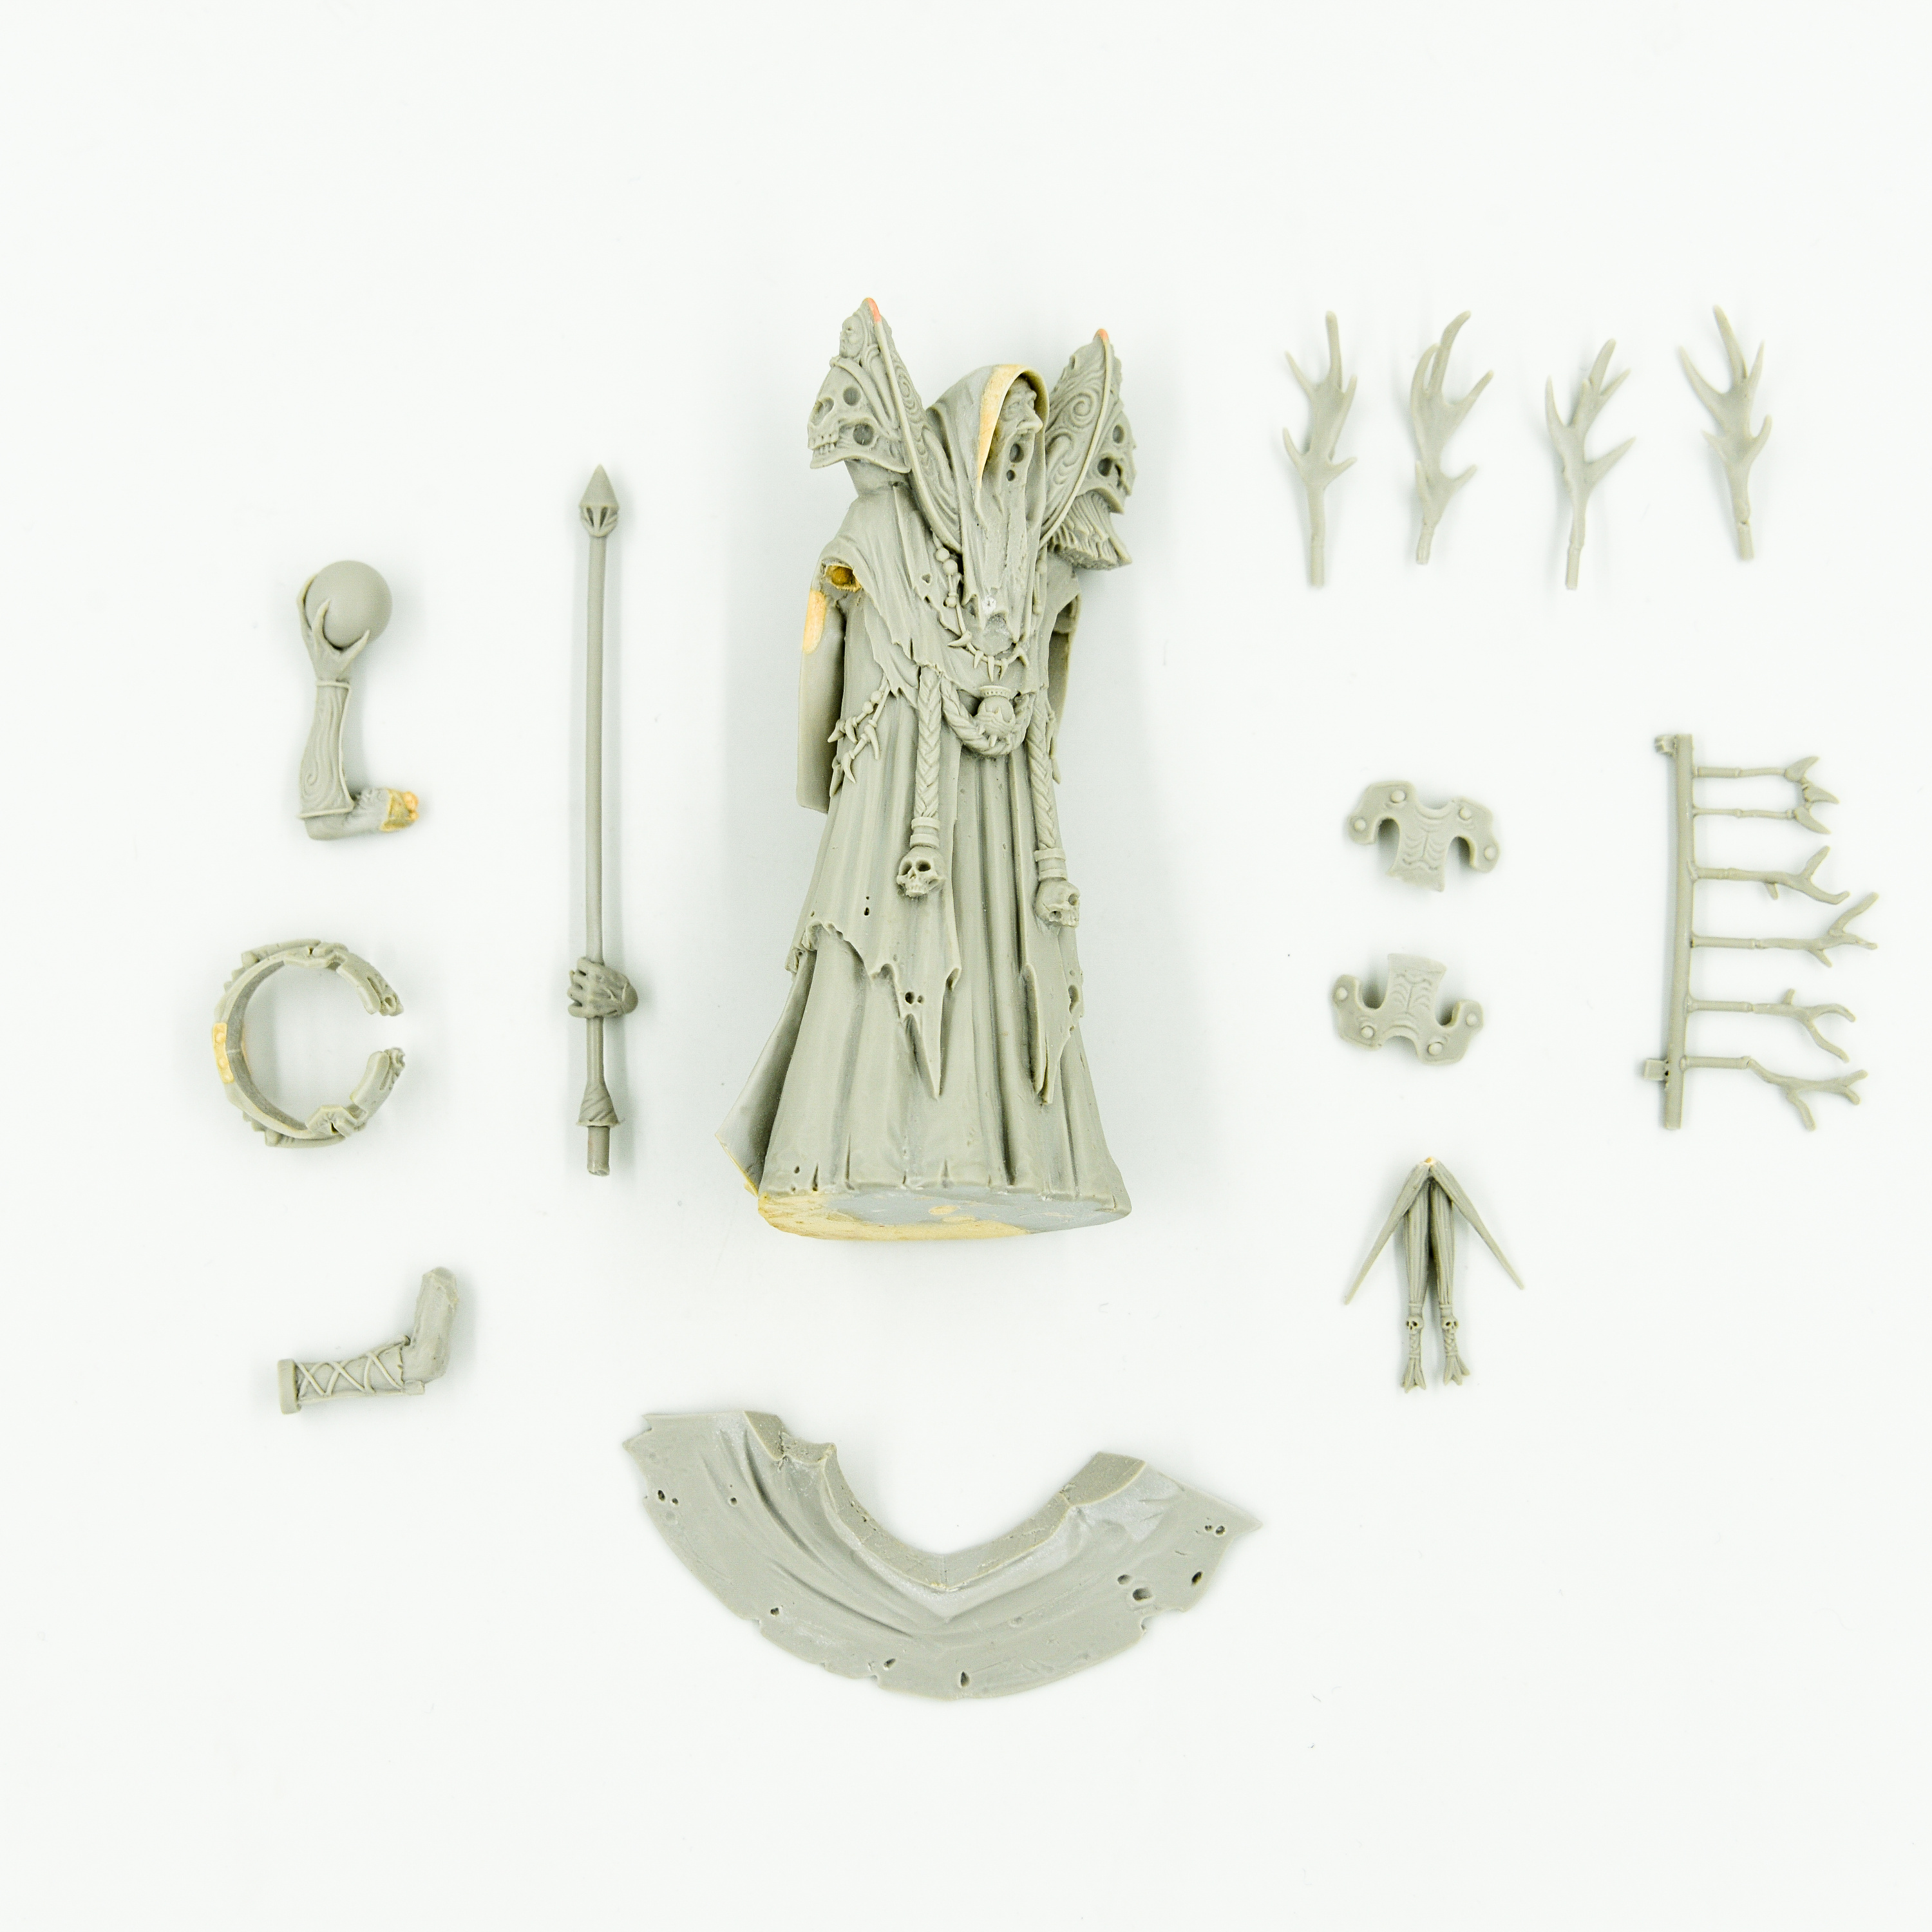
7) It is this sample WE consider the master-model and next, work with him.
8) At the finish stage, we perform a thorough quality control and even the slightest deviations from our standards are not allowed. Epoxy resin and putty, which we use is of high quality and have excellent physical and chemical properties: it is easy to dye, it is resistant to mechanical damage, it can withstand even short-term exposure to solvents (DO NOT ABUSE). And individual thin parts of miniatures that can break we reinforce a special wire!
9) After that, those parts that are recognized as meeting our standards are additionally cleaned from the burr, further order will be assmebled.
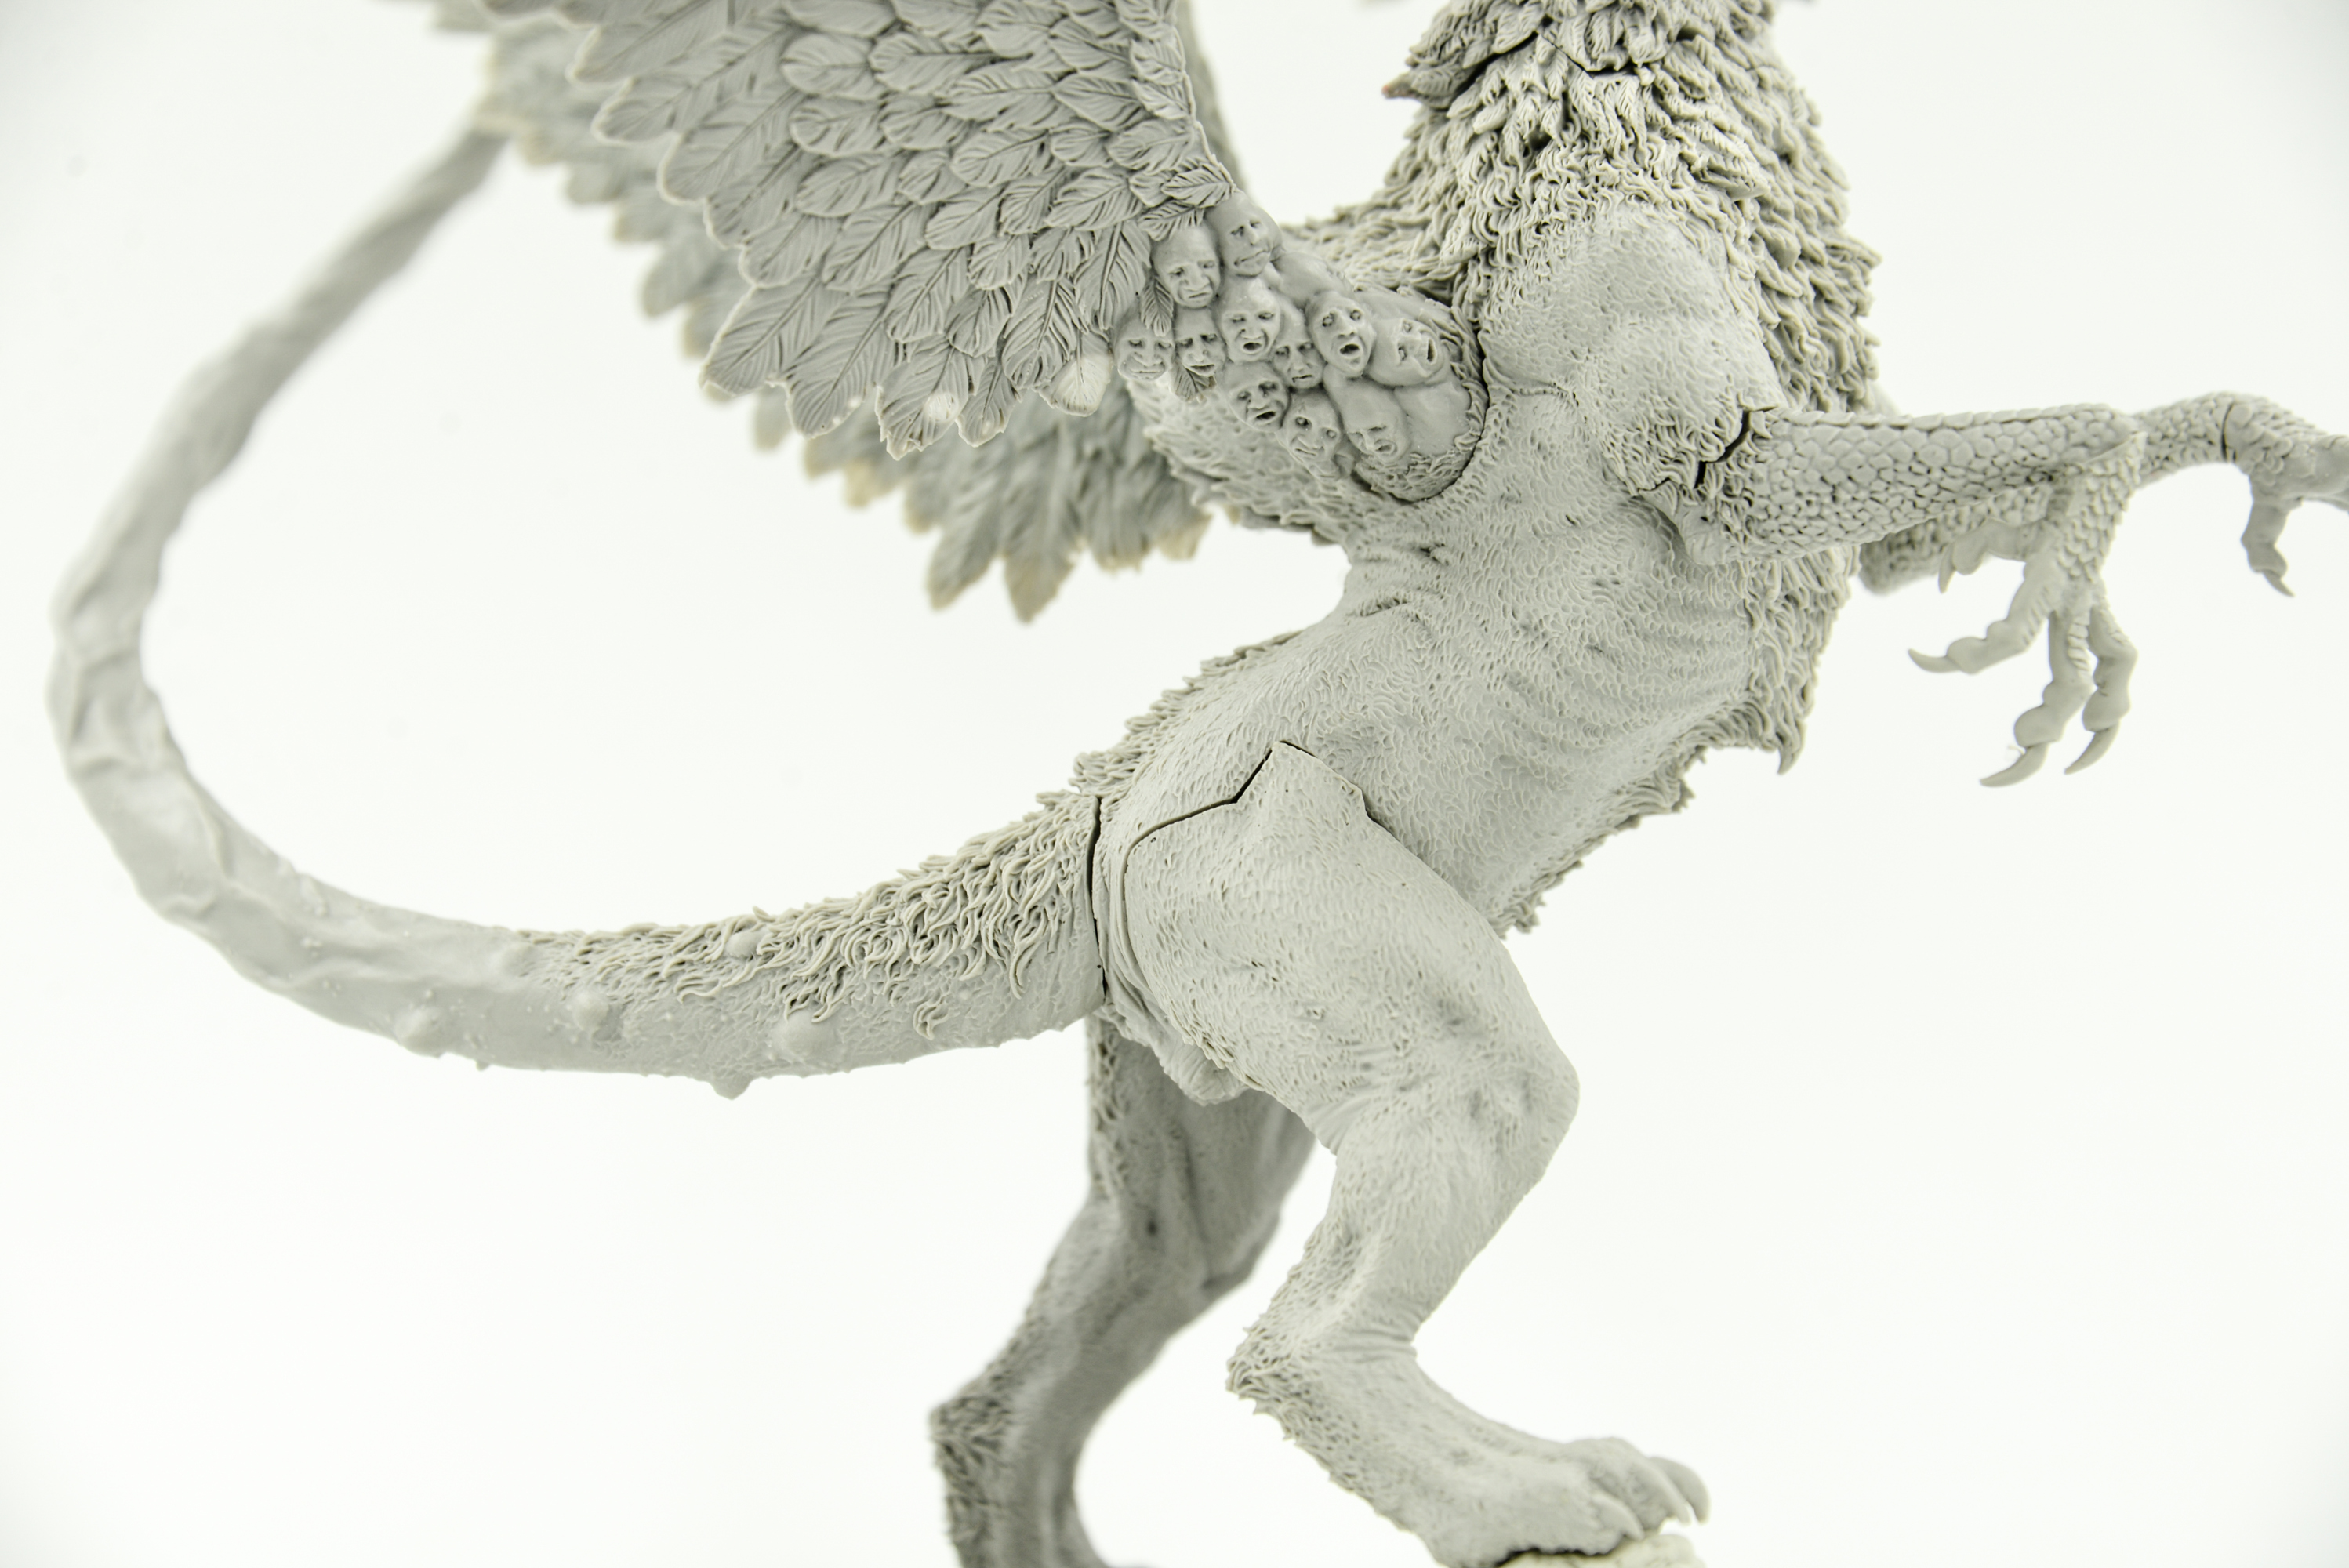
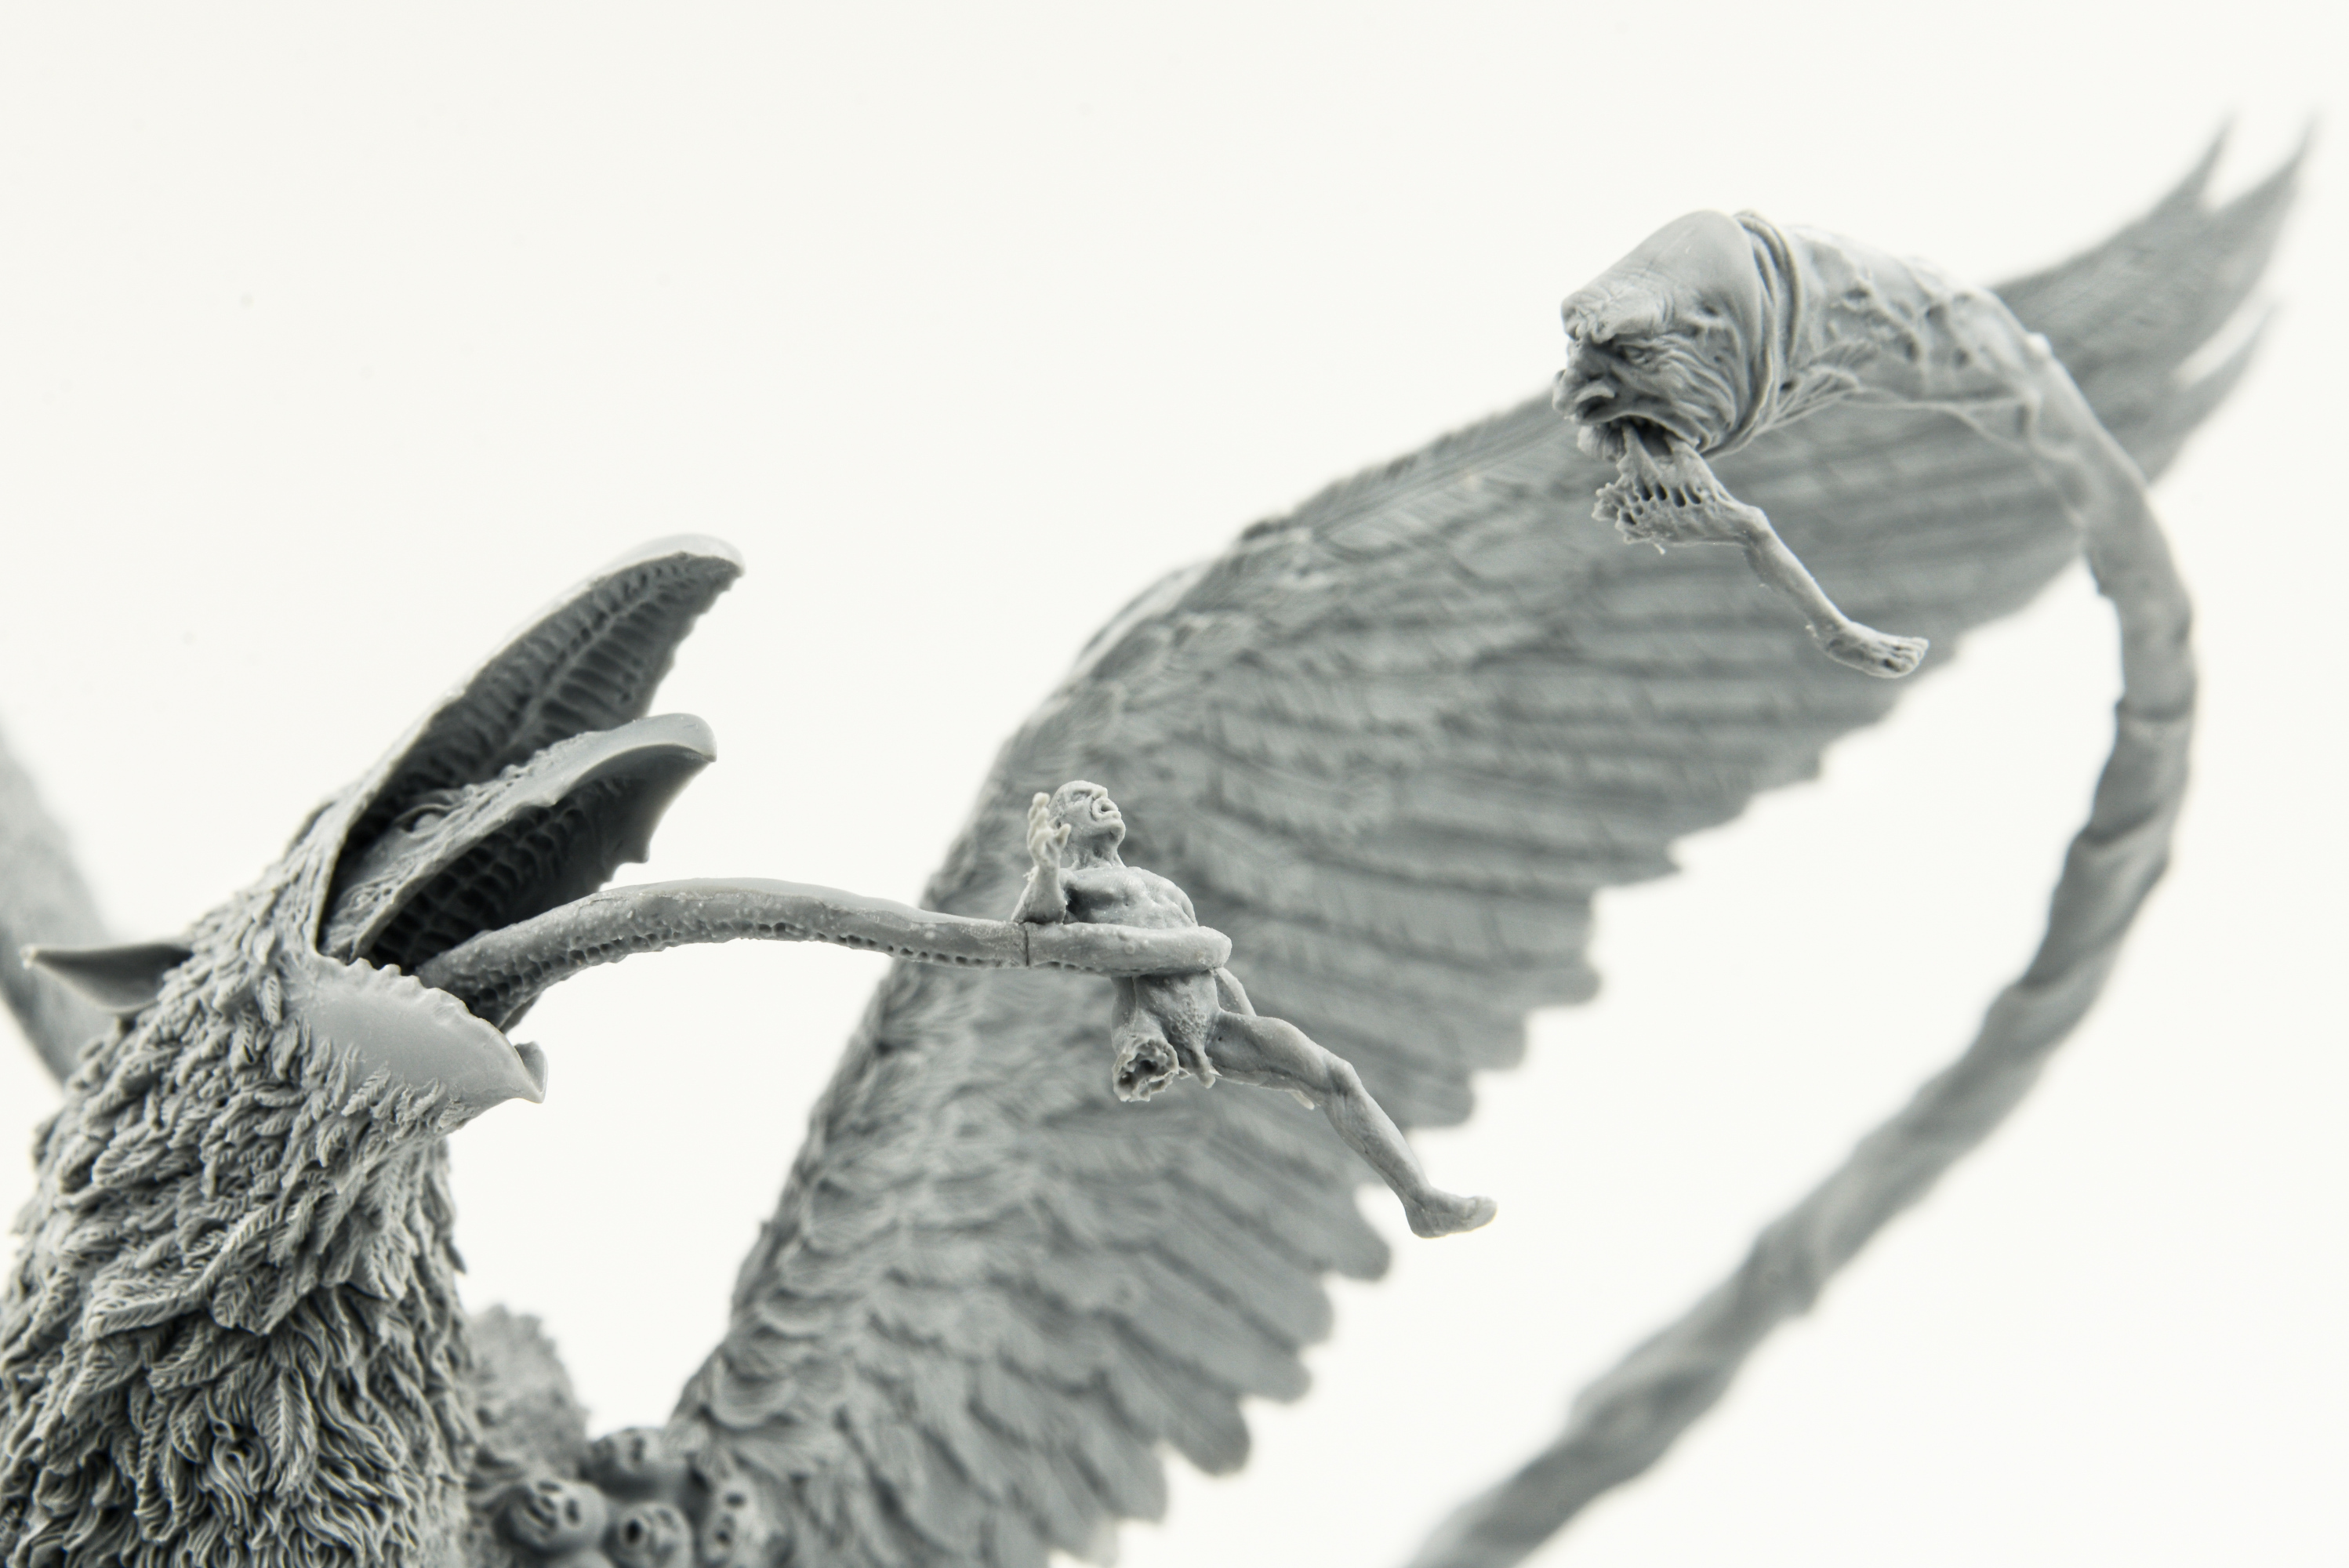
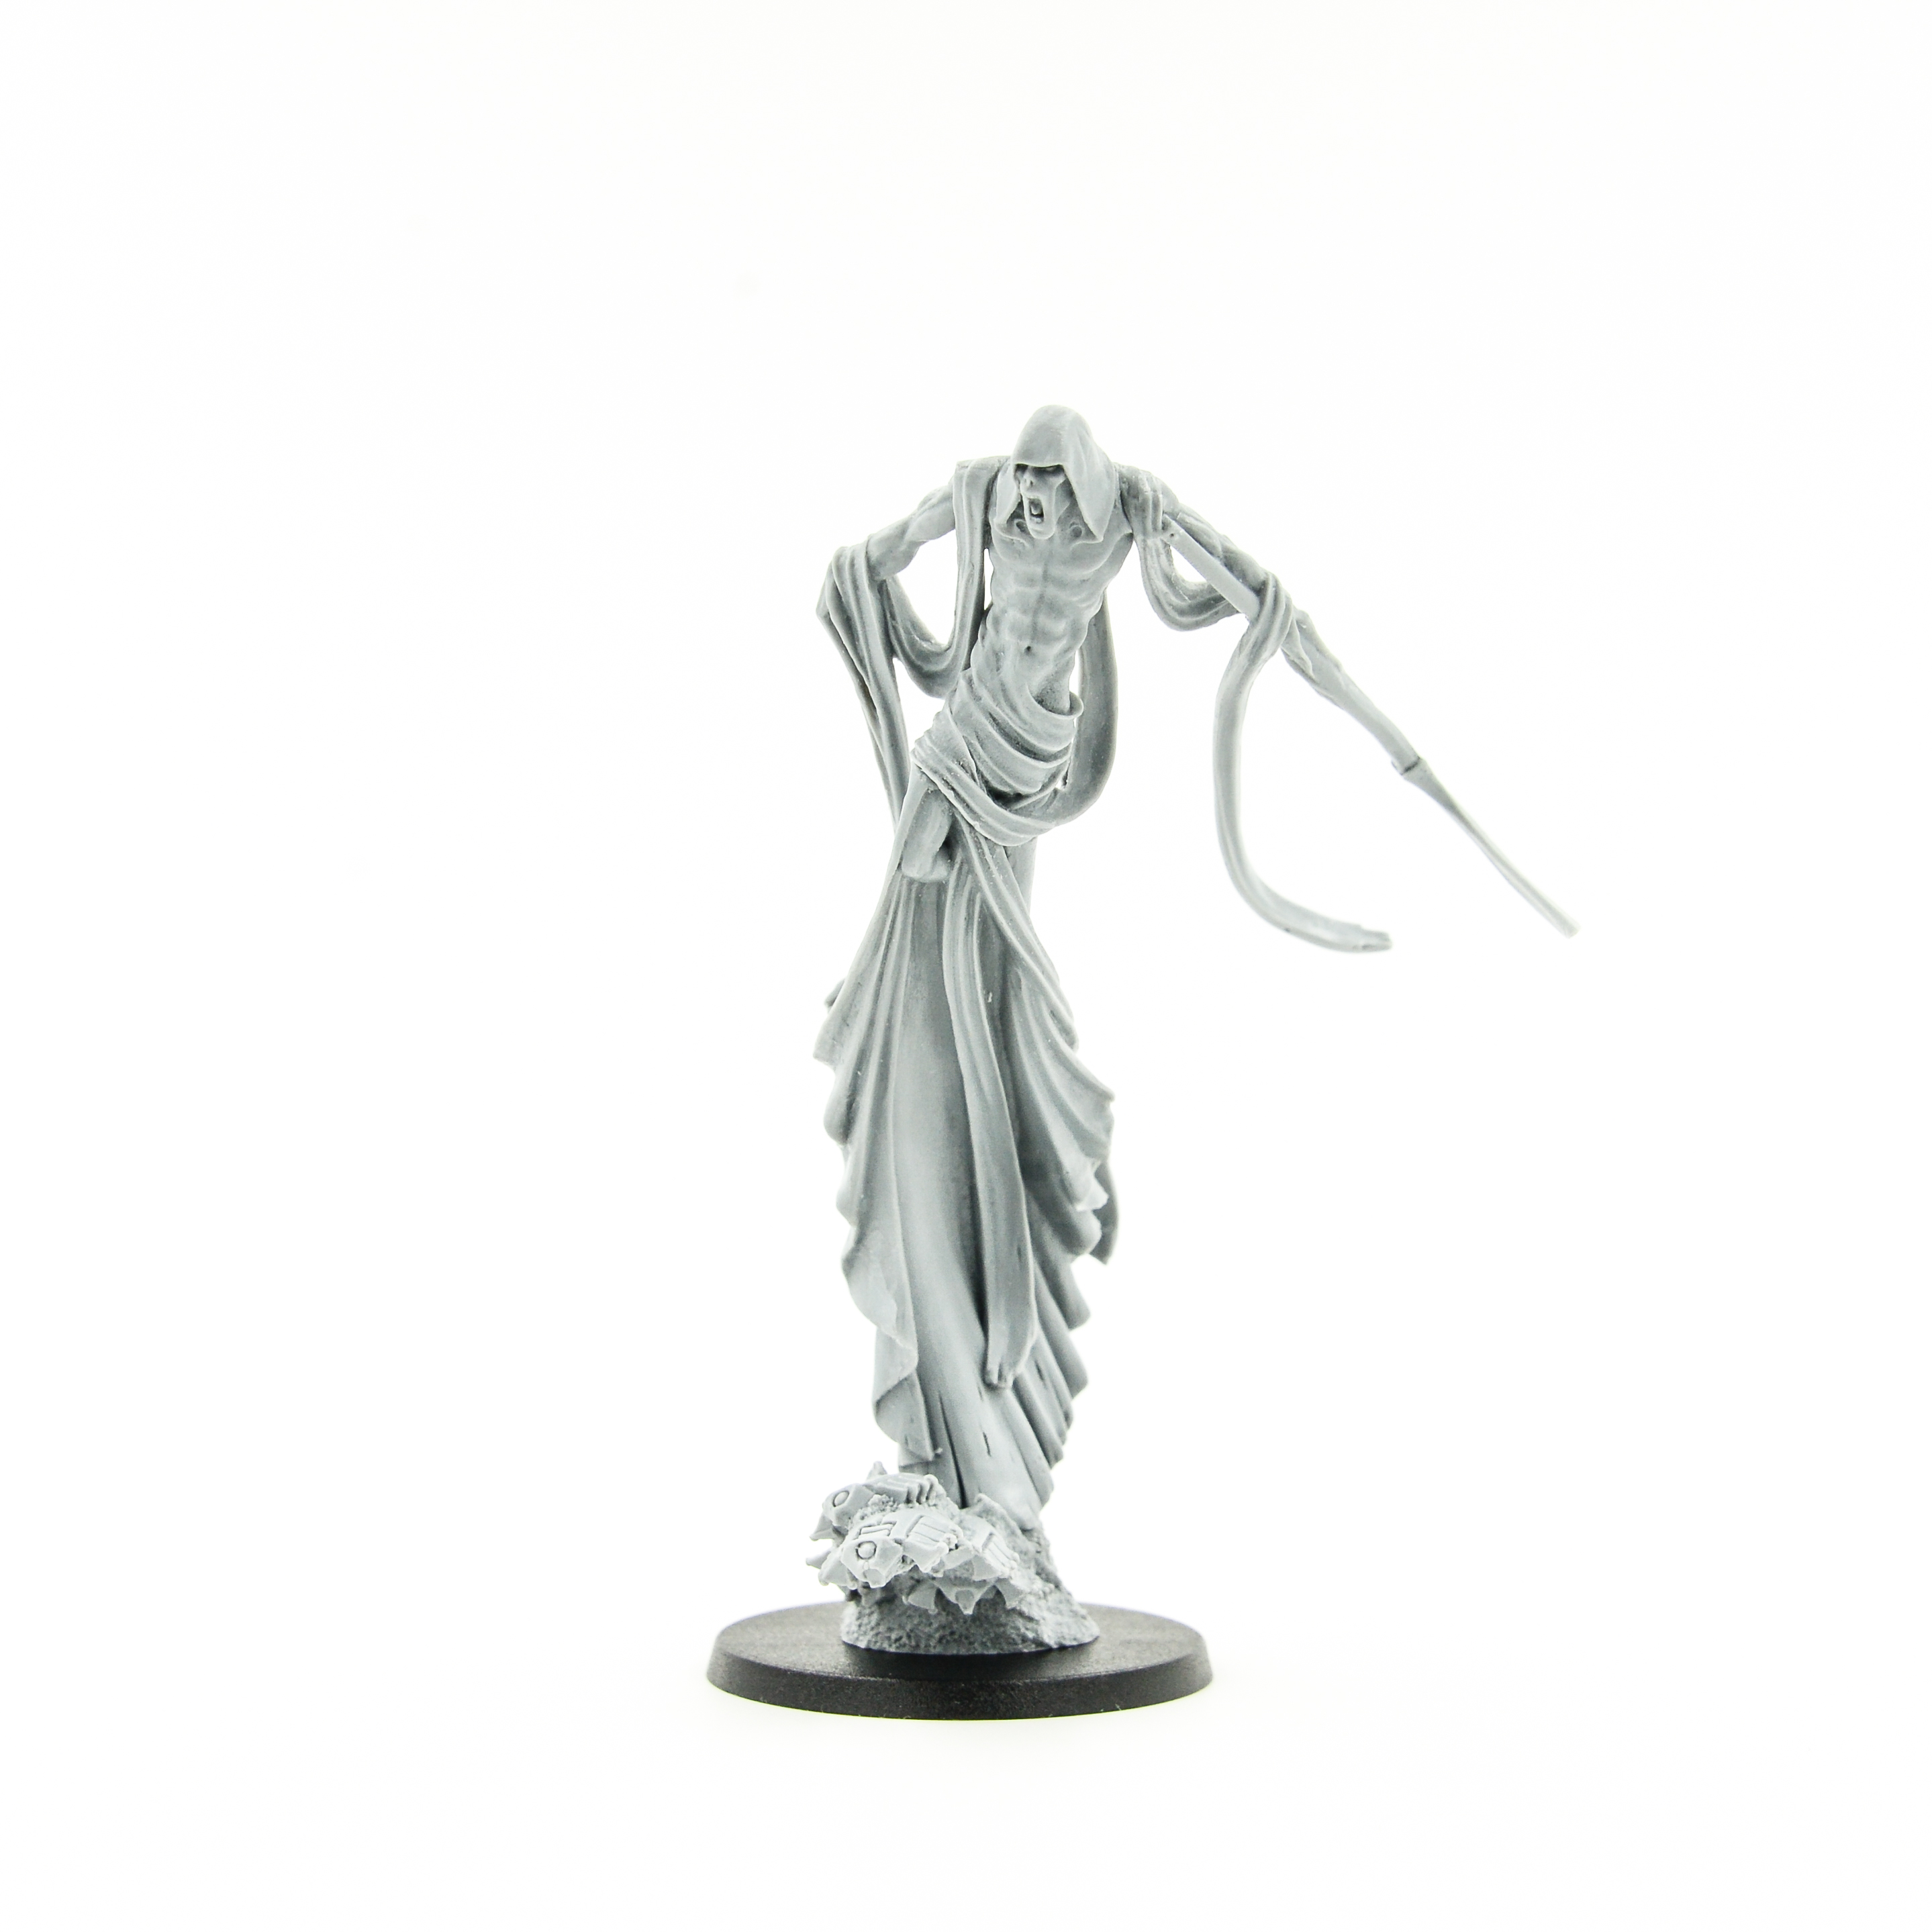
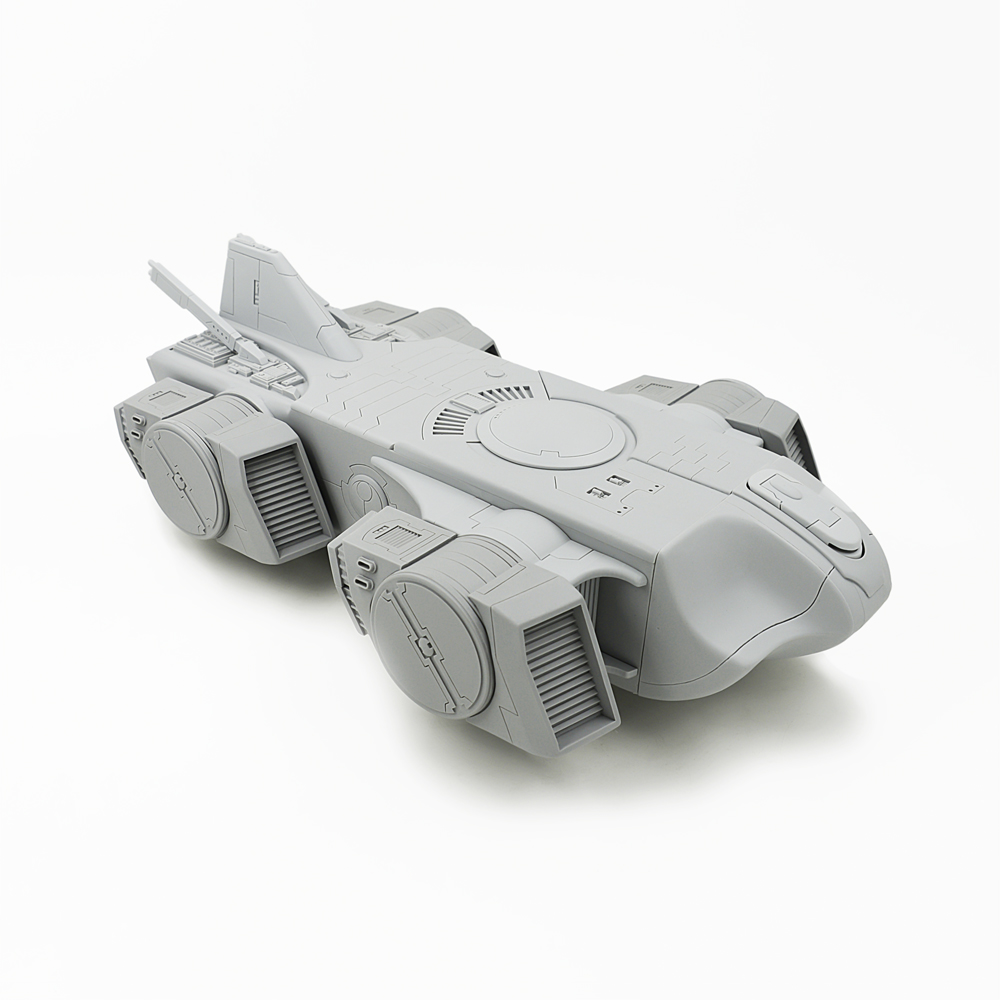
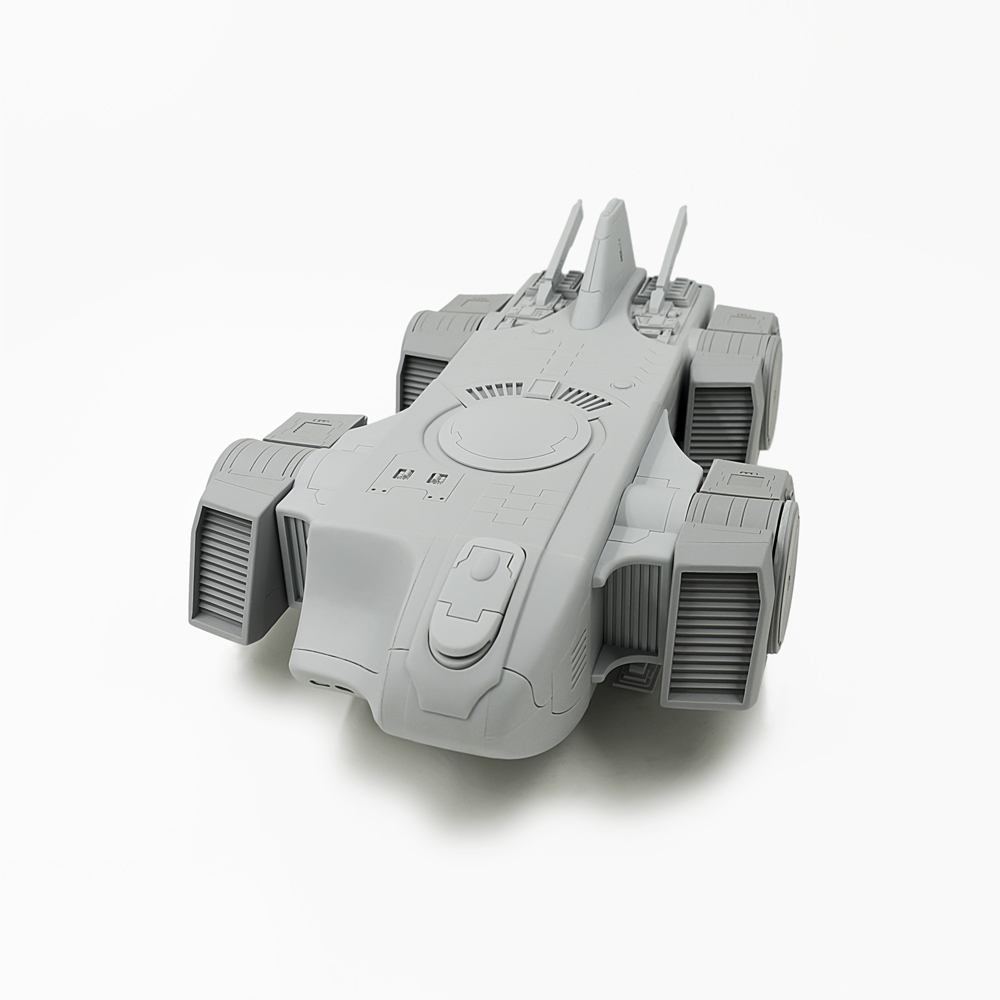
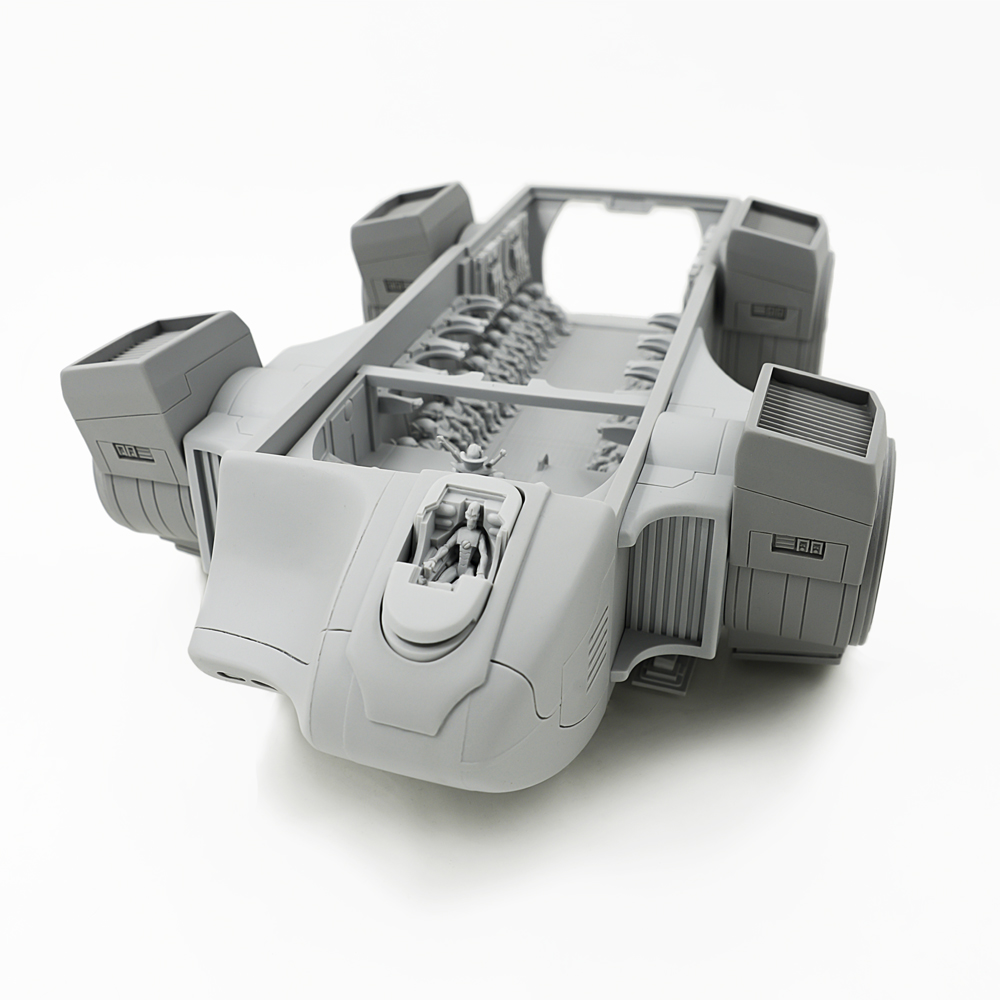
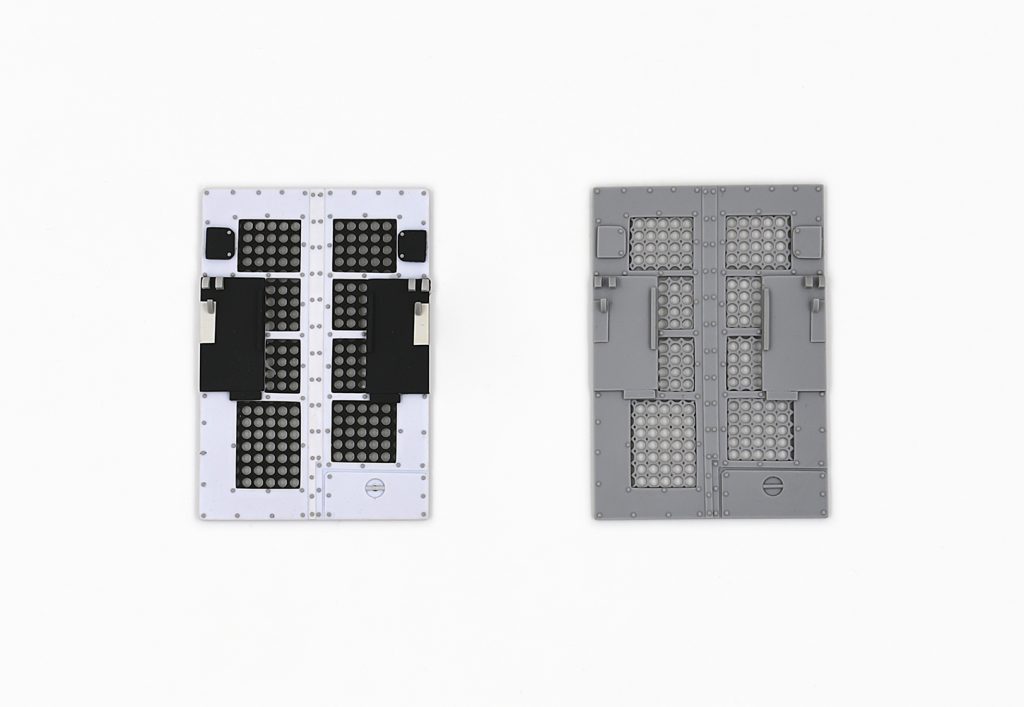
10) Thats look like finished miniature, which will please you in the future: a lot of photos that we usually post to the site (Click on the picture to enlarge the image):
 |
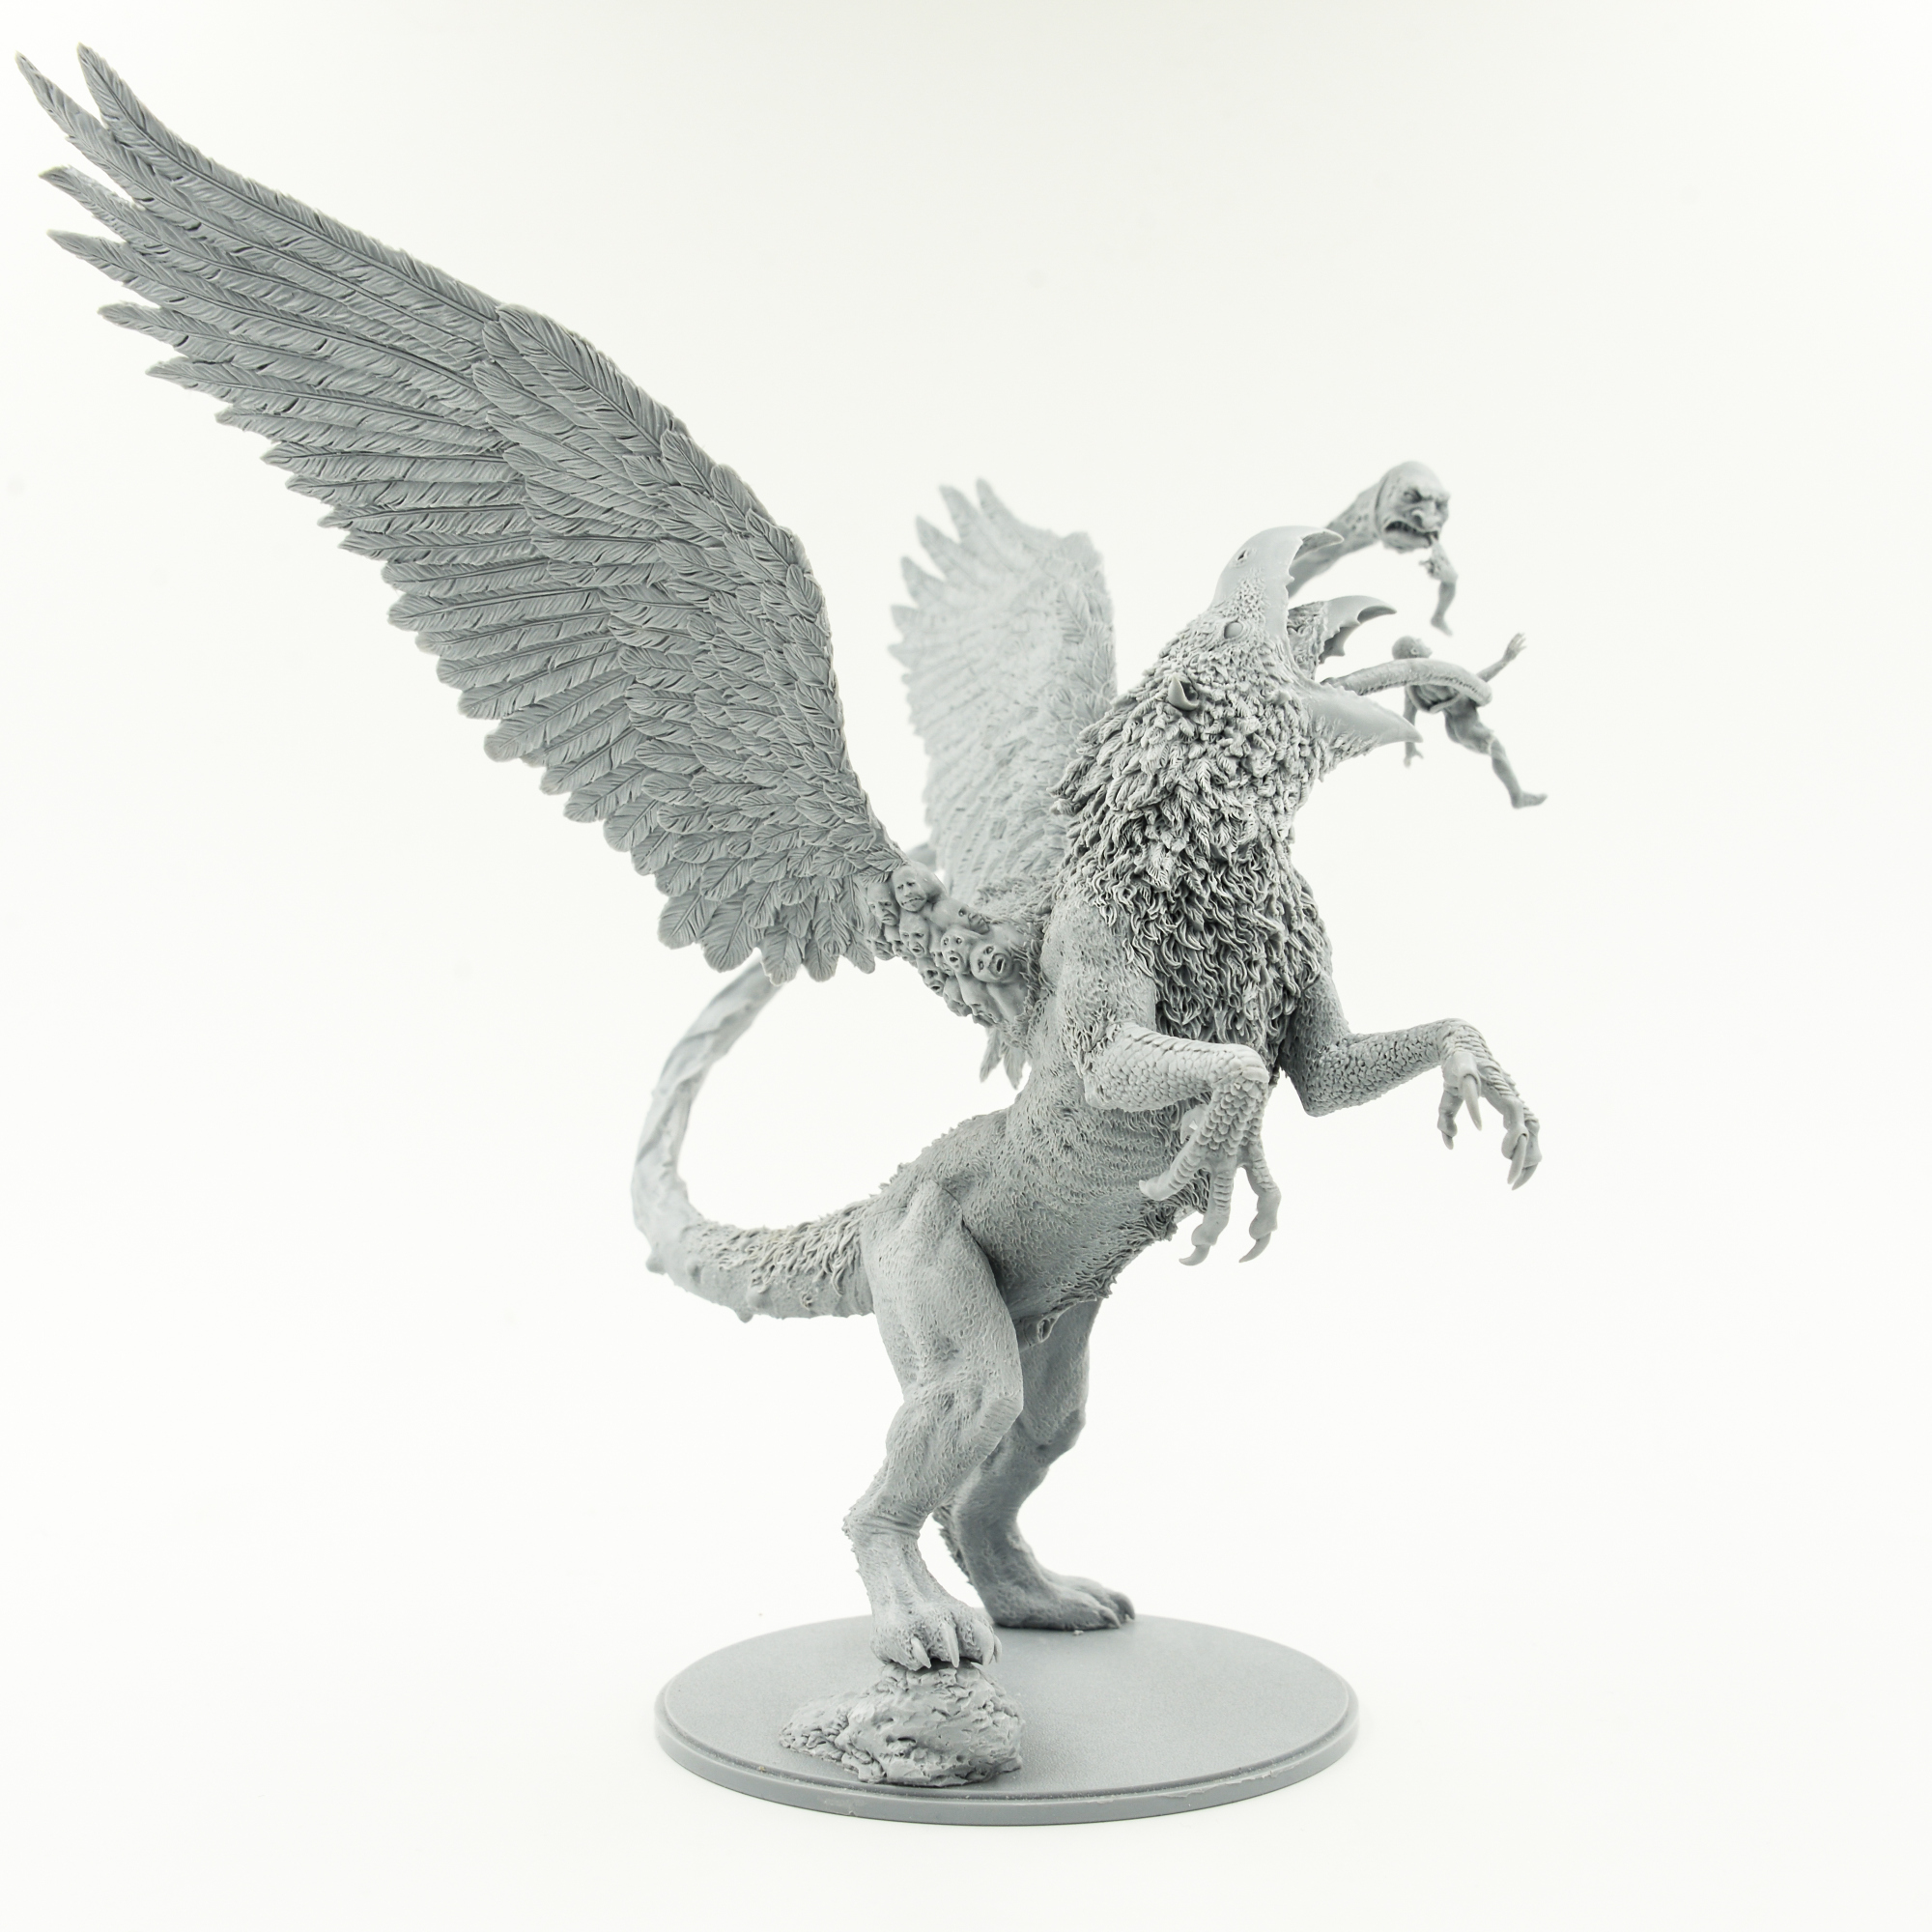 |
 |
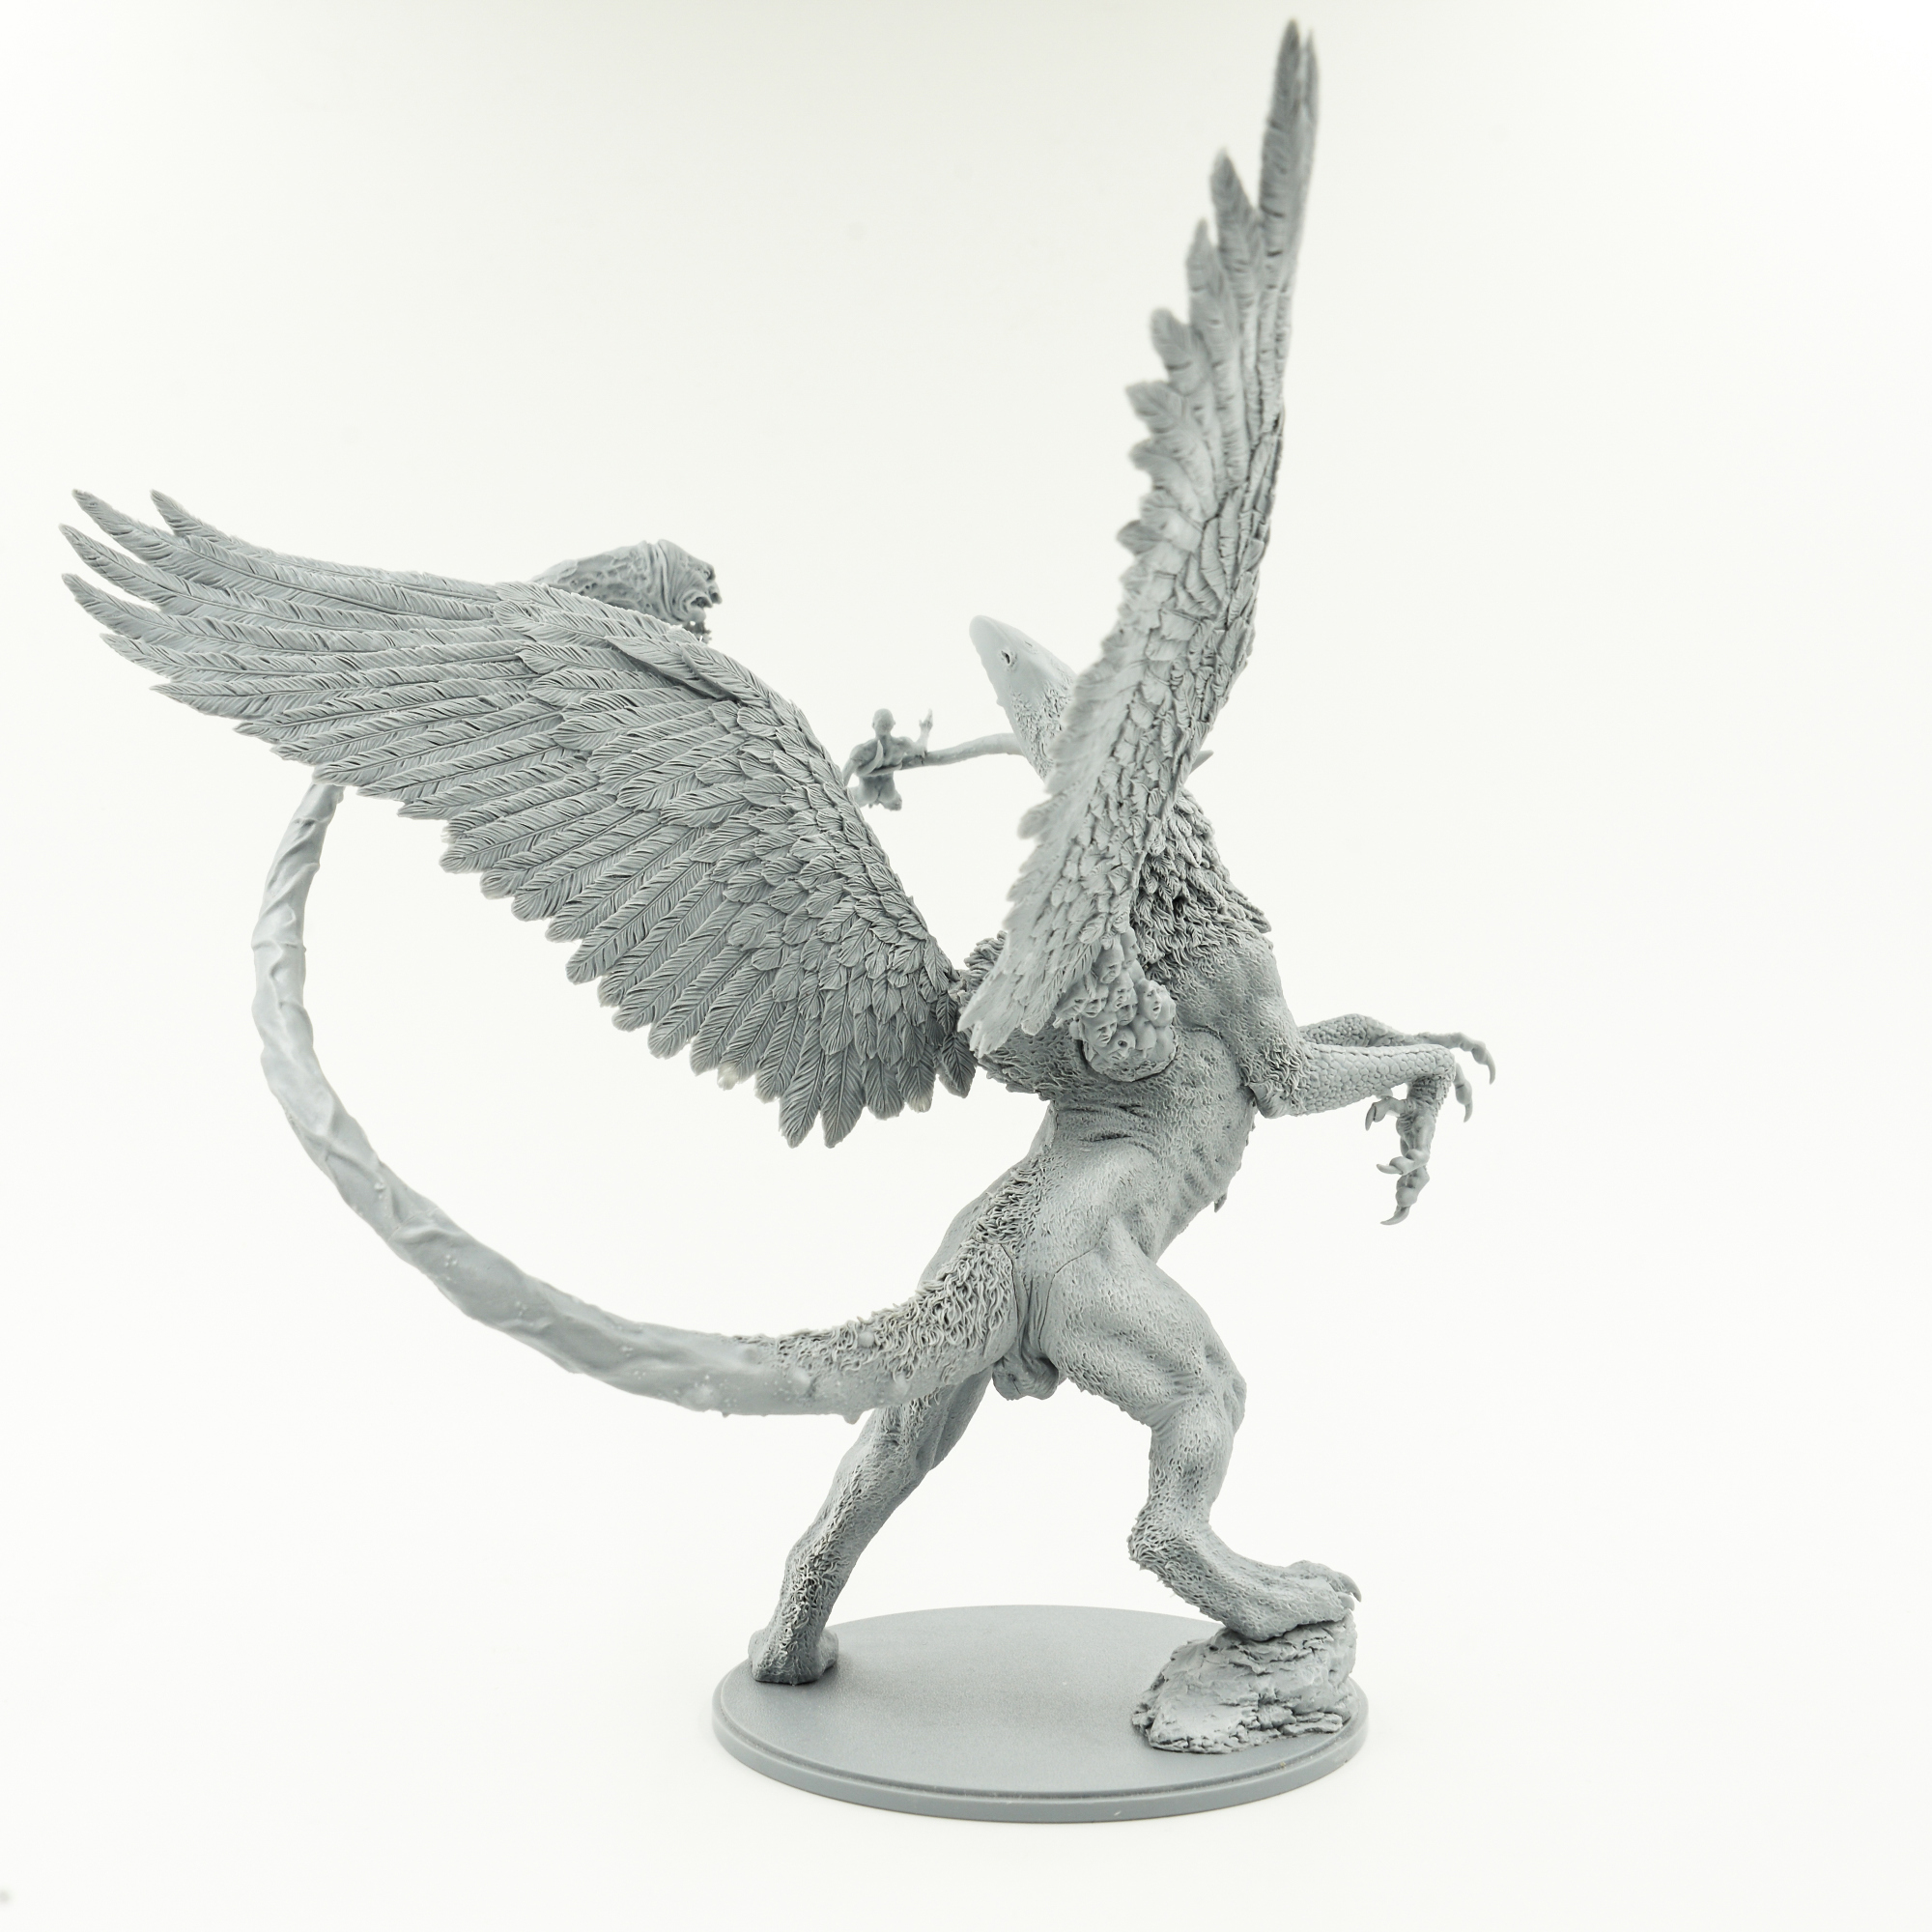 |
 |
 |
 |
 |
 |
 |
In total, the restoration process, or Pro’Cast (as we call it), one miniature can take from a week to a month. In simple terms, instead of Chevrolet from the assembly line, you get a hand-assembled Ferrari. Whoever held the miniatures of our manufacture does not doubt this.
Due to the difficulty of restoring miniatures to the original state, the high cost of materials used and the abundance of highly skilled manual labor, our miniatures can not be cheap by definition. And in our case, you do not pay for the brand, not for marketing and not for the abundance of advertising, but for quality!
Therefore, we can rightly be proud of our product and our duty is to preserve and restore miniatures for our customers and fans of our creativity.
More examples of our work – the original photos from owner website (at the left) and our photo (right side) (Click on the picture to enlarge the image):
 |
 |
 |
|
Story №2.
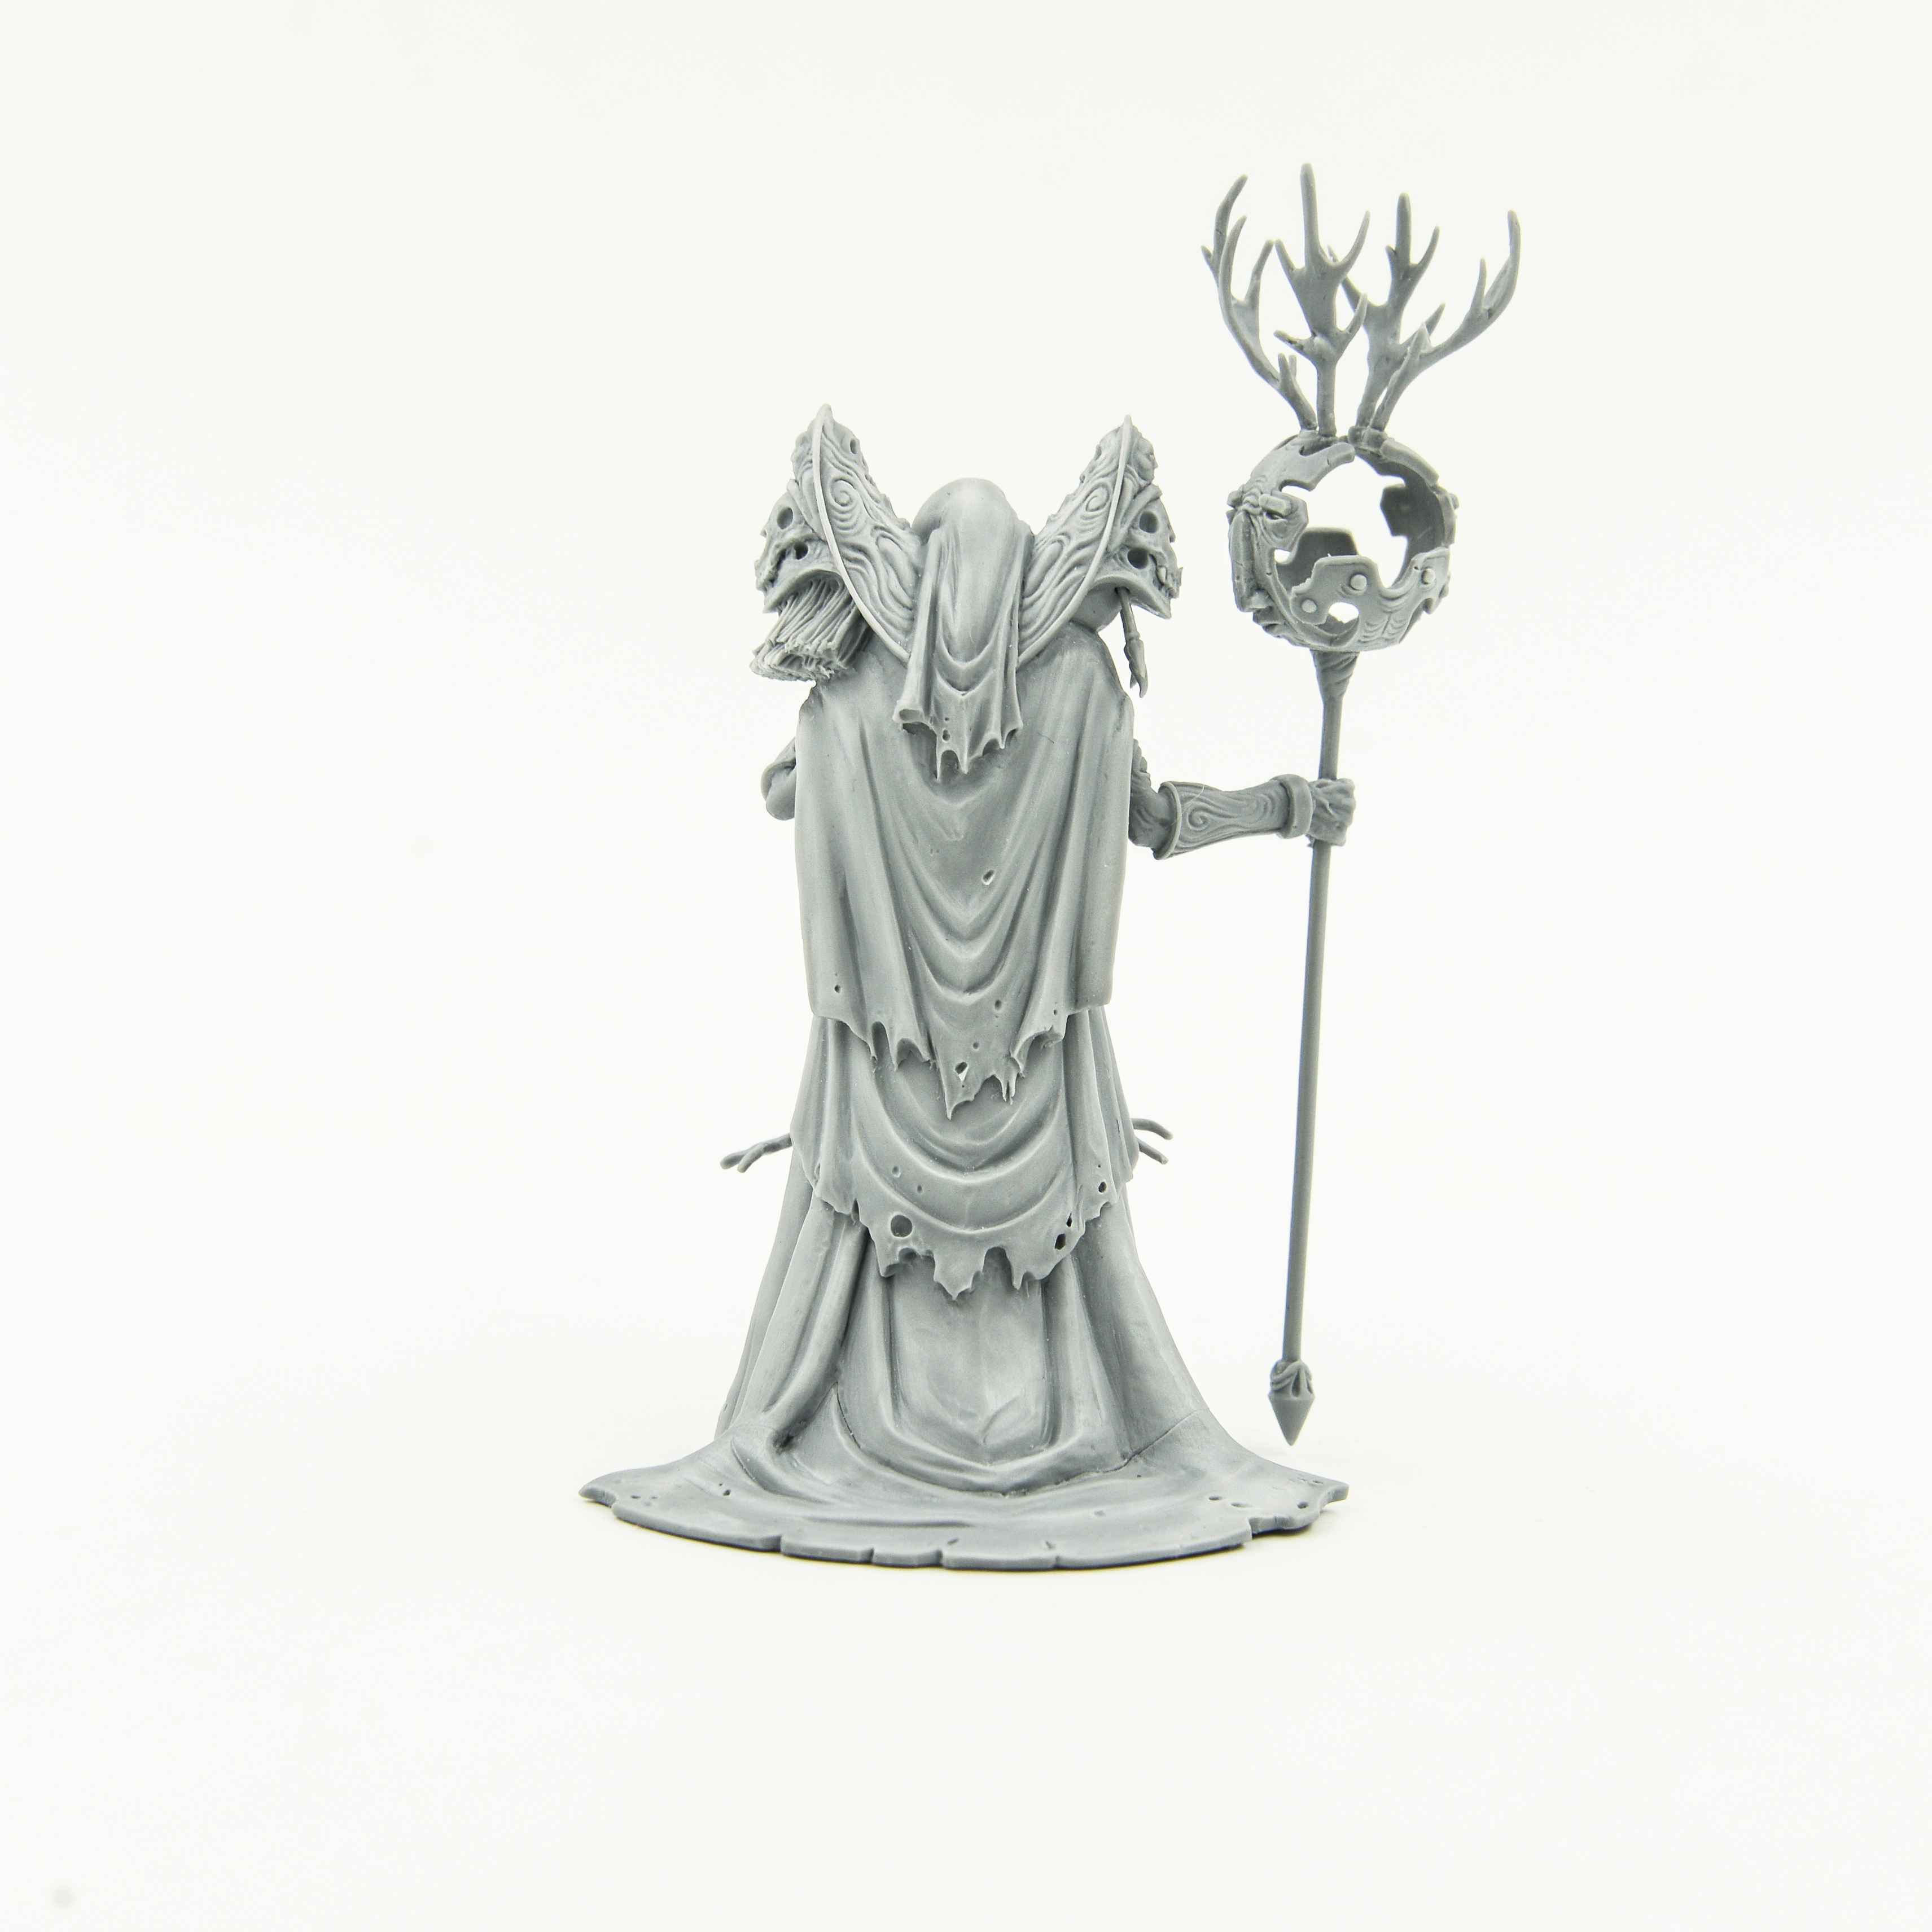
About how Mr.Smuggler “healed” the Necromancer Boss.
About how Mr.Smuggler “healed” the Necromancer Boss.
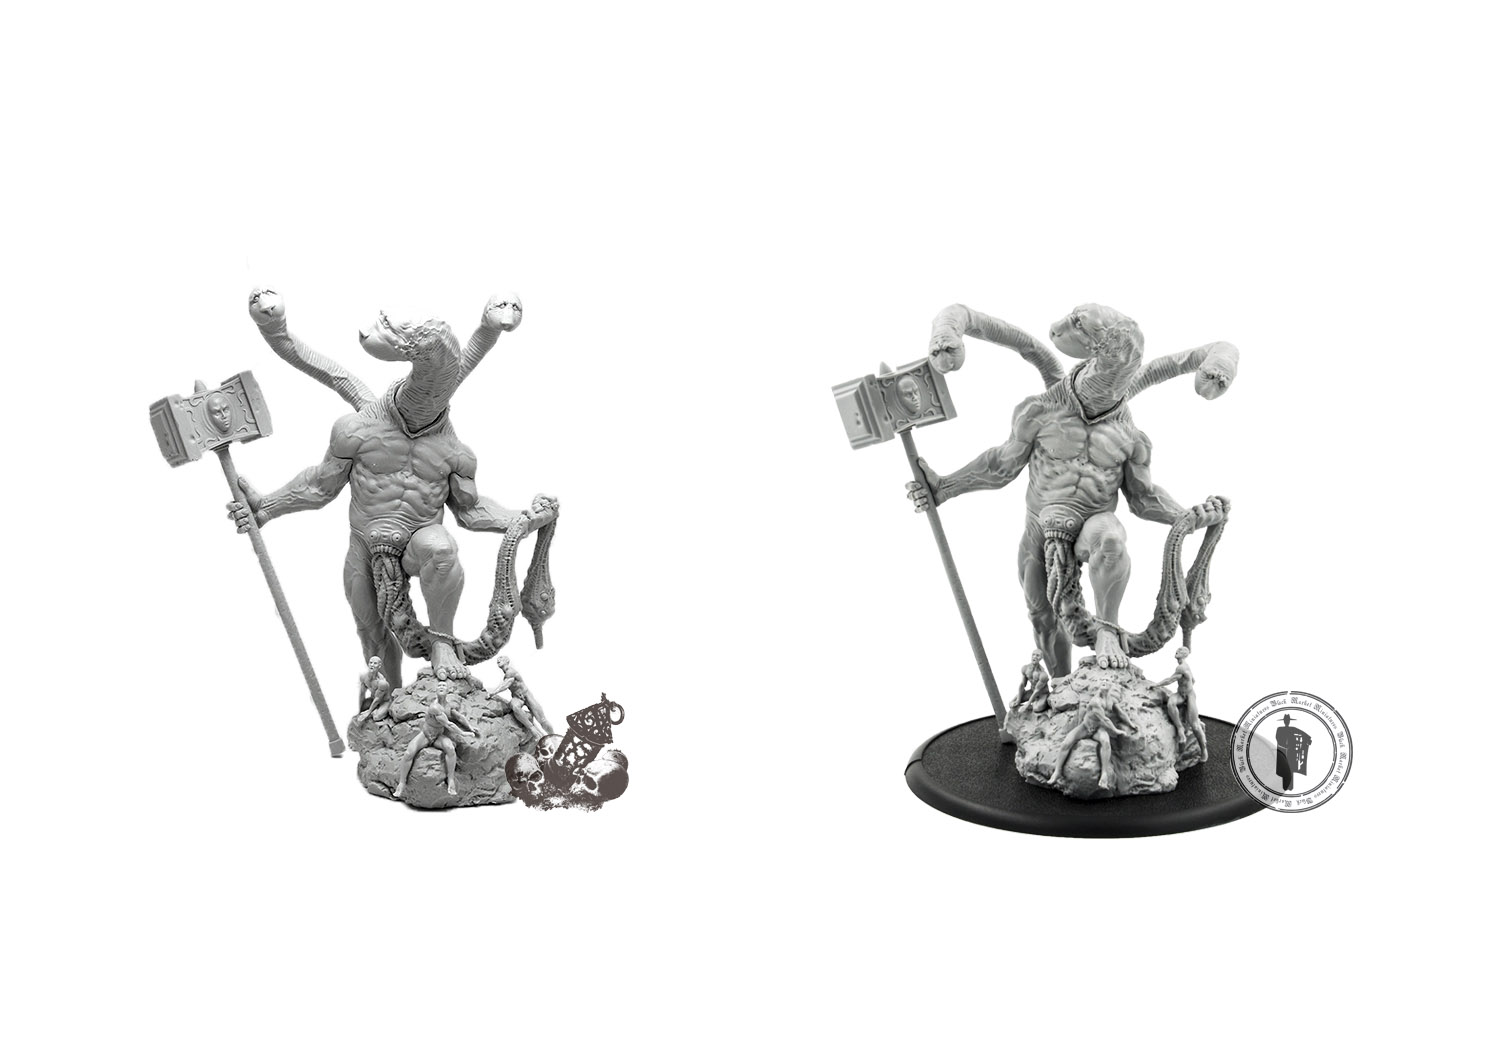
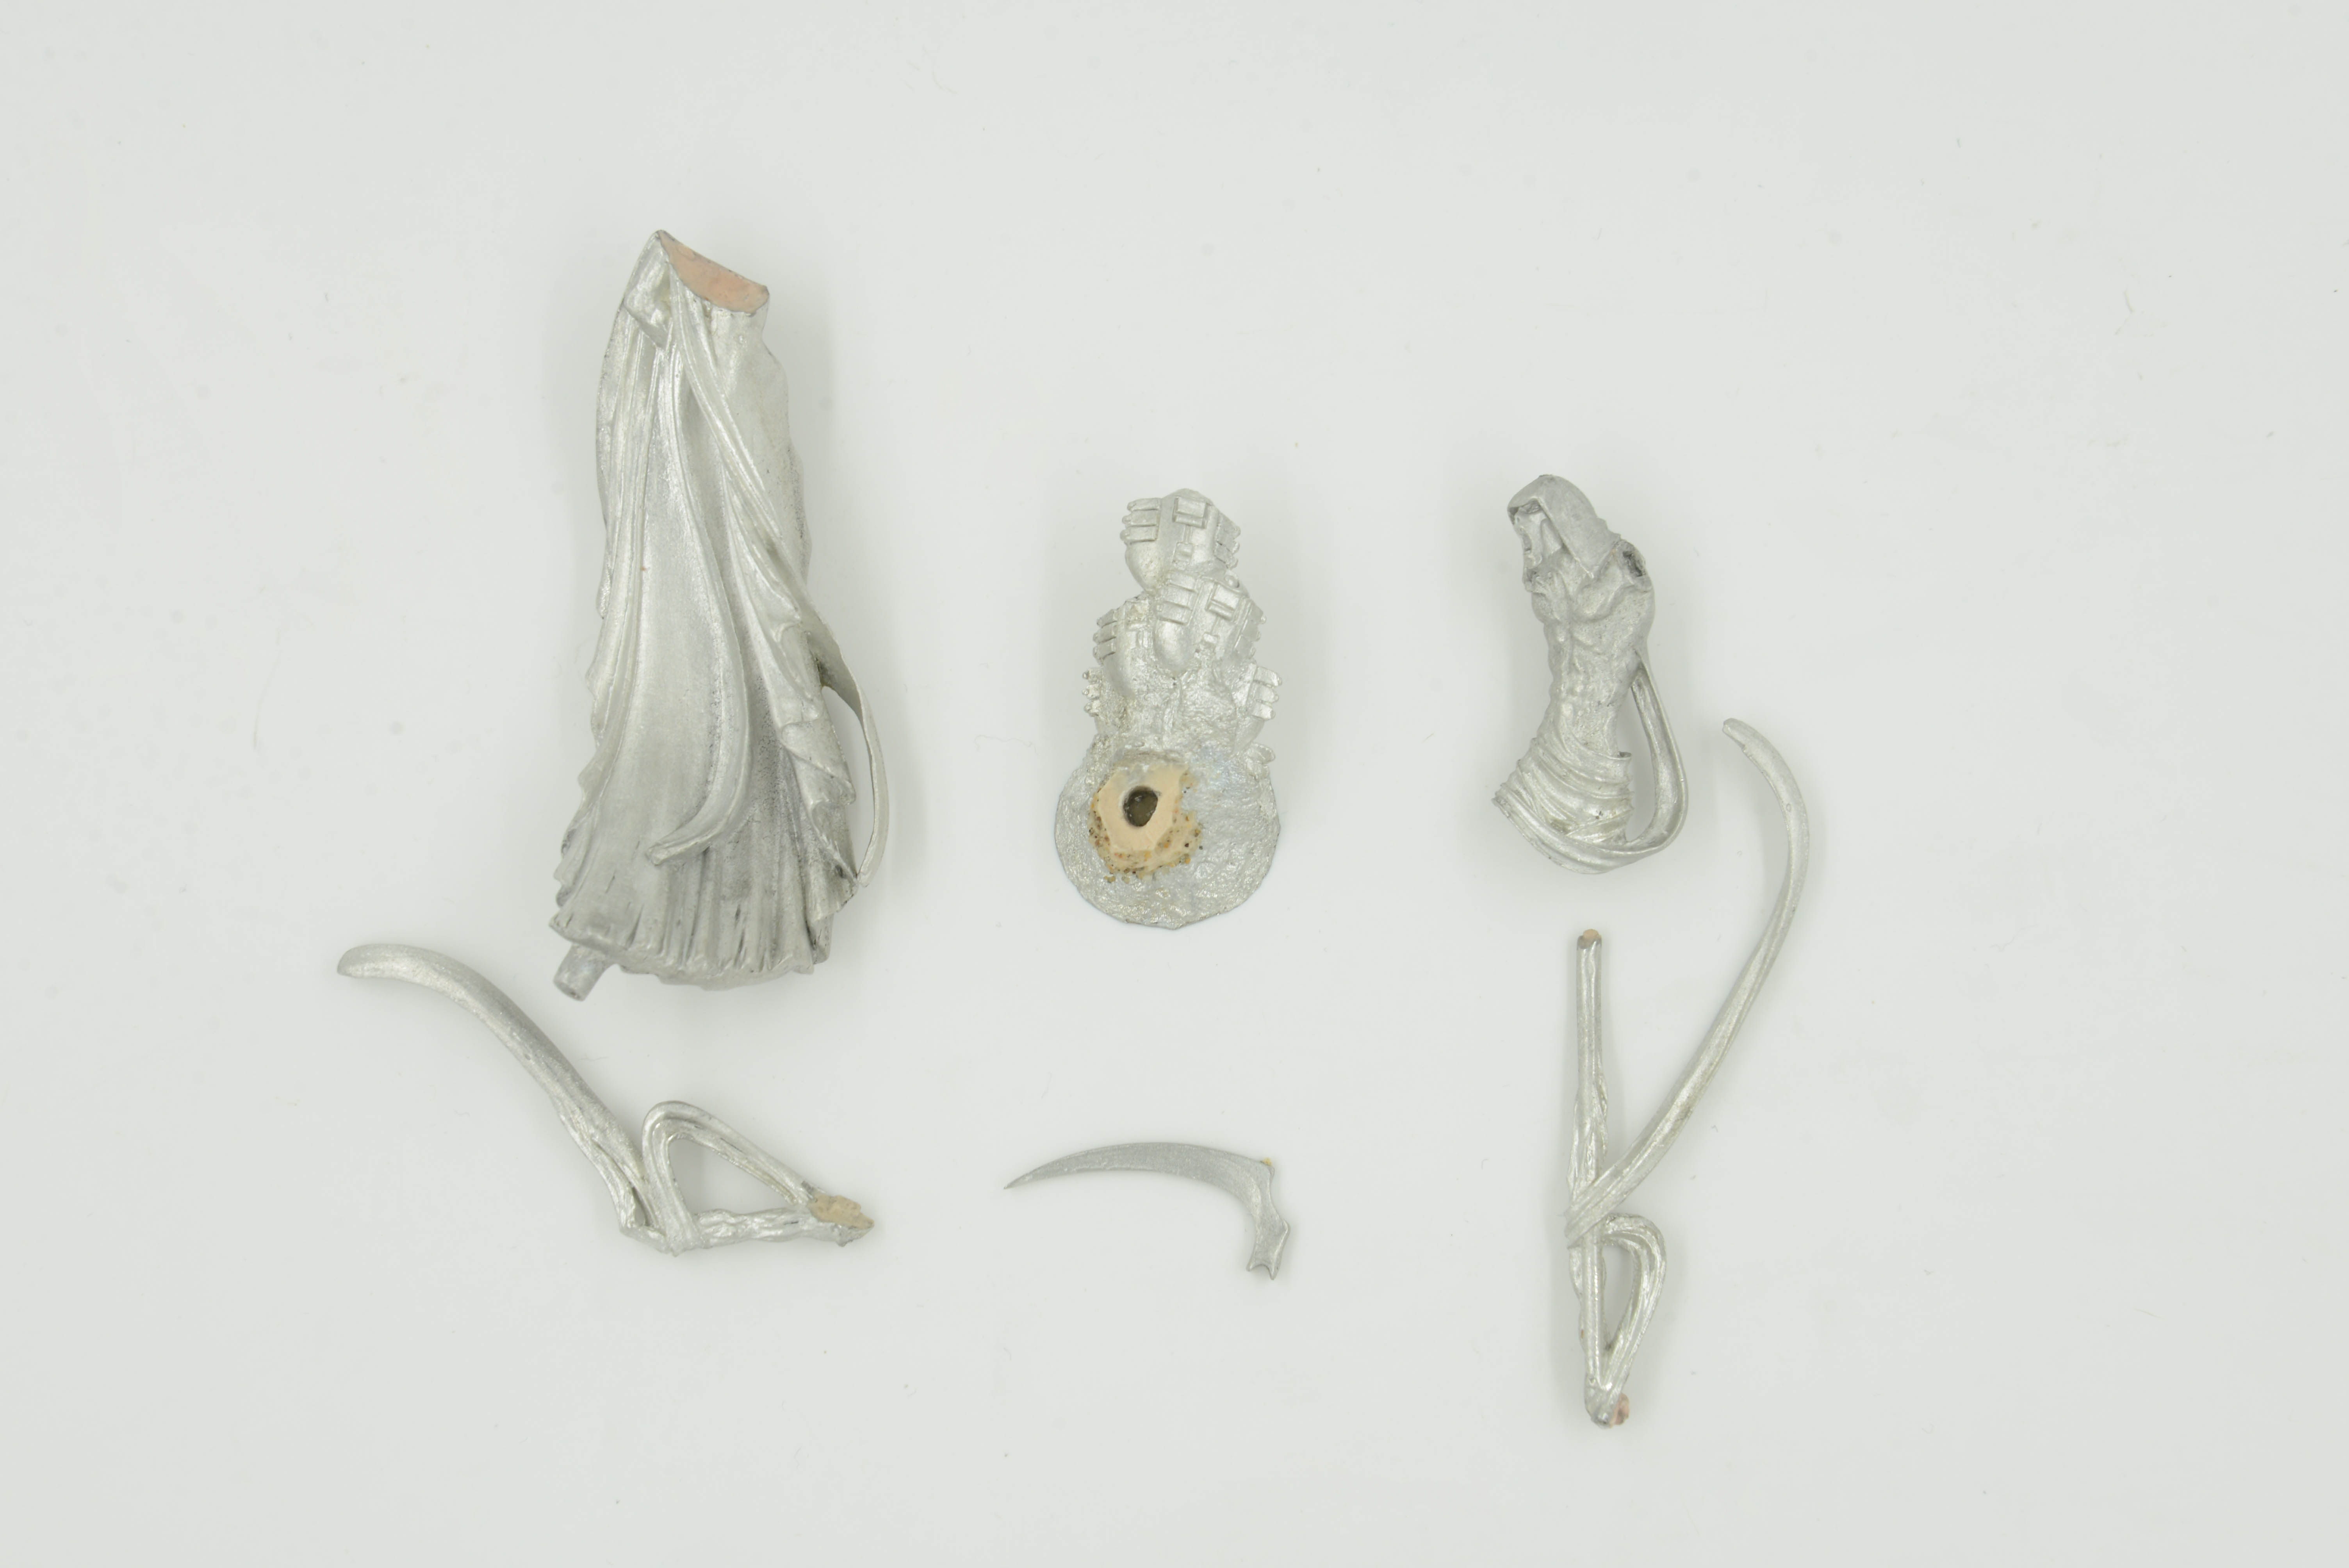
A small foreword. It’s no secret that we just adore Adam Poots’s products and bow our knee to his ingenuity and imagination. Special thanks to the sculptors, ready to translate any of his plans into reality. But unfortunately, not always official foundries can duplicate master-models with proper quality. To our hands, we have got Necromancer Boss kindly borrowed from our partner (Aaron – respect!). Here in this form he came to us (for better quality, click on the picture):
 |
 |
 |
 |
Our surprise was boundless. Postal services of course are not very careful, but so …!? But we are professionals and, rolling up sleeves, set to work.
The history received an interesting continuation. Literally within the next two weeks from our clients, we learn that the hood and pieces of miniature shoulder pads are damaged by similar, or similarly, in 80% of cases. Most likely in the production was a defect. The remaining damage (elements of the staff and some horns) most likely occurred through the fault of the mail. We can not argue that all 350 our miniatures have such damage, but we can’t ignore this facts.
After a long rehabilitation course and a certain amount of antidepressants consumed by our sculptors, the Necromancer acquired the following form (for better quality, click on the picture):
 |
 |
 |
 |
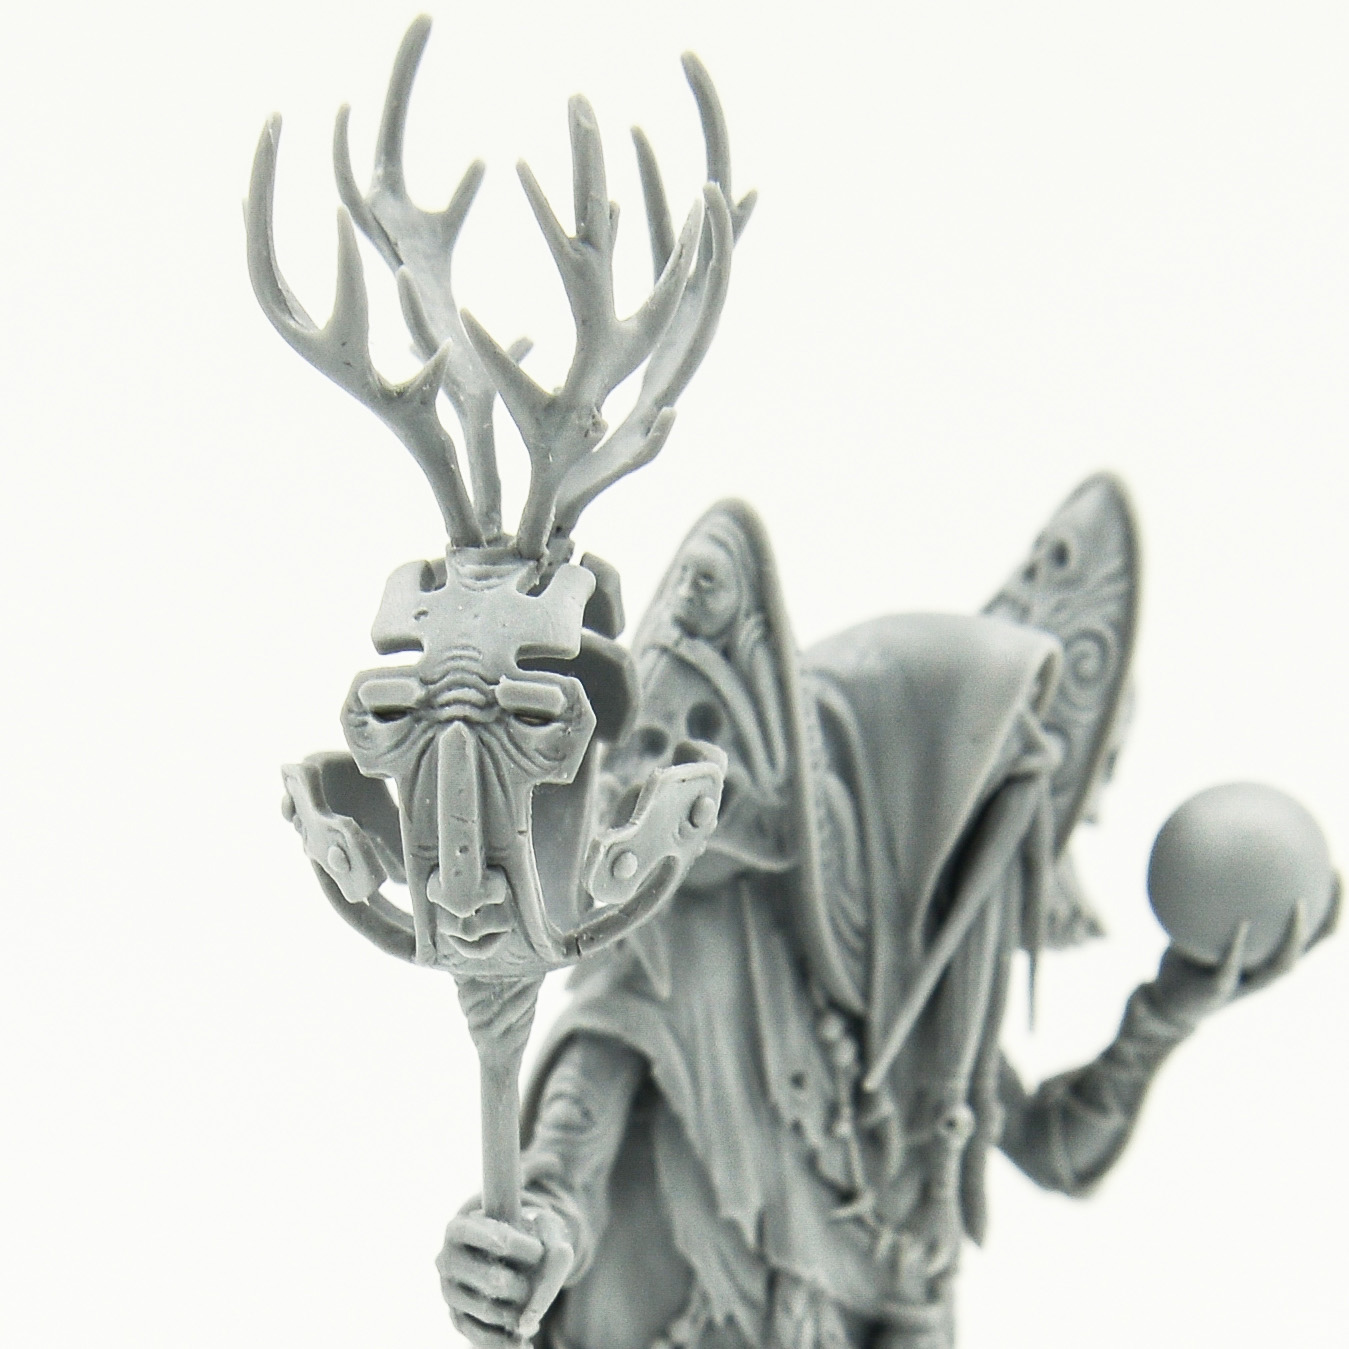
As you can see, all horns, a hood, elements of a staff and shoulder pads are restored. The staff is straightened. The conjugations of the parts are brought almost to the ideal. And now this ideal is matching our quality standards and we left it as a master model.
And here’s the result (for better quality, click on the picture):
 |
 |
 |
 |
 |
 |
The result satisfied all. The partner received his restored Necromancer Boss and another mountain of “сool thing” as a gift. We received a new awesome miniature in the catalog. And you will got the opportunity to seen the “true”, the ideal Necromancer Boss!
Story No. 3.
In it, we reveal the mystery of high-quality photos on our website.
We make good photos we restored the miniatures. It is a fact. Of course, we are still far from the guru of photography, but the main thing we have achieved. Detail, light, realism. “Is it photoshop?”- this question began to be heard more often. We can assure you that there is. What you see in the photos is the result of the painstaking work of the entire restoration team and the photographer’s flair. Well, a little bit of magic 🙂
For example, we’ll take a miniature from Games Workshop and its C’tan Shard of the Nightbringer. The choice of this manufacturer is not accidental. GW is the most recognizable Board game manufacturer.
Start:
1) Note: we only work with the original miniatures! In the beginning, we have on hand a disassembled miniature with which we clean off the bark and restore to its original appearance(for better quality, click on the picture):
You can read more about this stage of work in our previous History №1.
2) Next, depending on the task, we, or priming part of the miniature, and then glue together, or glue immediately. Once the miniature is ready for photographing, we primed it with gray primer thin layers over two or three times. Gray color was chosen by us not by chance. It shows all the details of the miniatures as much as possible and allows you to effectively show the relief of the miniatures in the photo. In any case, cannot be primed once. Necessarily will appear drip. Metal and resin miniatures are exposed to a first coat since epoxy parts of official manufacturers often differ in color (for better quality, click on the picture):
3) Next, we place miniature in a special lightbox device. Our lightbox is manufactured in the factory, but there are many ways to make lightbox at home on the Internet. The basic principle consists in uniform illumination of the photographed object from all directions. It looks like this (for better quality, click on the picture):
 4) next, the photographer sets the shutter speed, photosensitivity (ISO) and aperture value. Oddly enough, the photographer uses a regular telephoto, switching it to manual focus. It’s more convenient. Then make a series of photographs with correction of focus. Since the miniatures themselves are quite small and, in addition, have a high detail, you have to make a few photos from the same angle.
5) the next step is to select the best shots (for better quality, click on the picture):
Unfortunately, the camera can not independently distinguish gray from white. Therefore, color and light correction is necessary to make the gray miniature on a white background look exactly as the person sees it . That is why the selected images are loaded into a special processing program. In our case it is Lighroom. With the aid of a “light pen” is adjusted too dark shadow areas, in some cases, the amount is added, since photography, as we know, often “flattens” the object. And nothing more. No wipe away, and photoshop. Adjustable exposure, light, shadow, clarity, glare and some other options as needed, as in any other professional photography. Unfortunately, we can not lead to a universal processing algorithm, as periodically have to adjust the settings, because light is a capricious substance and depends on many factors.
6) The same thing we do when we photograph a miniature in parts, but there is regulated only exposure, because it is more technical photo than art.
7) The photos we post on our website and they continue to delight you with their quality and detail! (for better quality, click on the picture):
 |
 |
 |
 |
Story No. 4.
About saving rare and endangered species.
It’s been a long time since we posted anything new in this category. But time passes and new interesting topics for stories appear. So, our dear reader, here we go…
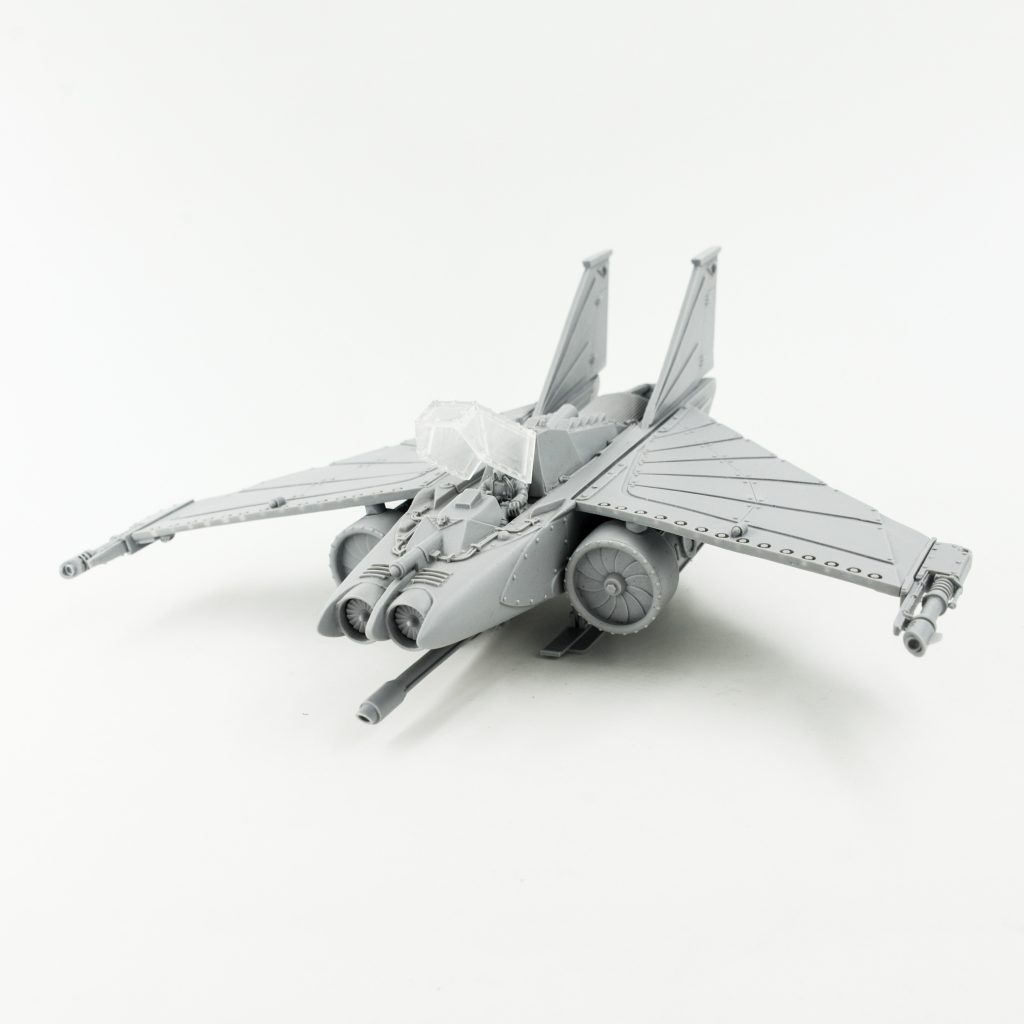
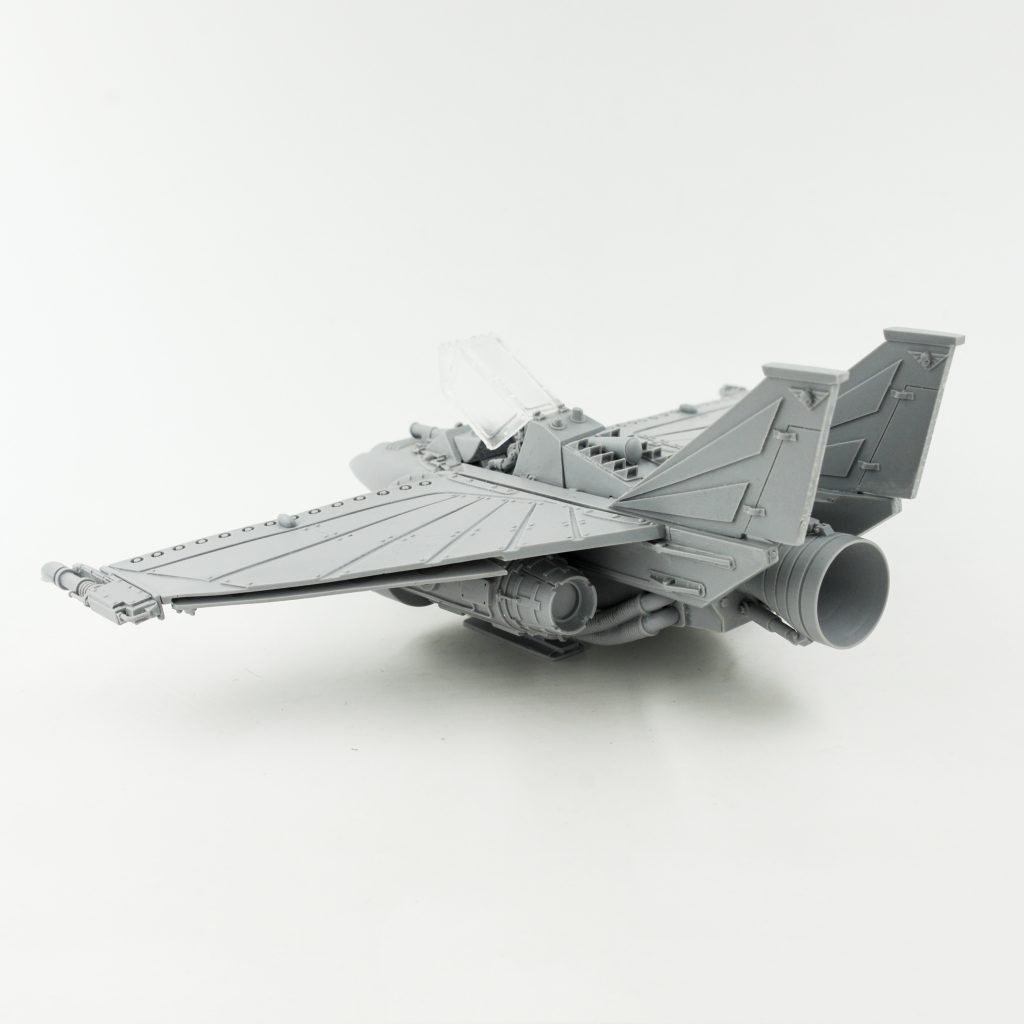
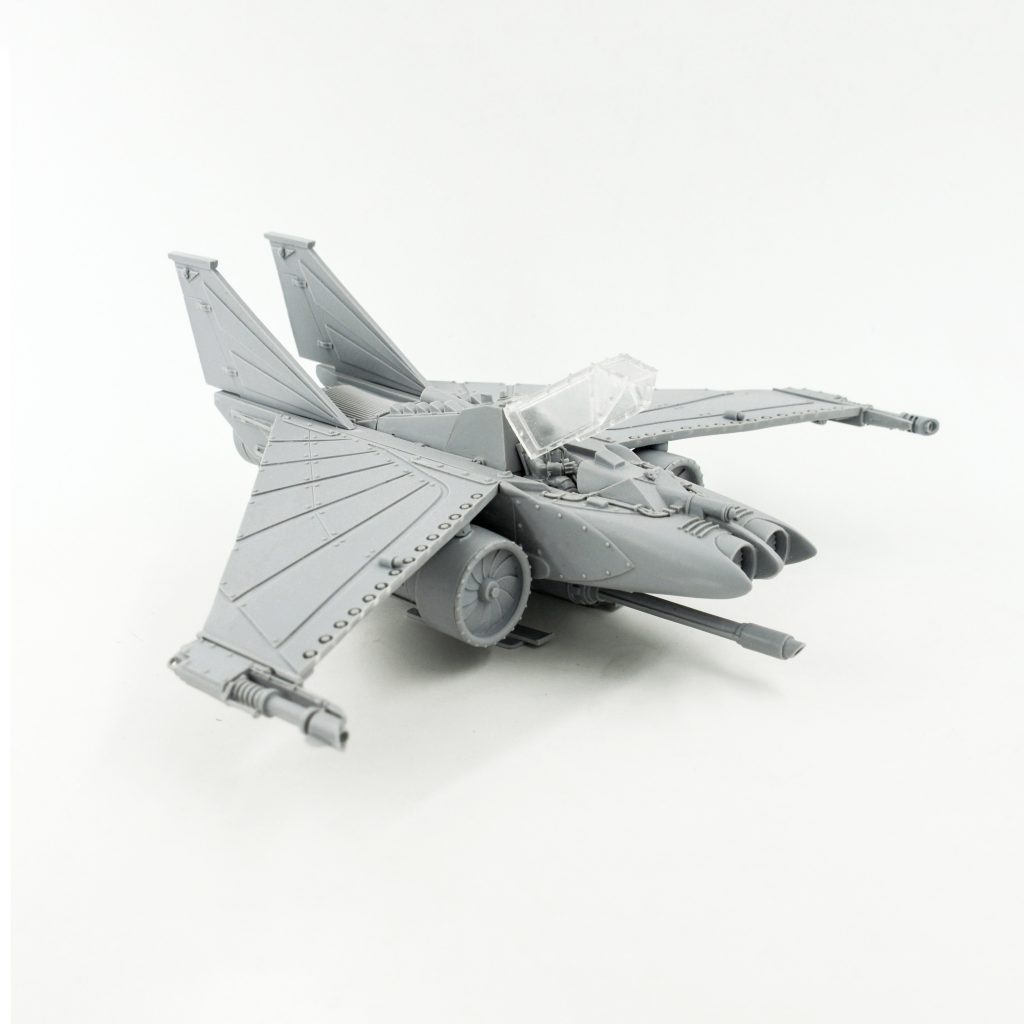
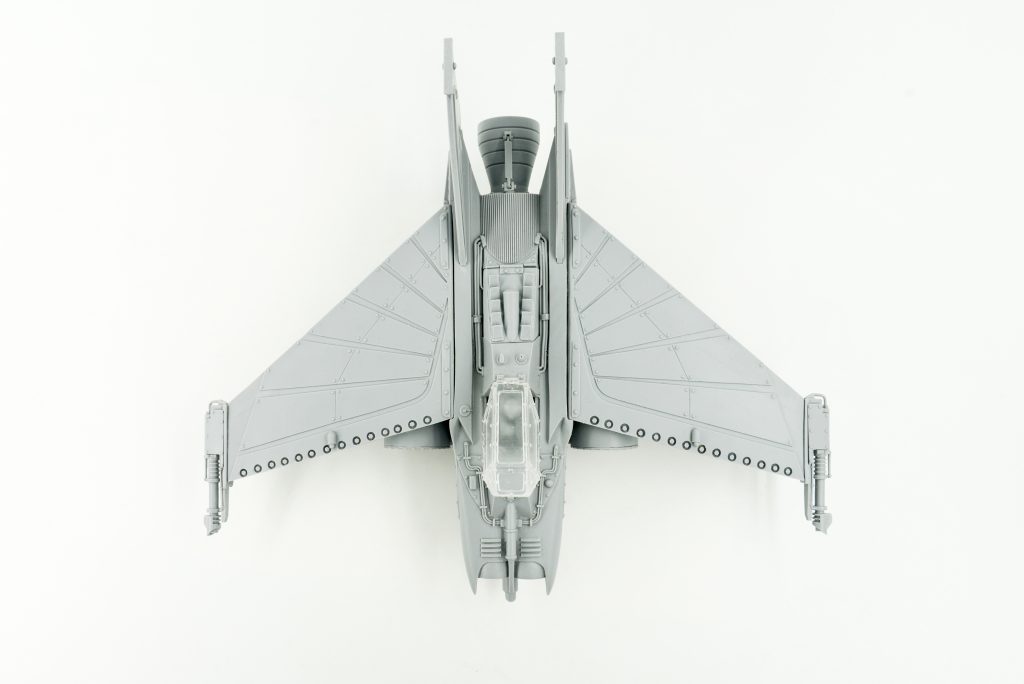
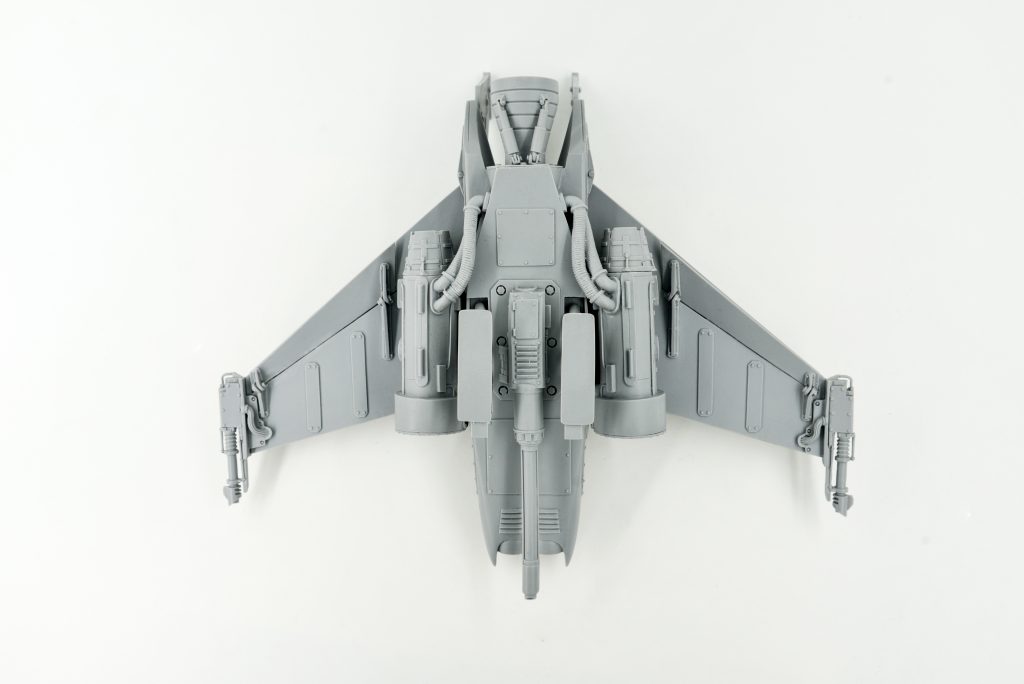
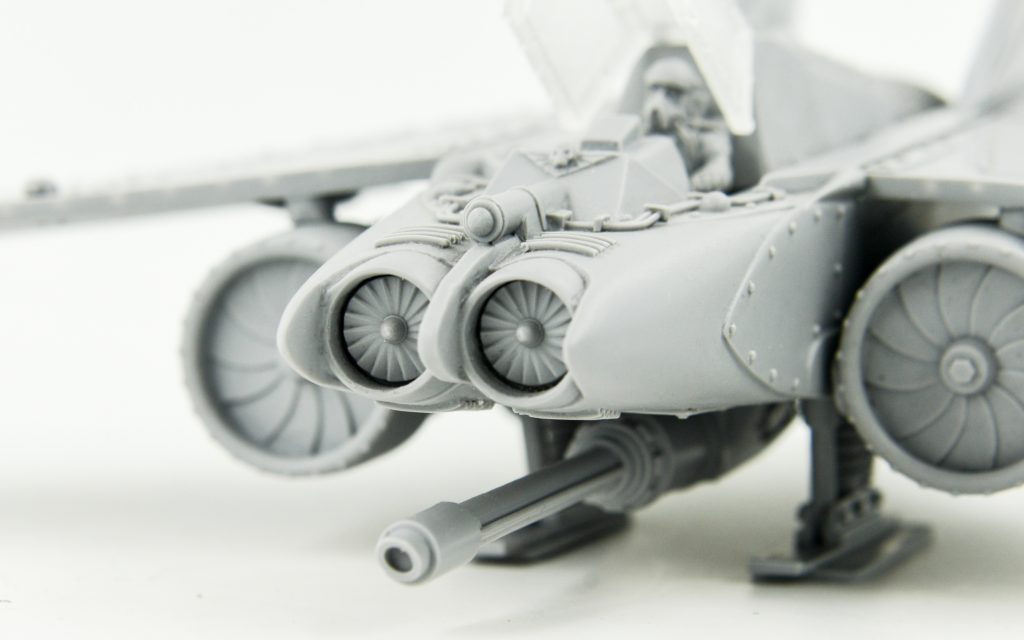
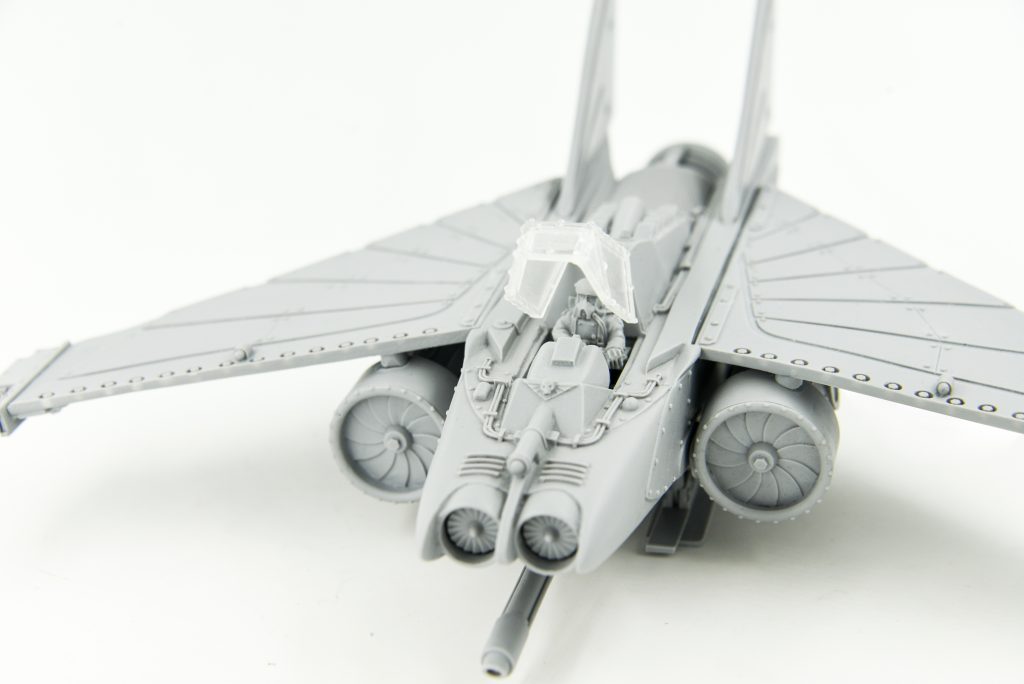
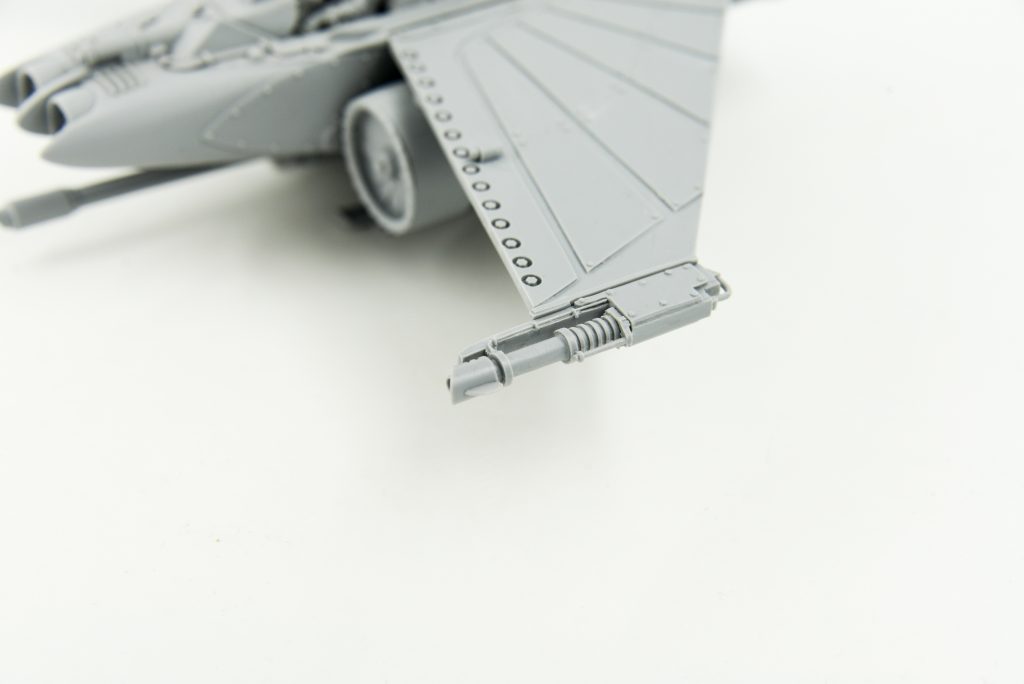
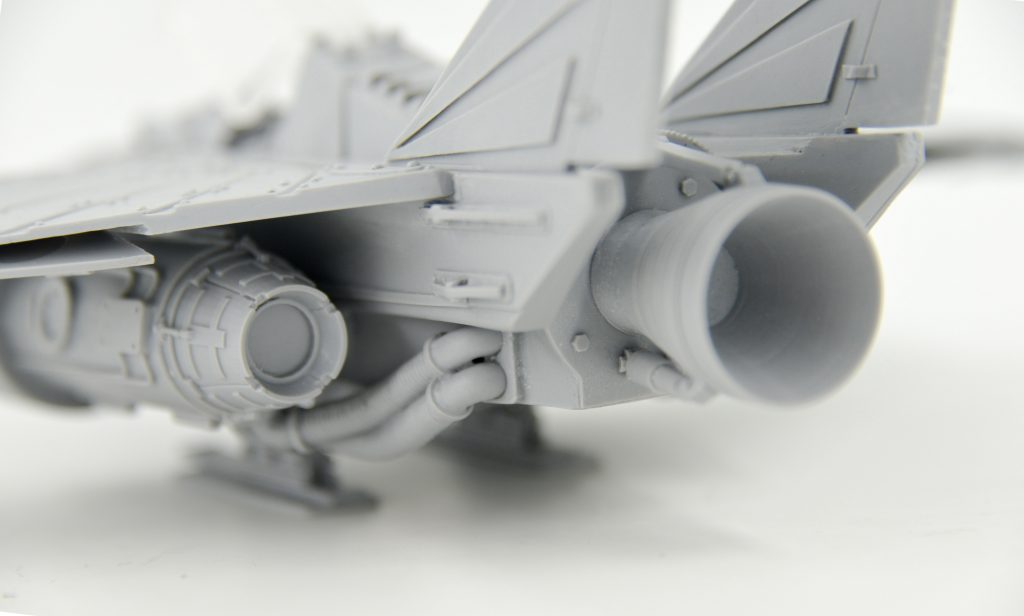
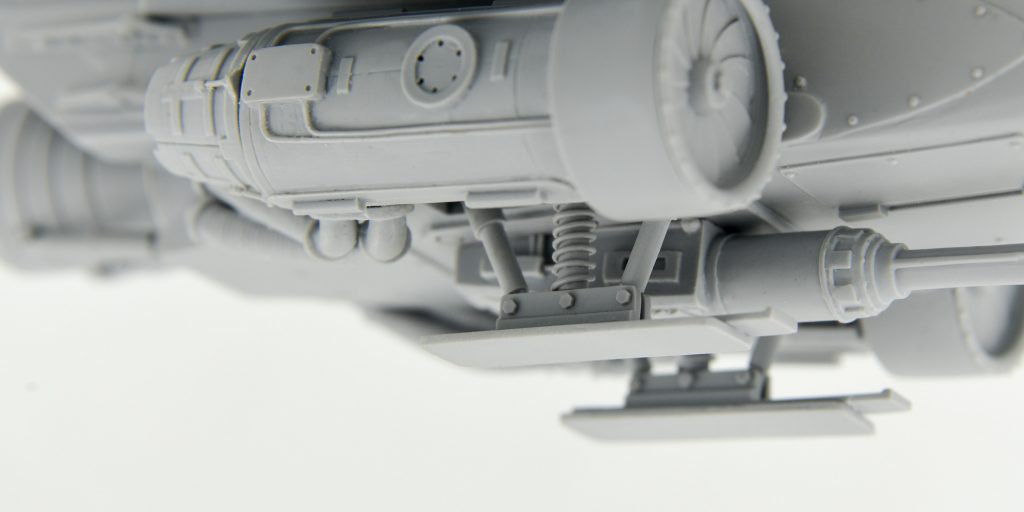
One of our esteemed partners got (We don’t know what it cost him) a miniature first edition Forge World Lightning Fighter. This miniature now does not appear on the battlefields due to its rarity. He sent it to our partner program and asked us to do what we are good at with it. I must say, when we received this model, we decided to refuse in the beginning. Deformations of the body, wings, seams, chips, lost texture, and so on (detailed photos from the parcel, unfortunately, have not been preserved). Usually, we try to achieve maximum authenticity of the miniature, but studying the photo of this original model, we came to the conclusion that we can significantly upgrade it and detail it. The call was accepted.
It should be noted that we try to keep up with the times and six months ago purchased a photopolymer printer for the needs of our Studio. It greatly facilitates some aspects of our work. We will not focus your attention on our standard correction procedures (putty, straightening, fitting, etc.), but will focus directly on things that have undergone detailed processing and modernization.
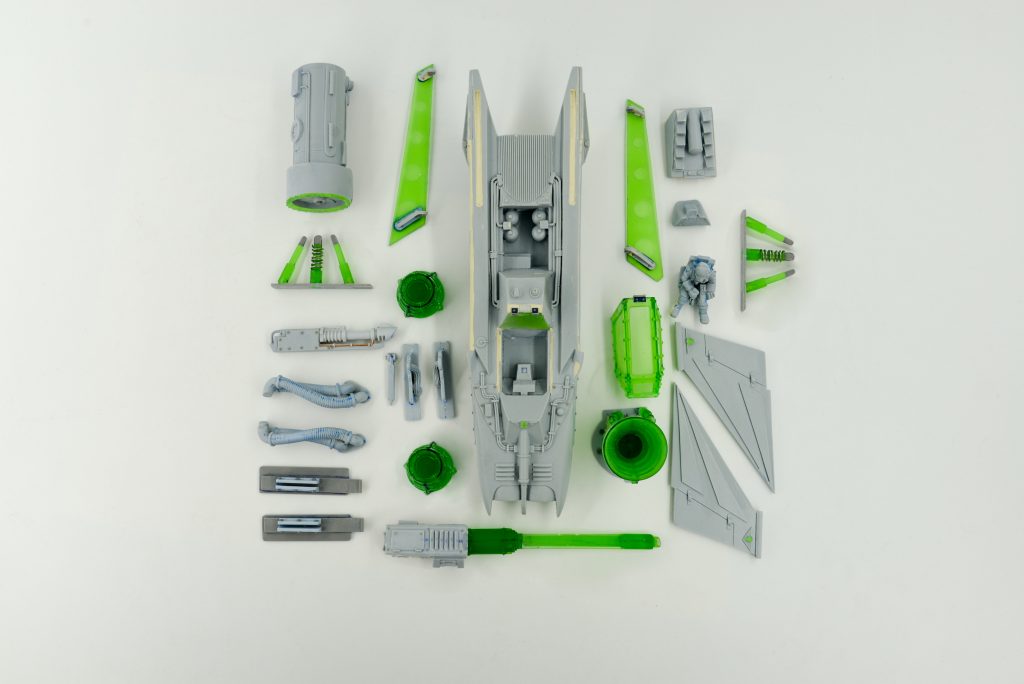
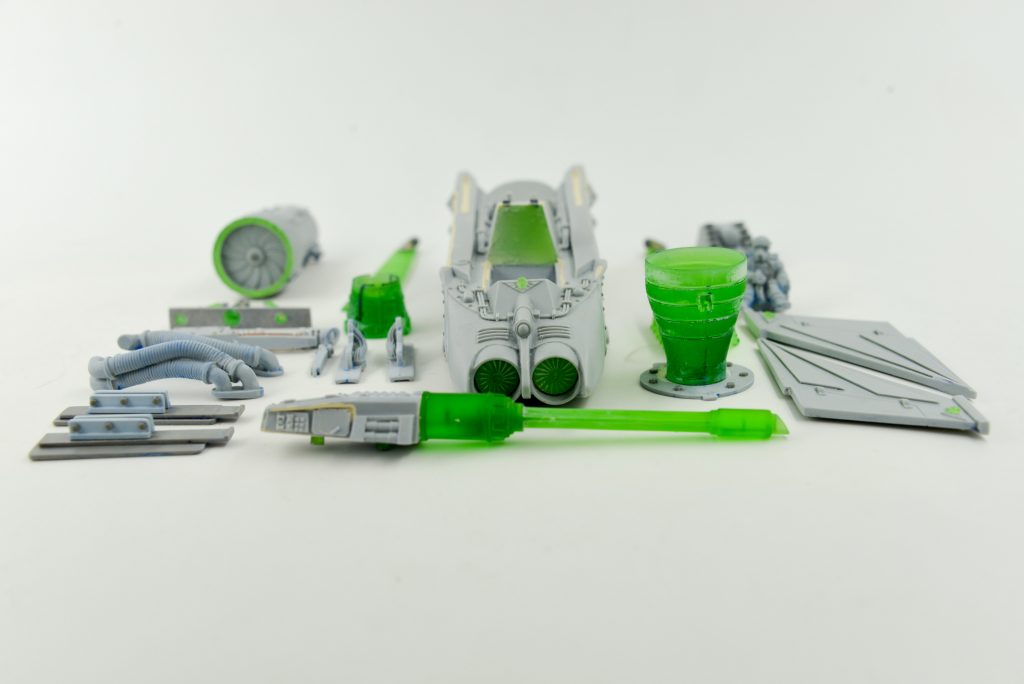
- All rivets and bolts have been restored all over the body.
- Redesigned Aquilla icons.
- Redesigned cockpit-it finally became transparent!
- Changed all nozzles and deflectors of the lattice.
- Completely redesigned chassis and shock absorbers.
- Modified and converted all of the long-barreled autocannon and twin-linked lascannons.
- Completely redesigned front air intakes.
As you can see from the photo, almost everything in this miniature was subjected to work. It was a truly Titanic job. But, as we hope, the result was worth it! (for better quality, click on the picture):

You can get acquainted with Forge World Lightning Fighter directly in our store
In the next story №5, you will learn how we restored the legendary Orca Tau! and some more photos of our work on other miniatures.
Story No 5.
The story of the return of the Orca to the bosom of the Great Good.
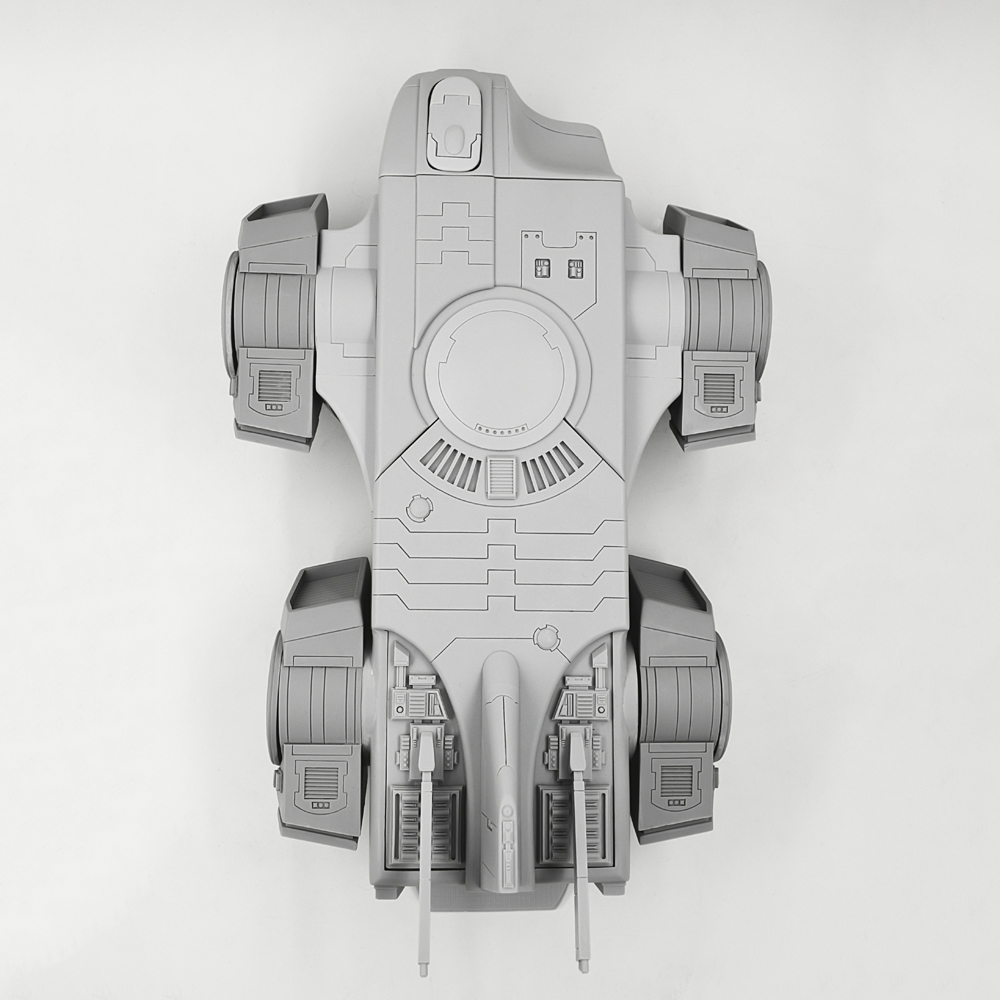
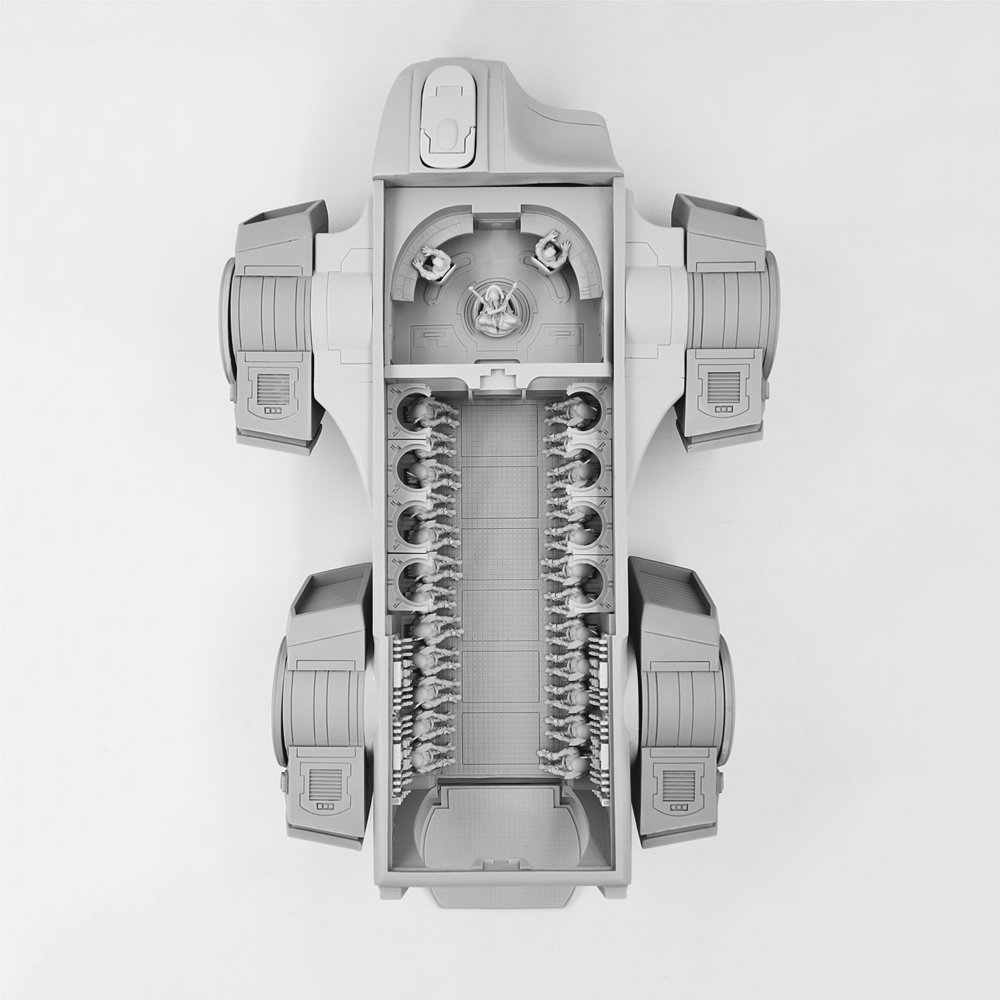
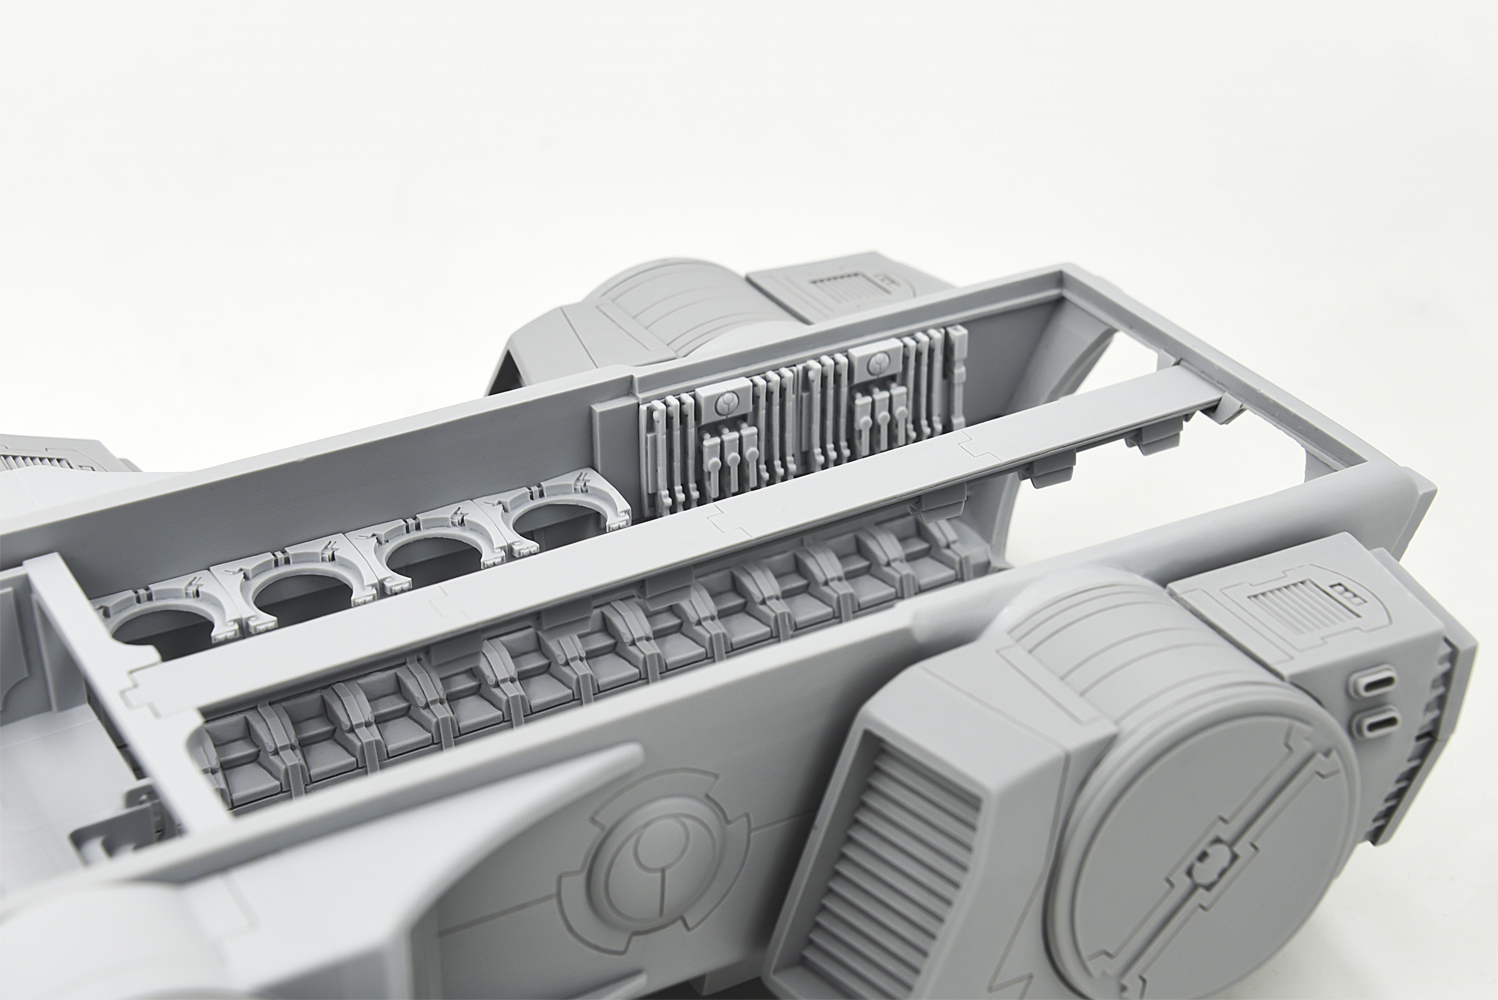
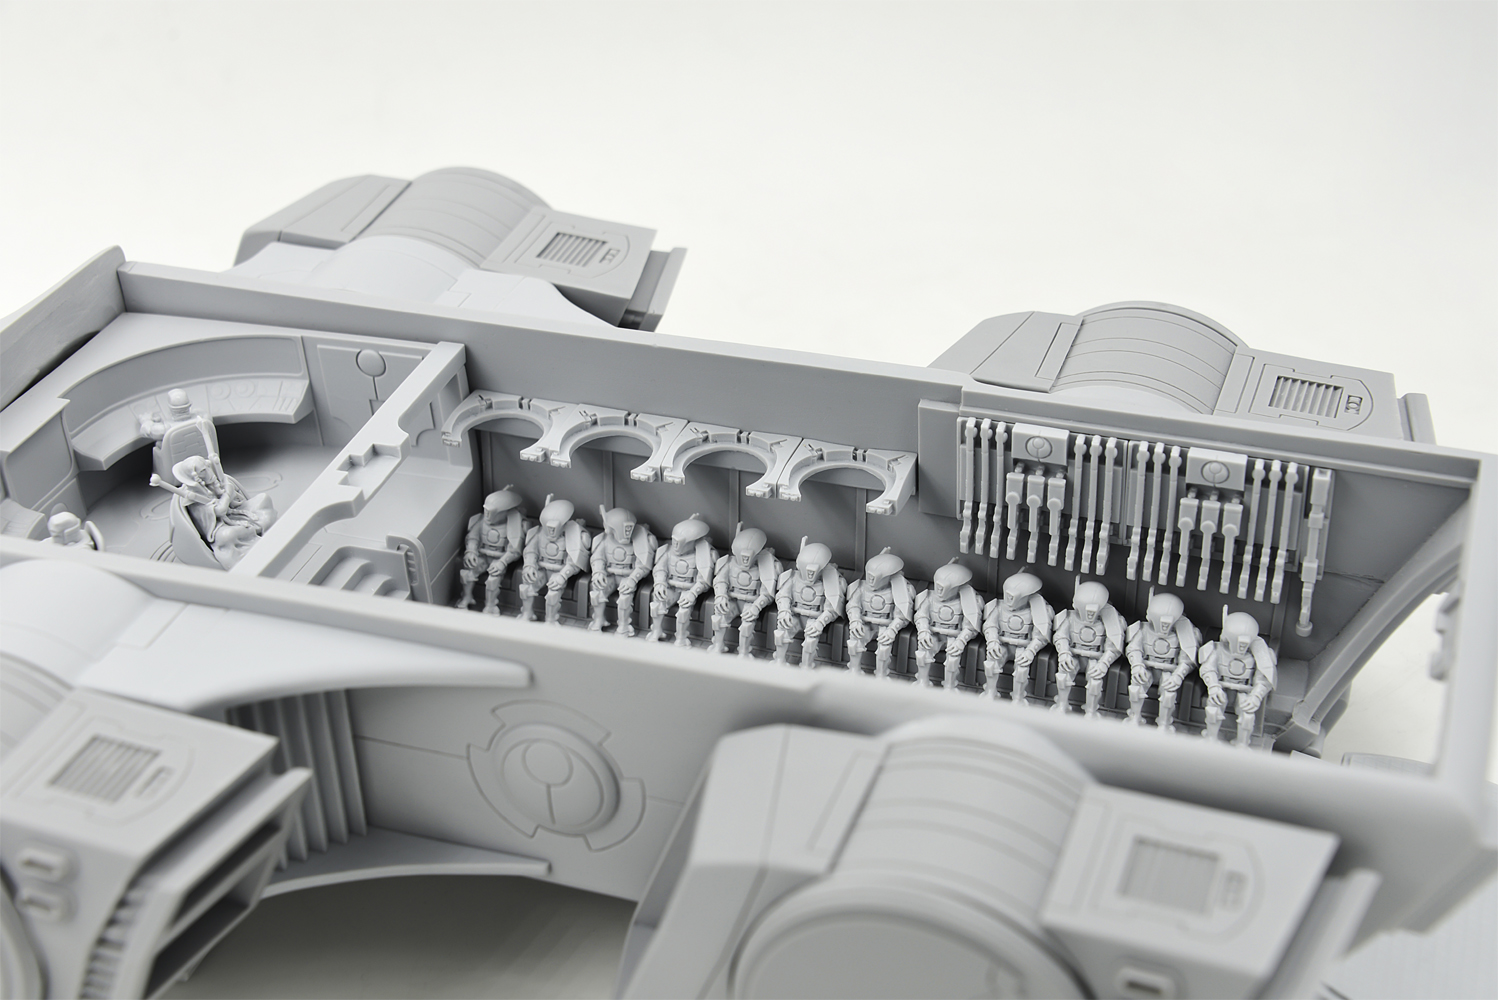
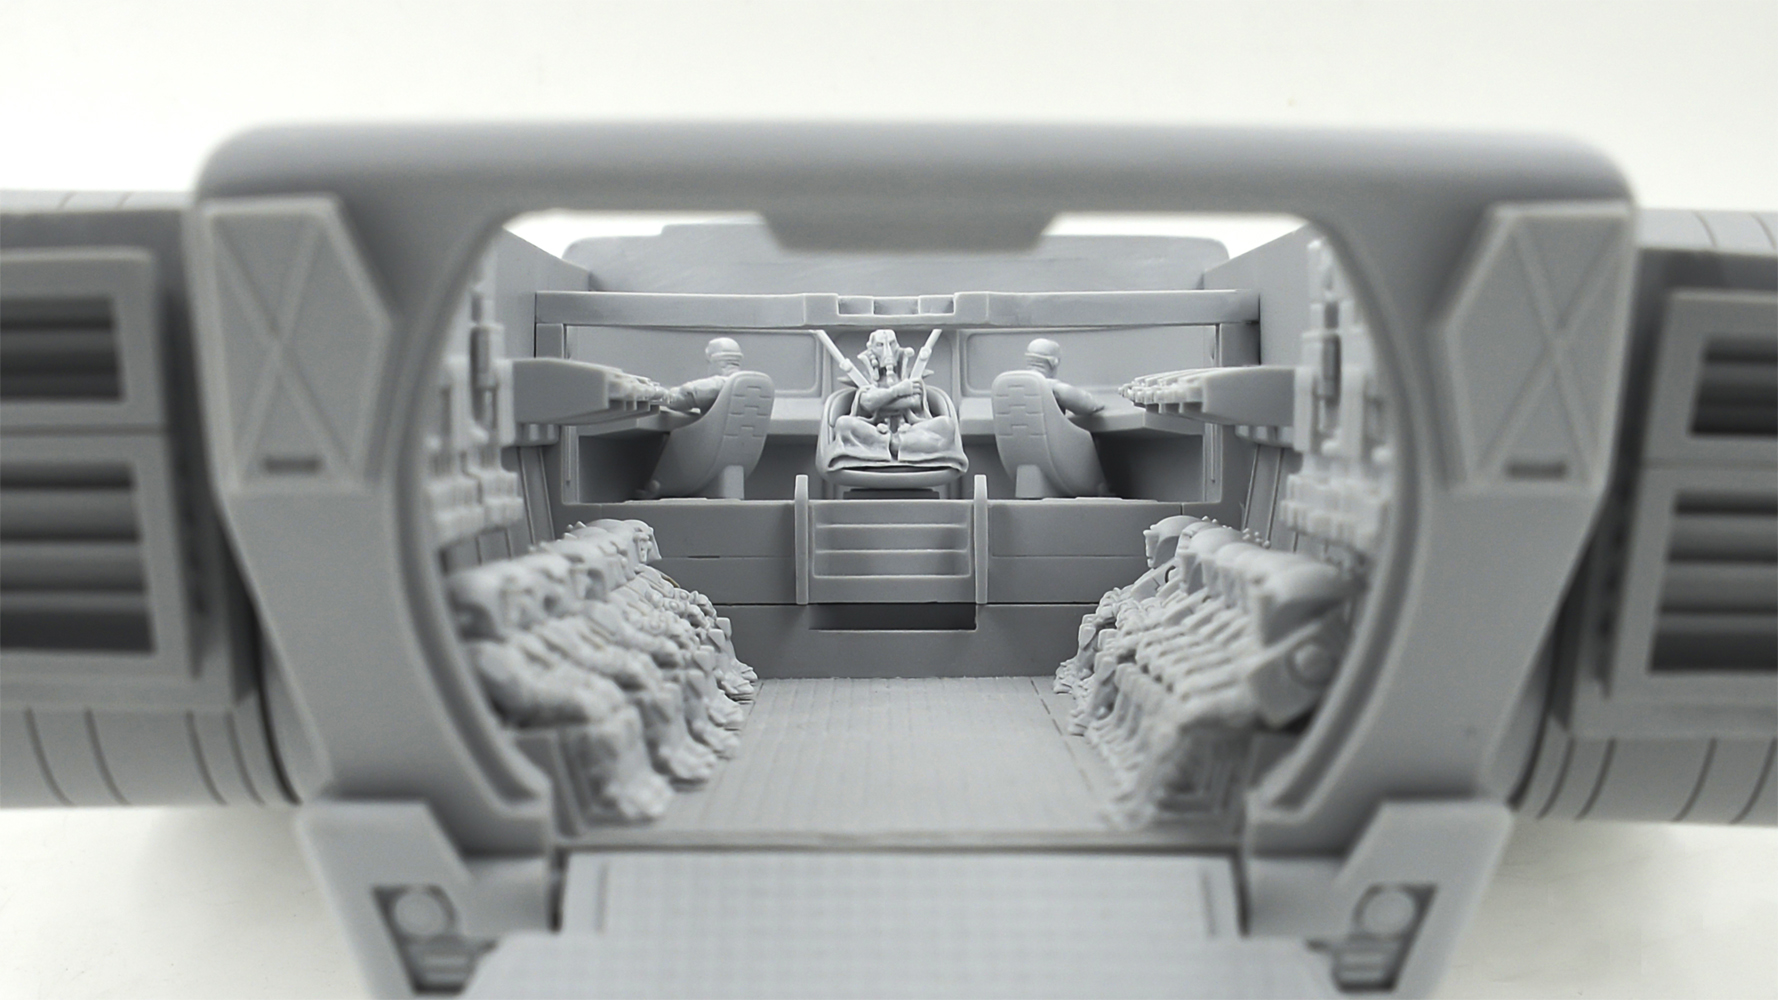
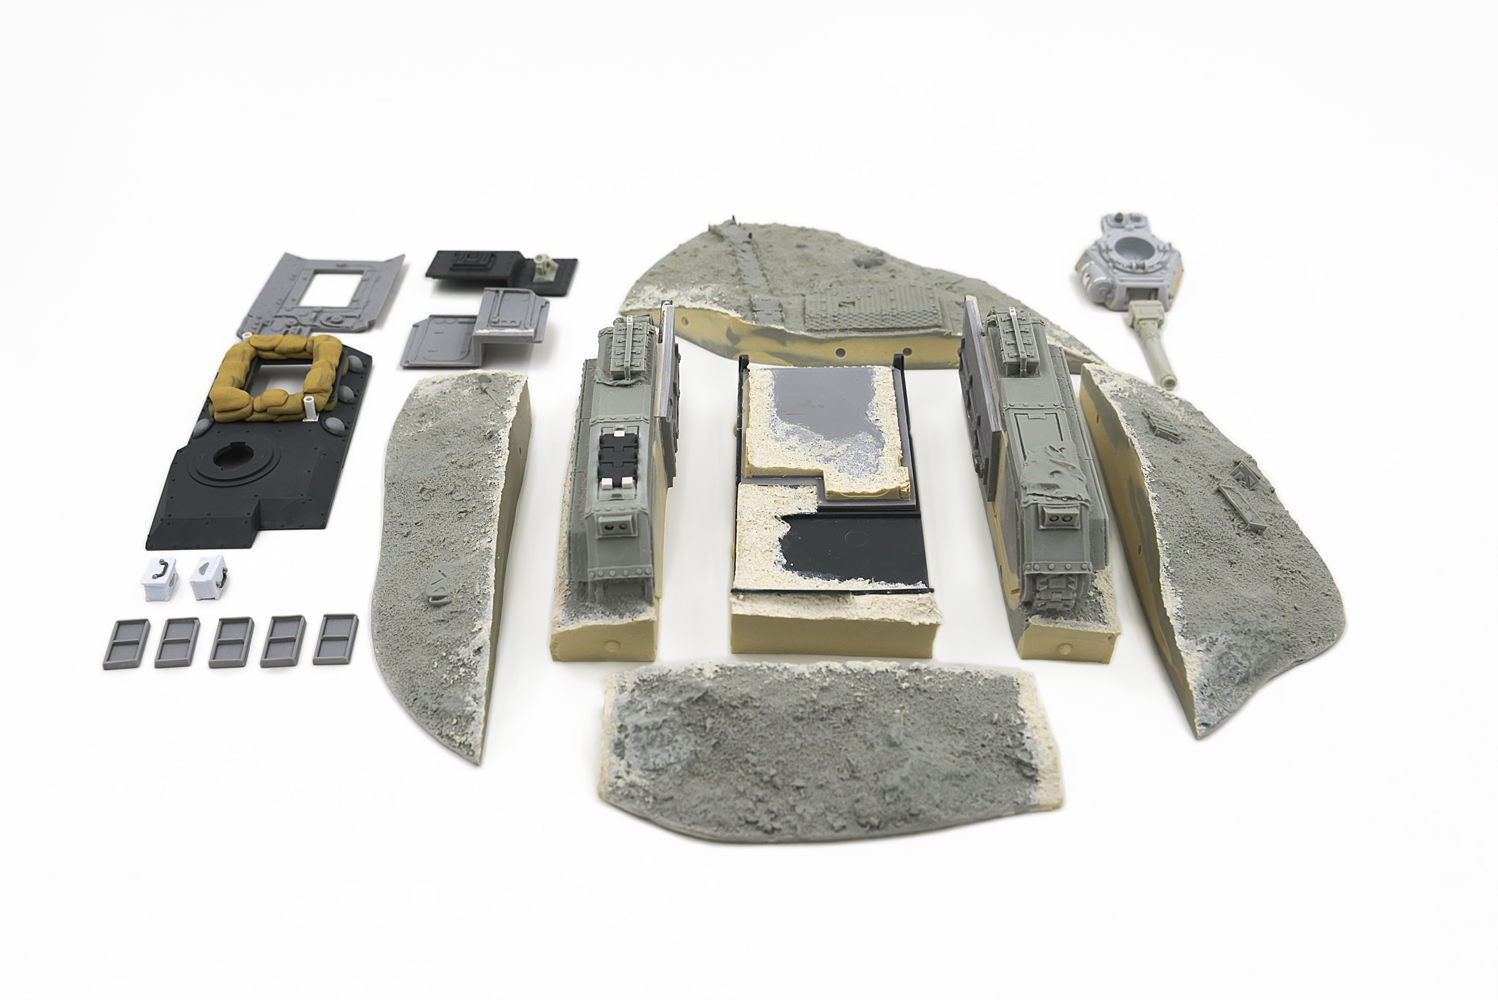
As we suspect, the only reason why the orca has survived to this day is the absence of some parts (the right air intake, rear landing gear struts, completely missing command room, operator chairs, rear ramp hinges, turret cover and rocket launcher) and the marriage of several more. Whether it was a lack of equipment from the manufacturer, or the this parts were lost on the long life path of the Orca, no one knows. The fact is that it was this model that we undertook to restore to its original appearance and even more).
Given the overall complexity of the work, in addition to the manual work of a master modeler, we used a 3d printer, 3d artist and, for the first time in our restoration history, a 3d scanner.
Here is a list of the work that we have done (in addition to the usual procedures of putty and chip removal):
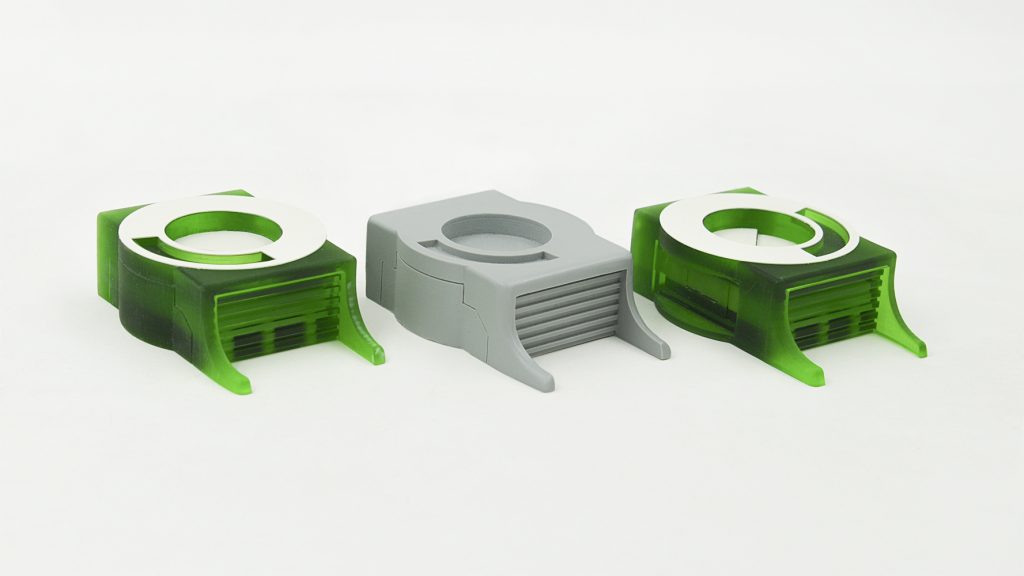
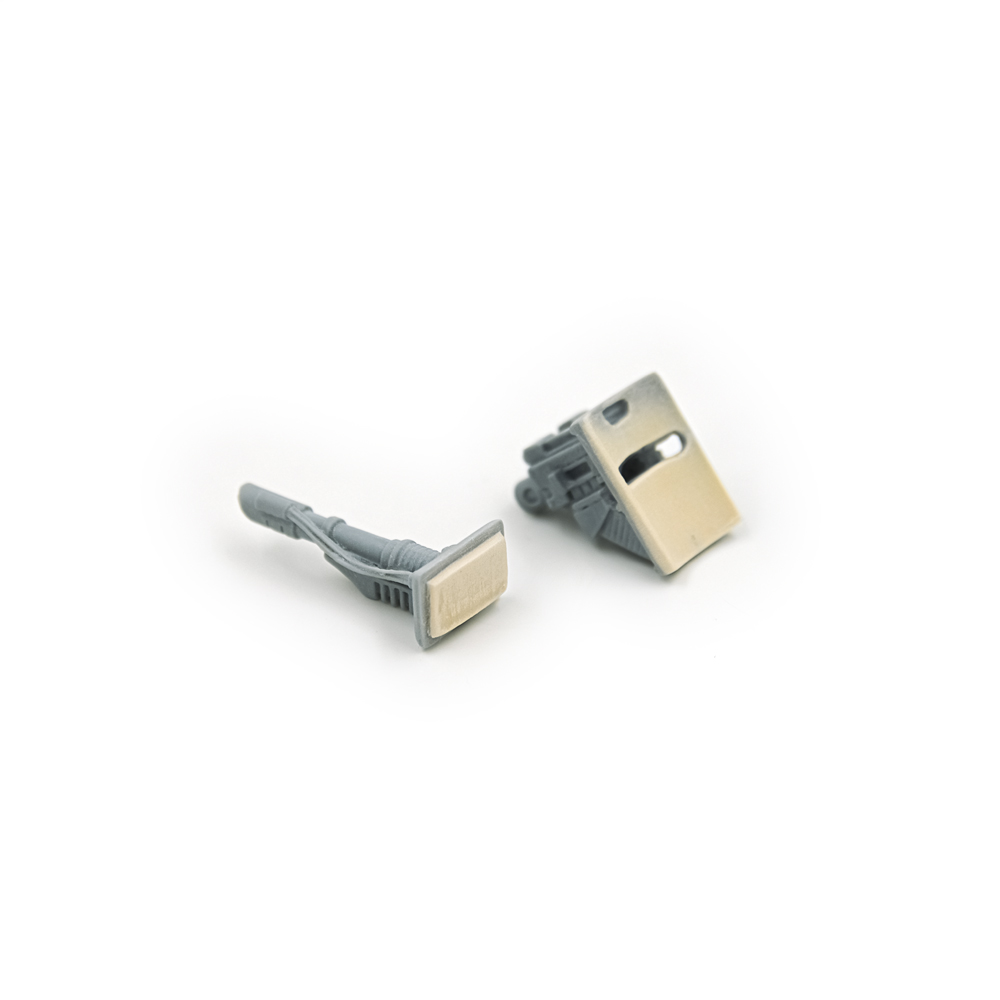
- First of all, we modeled and printed out the Exhaust Nozzles (оnly one nozzle out of 4 is shown in the photo №1). (for better quality, click on the picture):
-
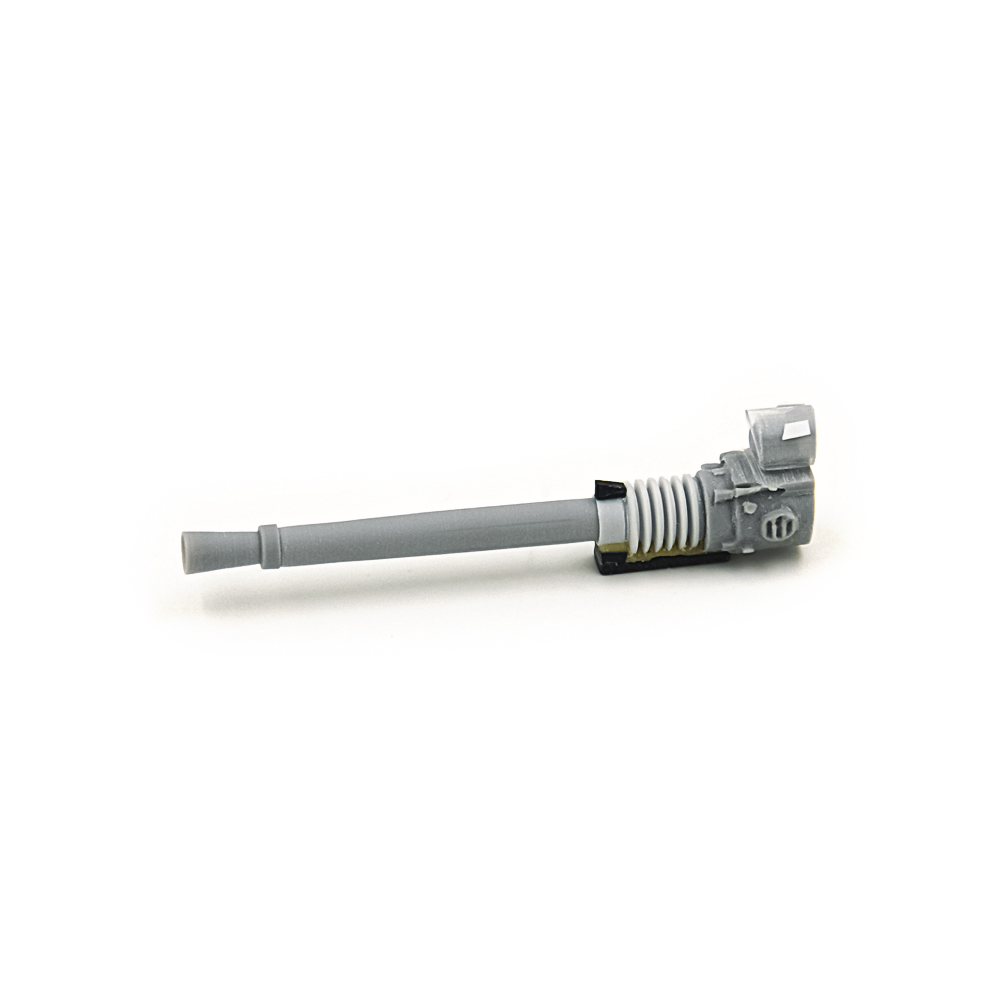
The right air intake (Port Engine Airflow Bypass) was missing, so we scanned the left air intake (Starboard Engine Airflow Bypass) and made a mirror copy. At the same time, we corrected the displacement and shrinkage of the original part. The printed parts were adjusted to the Engine Airflow Bypass Vents. To prevent the engines from wiping the paint off the air intake when turning, we added a washer made of a sheet of thin plastic. (for better quality, click on the picture):
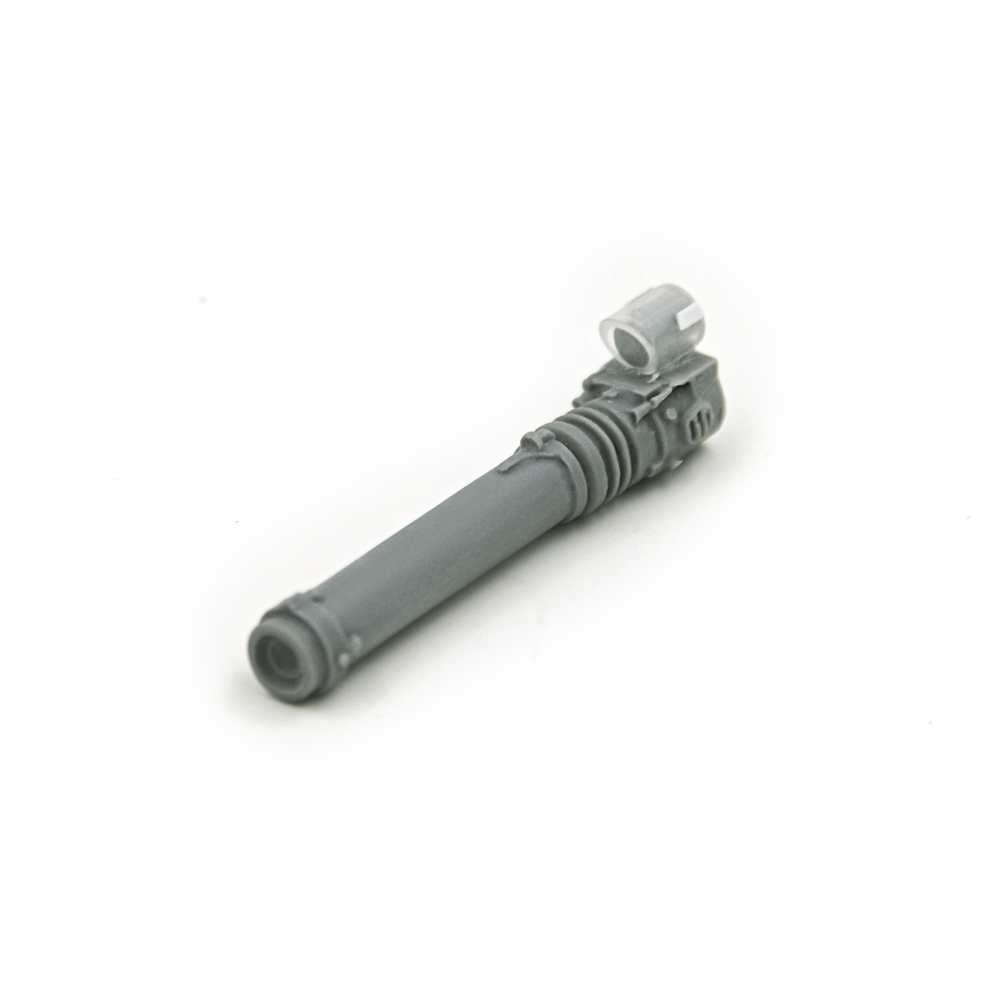
- We modeled and re-printed the Front Landing Legs together with the Landing Pad. The Rear Landing Legs, which were not included in our kit, were made from shortened front racks. (№2 on photo)
- Fuselage The Orca were fairly level and straight. We only removed the seams and reinforced the walls at the attachment points of the Rear engine (for better quality, click on the picture):
- The Nose was adjusted to the body, increasing the walls of the body with putty to close the gap. We cleaned the left side and applied a new cut.
- As previously mentioned, the set not included a command Center and Crew Chairs. A titanic work was carried out on a thorough modeling based on the photos and videos that could be found. We printed out the test versions several times to fit the parts as precisely as possible to the body. (№ 3 on photo) (for better quality, click on the picture):

- Crew, Etherial and FireWarrior were available. We putty bubbles, removed and cleaned the seams and added pilots a headset from the set (FireWarrior Team).
- The rear ramp had no Hinges. They also had to be modeled from photographs and printed. At the same time, with the help of putty, the ramp backlash in the open position was eliminated. (№4 on photo)
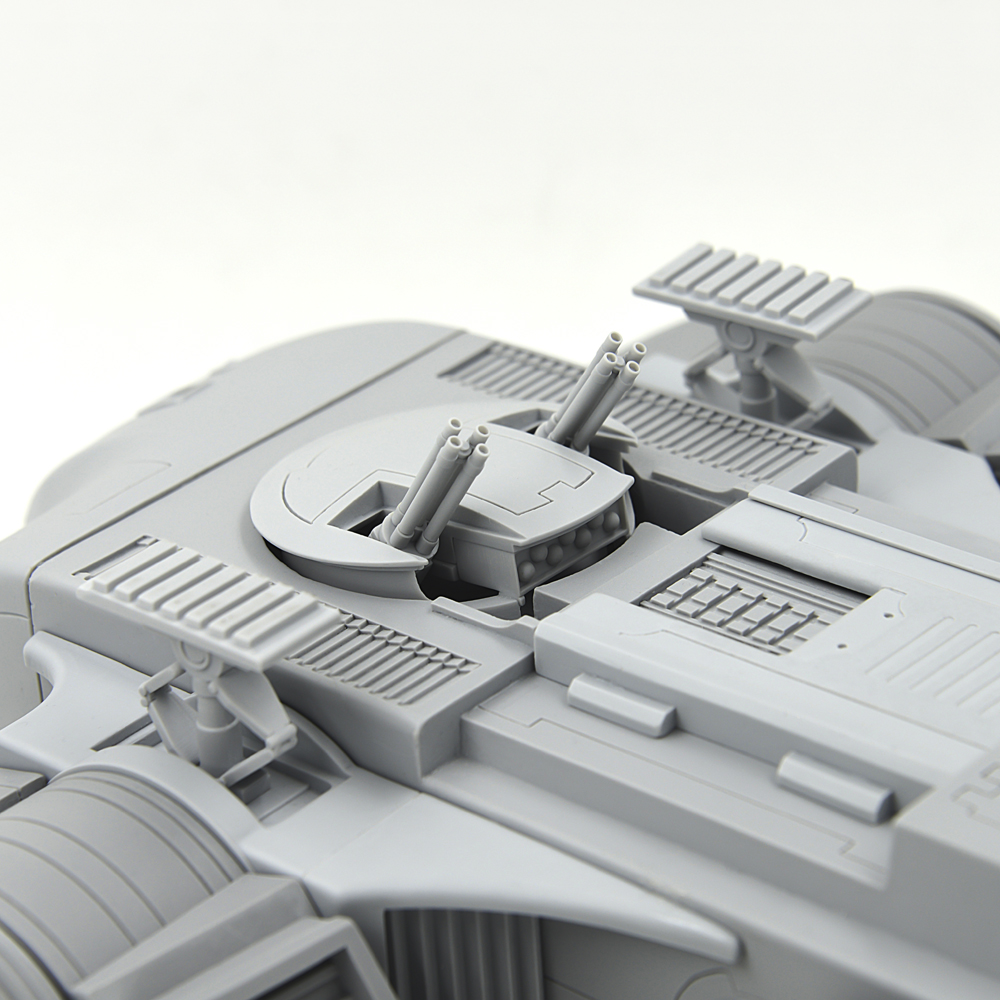
- The Orca’s turret also required 3D restoration. There was no Missile Pod and the Turret locking plate. (№ 5 on photo). Unfortunately, the turret cover was deformed after photopolymerization. So we decided to make it the old way – from a plate of plastic. They also redesigned the machine guns, thereby leveling the barrels and removing the warps and asymmetry. (for better quality, click on the picture):
-
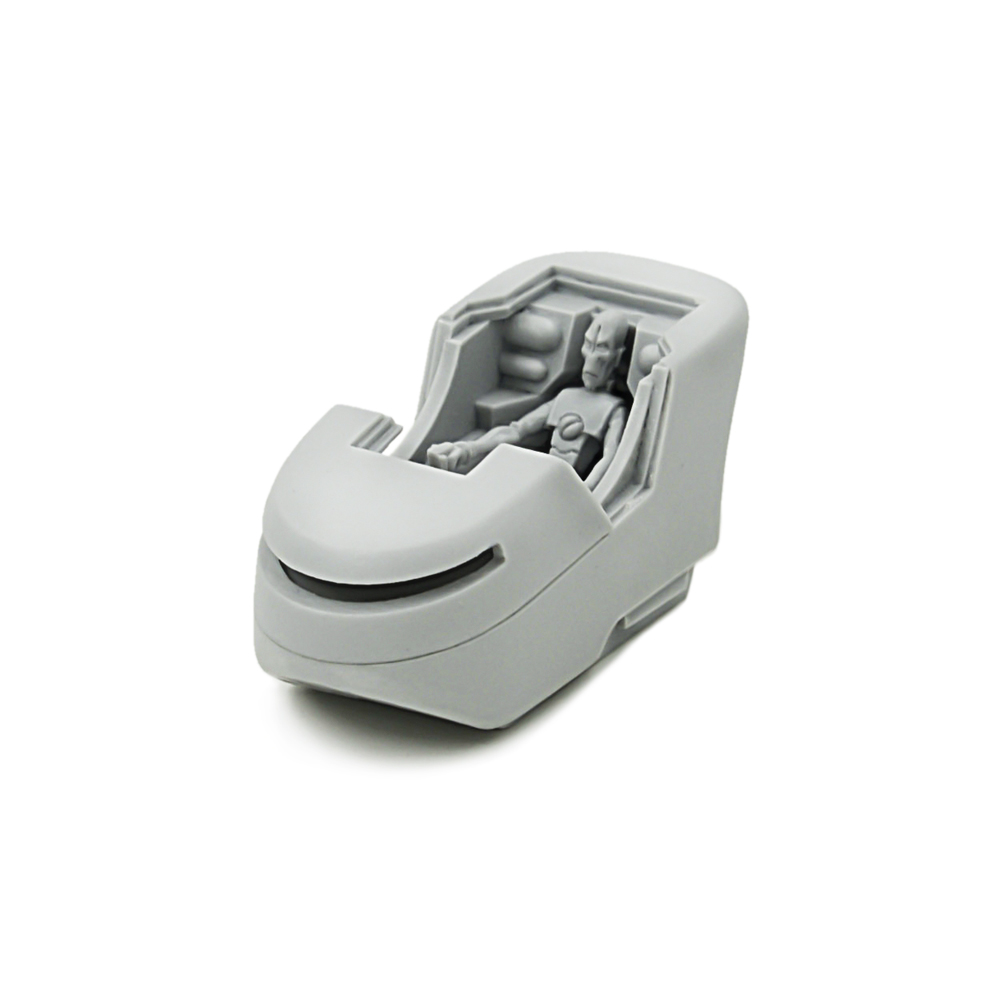
The Air Caste Pilot Escape Pod has also been modified. The pilot’s instrument panel was separated from the capsule, which allowed it to be aligned and eliminate the distortion. It will also be convenient for further painting. (for better quality, click on the picture):
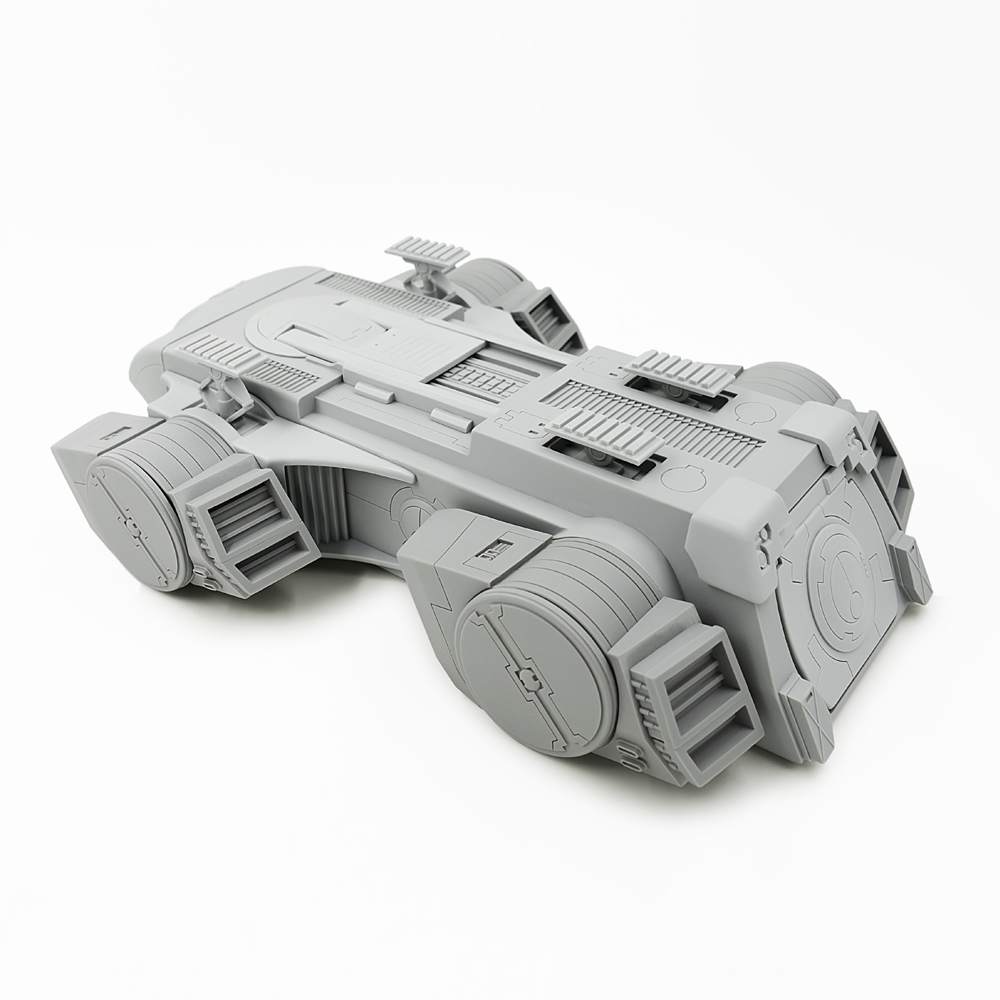
You can see the result of this titanic work here: Tau Orca
(for better quality, click on the picture):


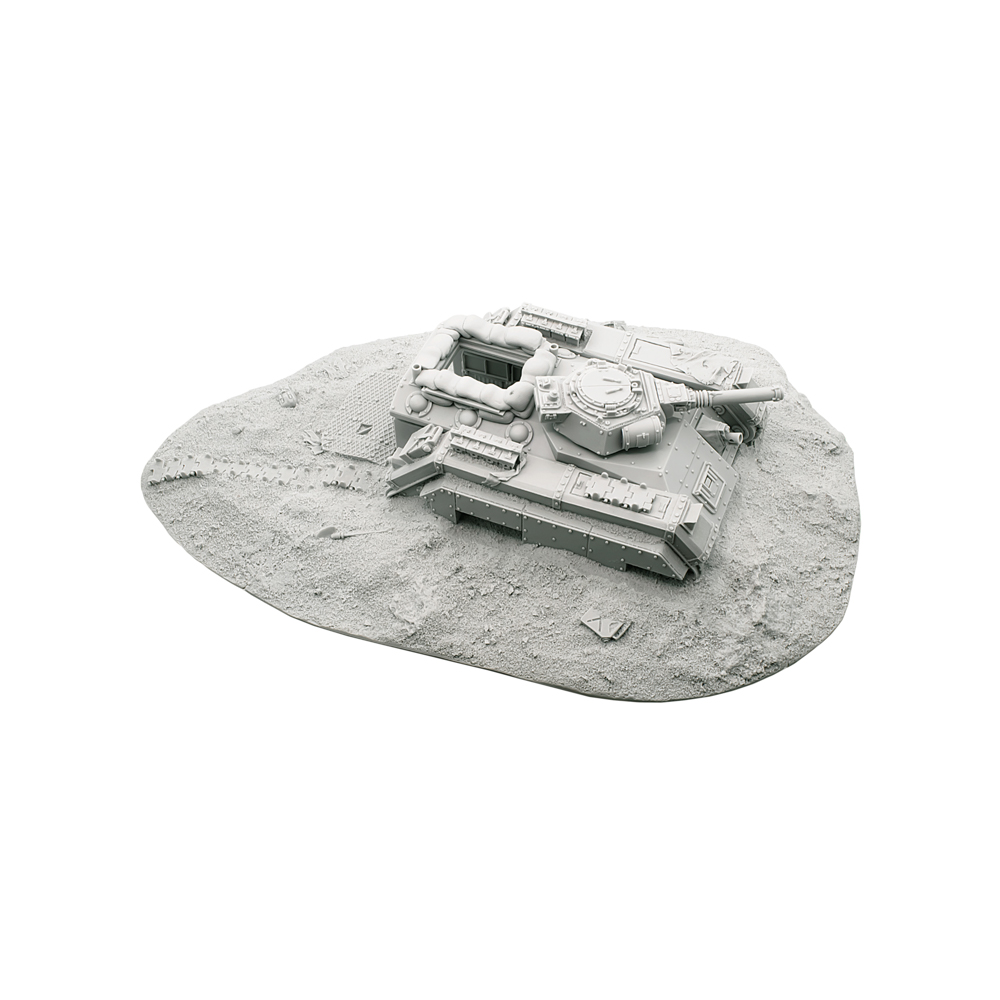
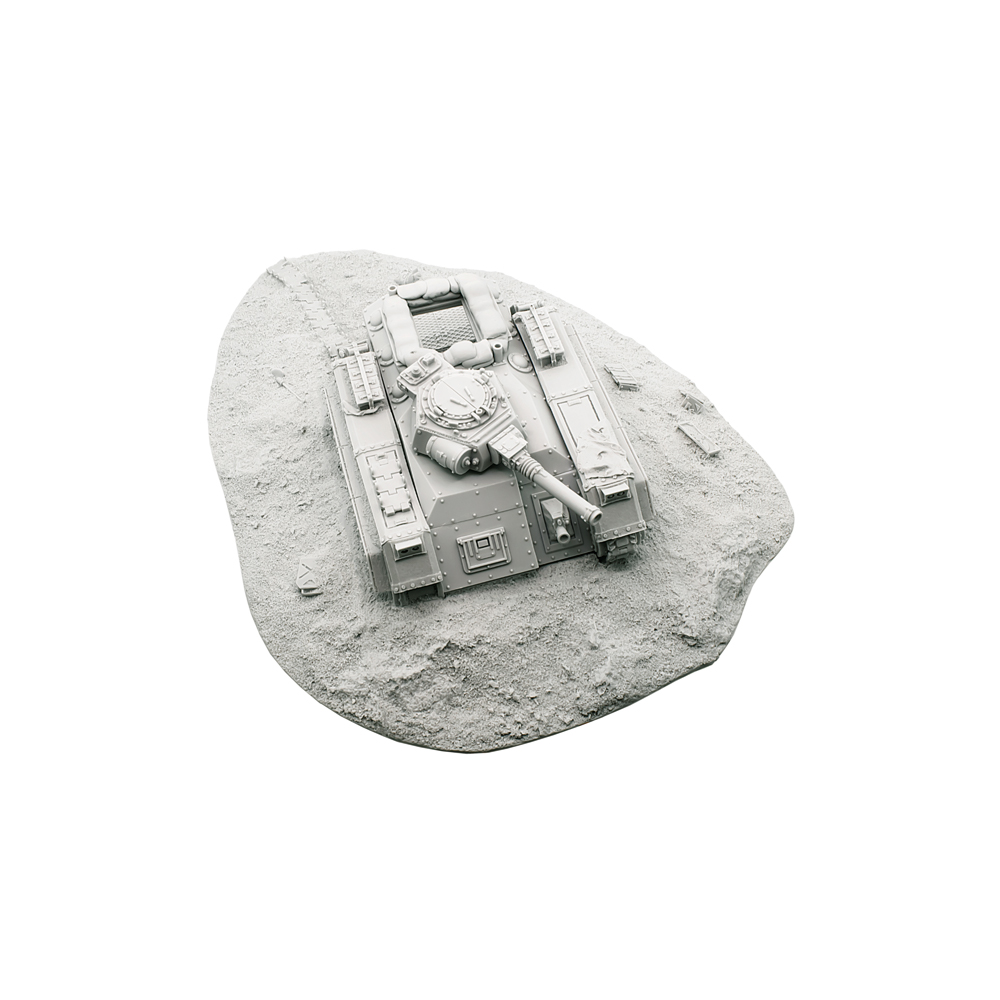
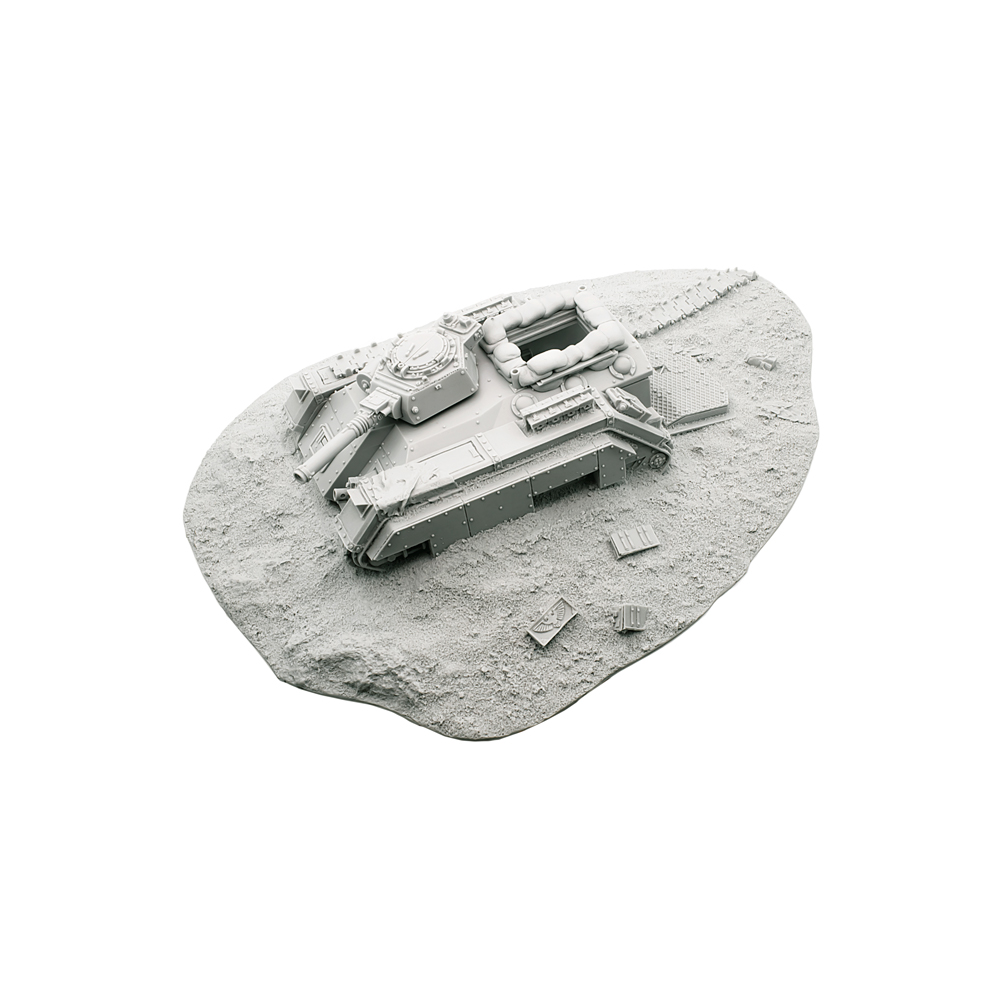
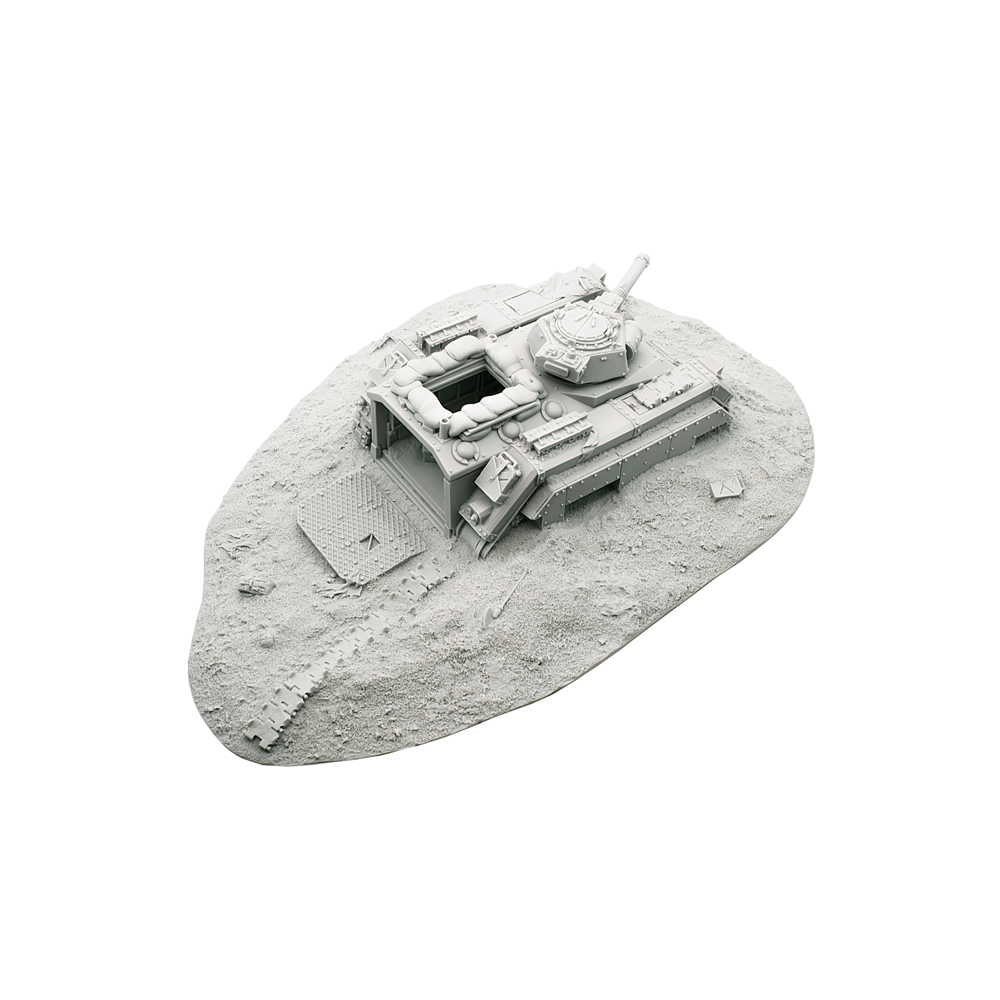
Story No 6.
A story about the work of small , but no less important.
This time we decided to devote our short article to a few not so global works as the last, but no less significant for us, because the skill is in the little things.
It is clear that our masters face such work on restoration every day. Some rare models can no longer be found in good quality, some were made at the dawn of the technology of resin casting and can not meet modern quality requirements. We have selected some interesting, in our opinion, positions and tried to write short reviews on what we do
-
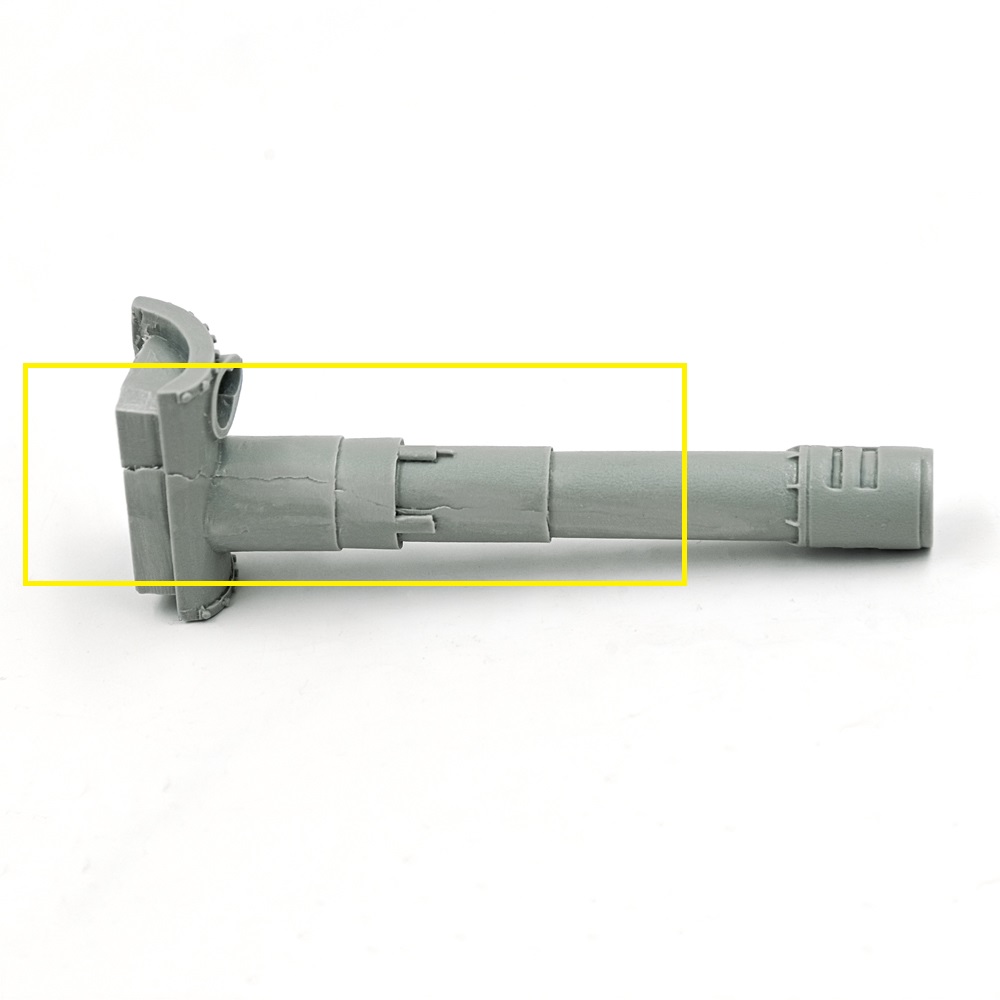
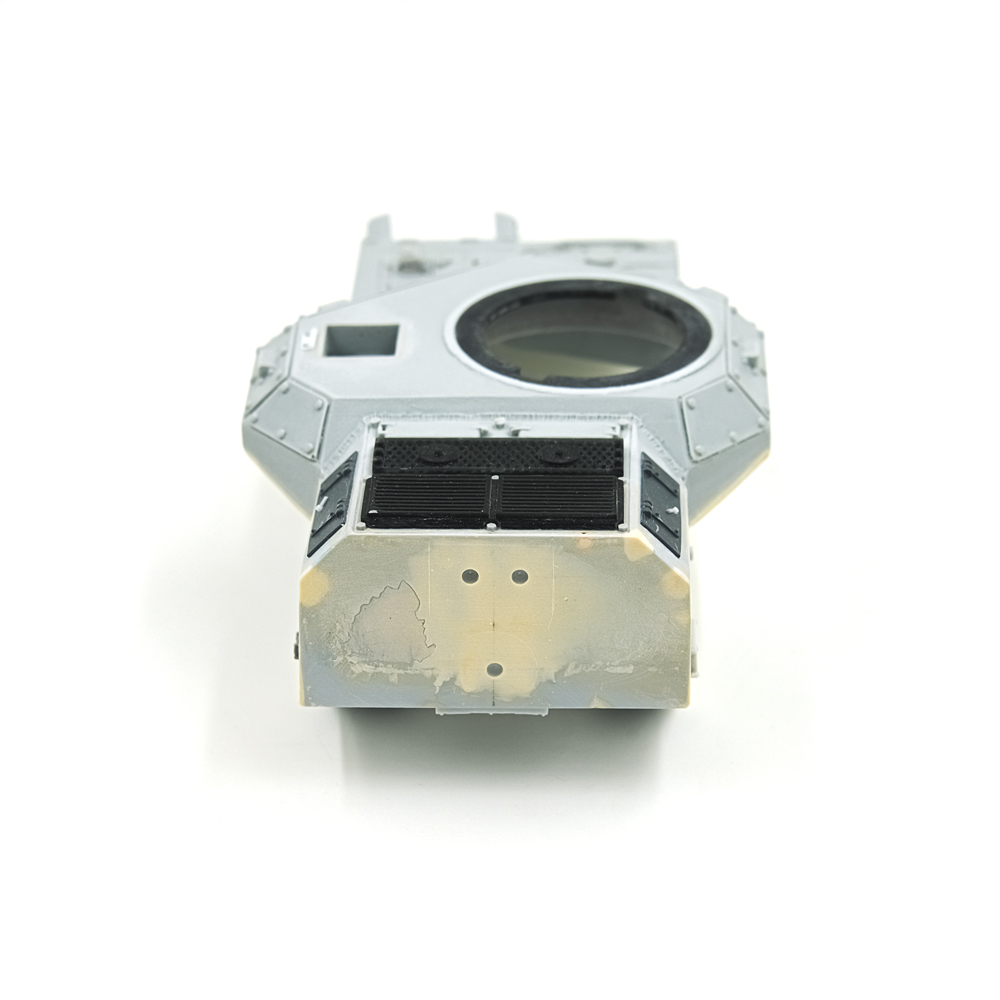
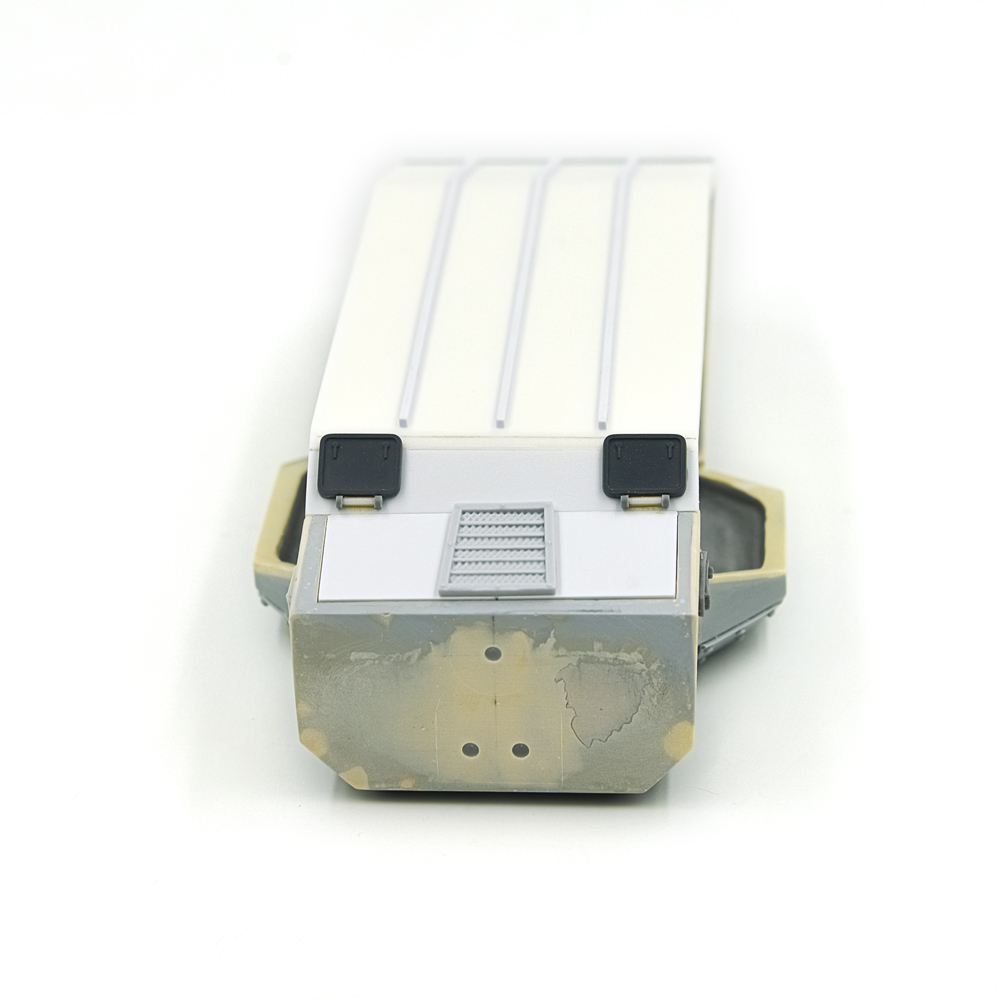
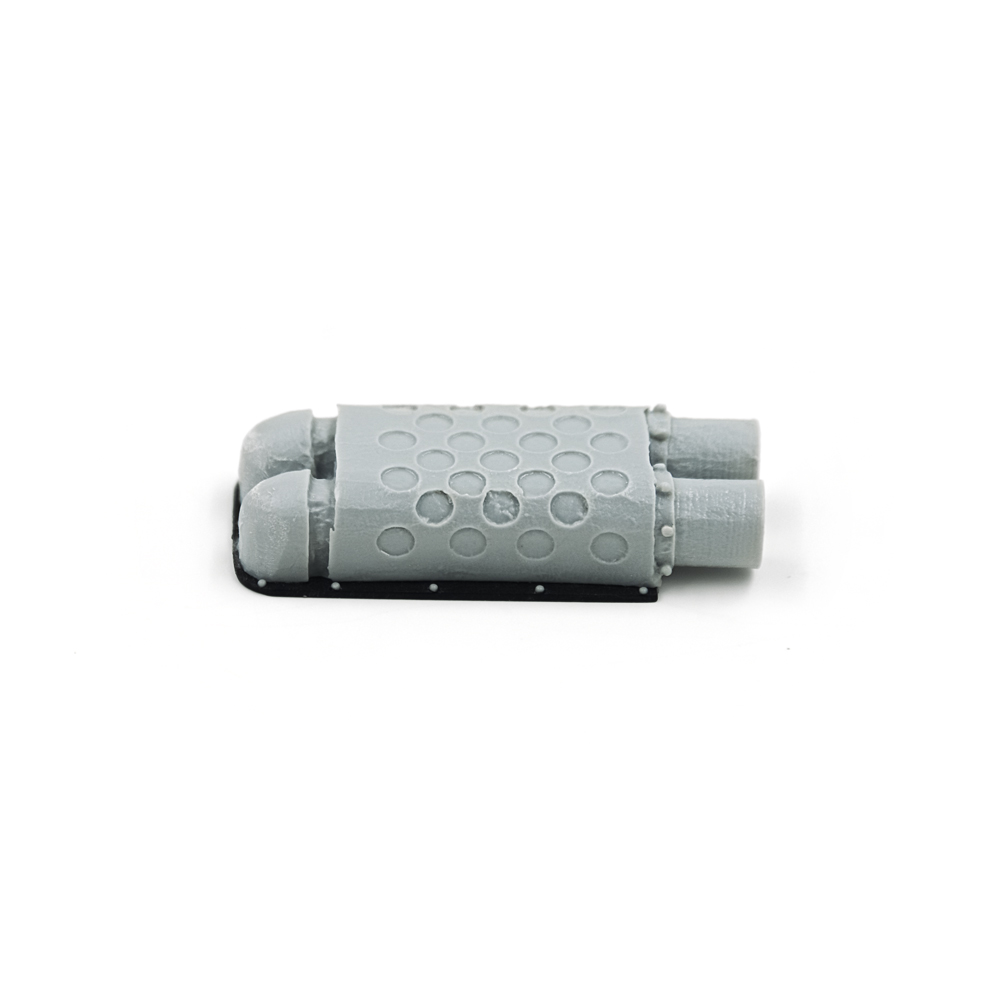
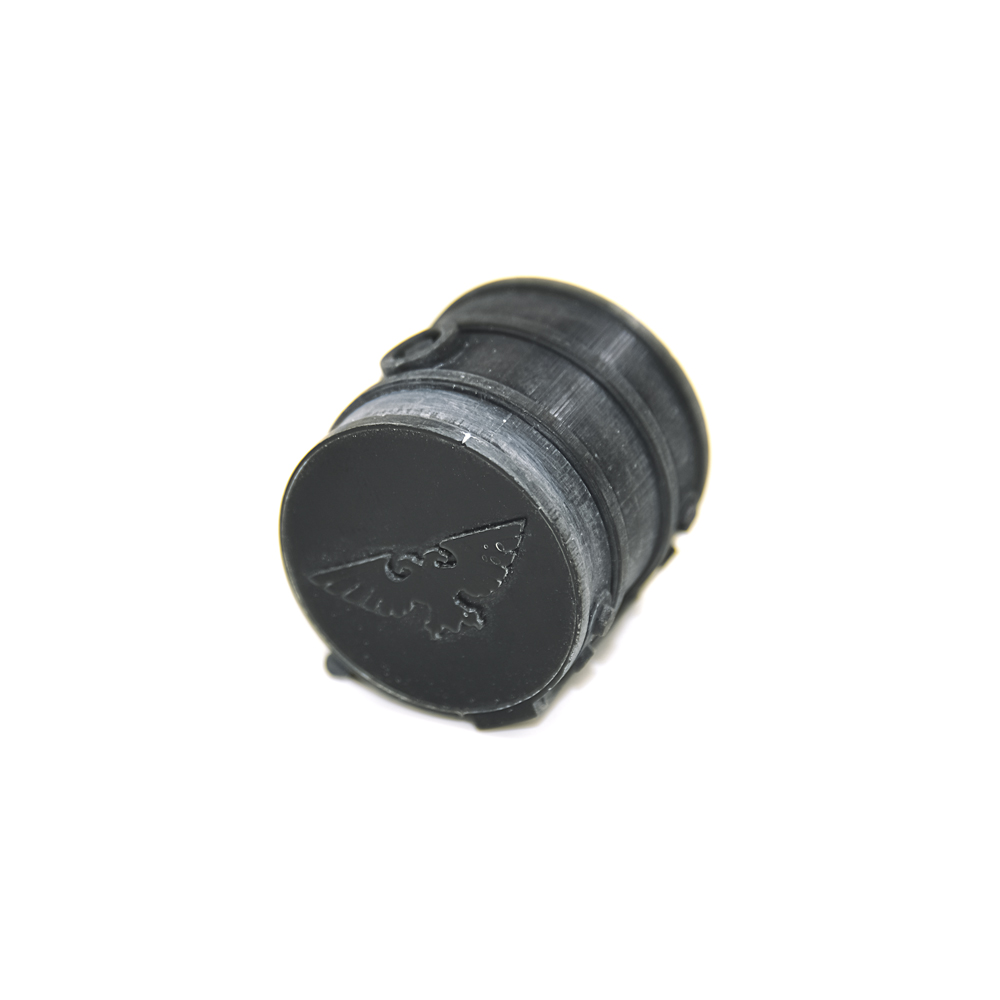
Opens our gallery Forge World Death Korps of Krieg Arkurian Pattern Superheavy Tank Upgrade. More precisely, its filters. Our craftsmen have completely restored filters body. The casing cap was also restored.
-
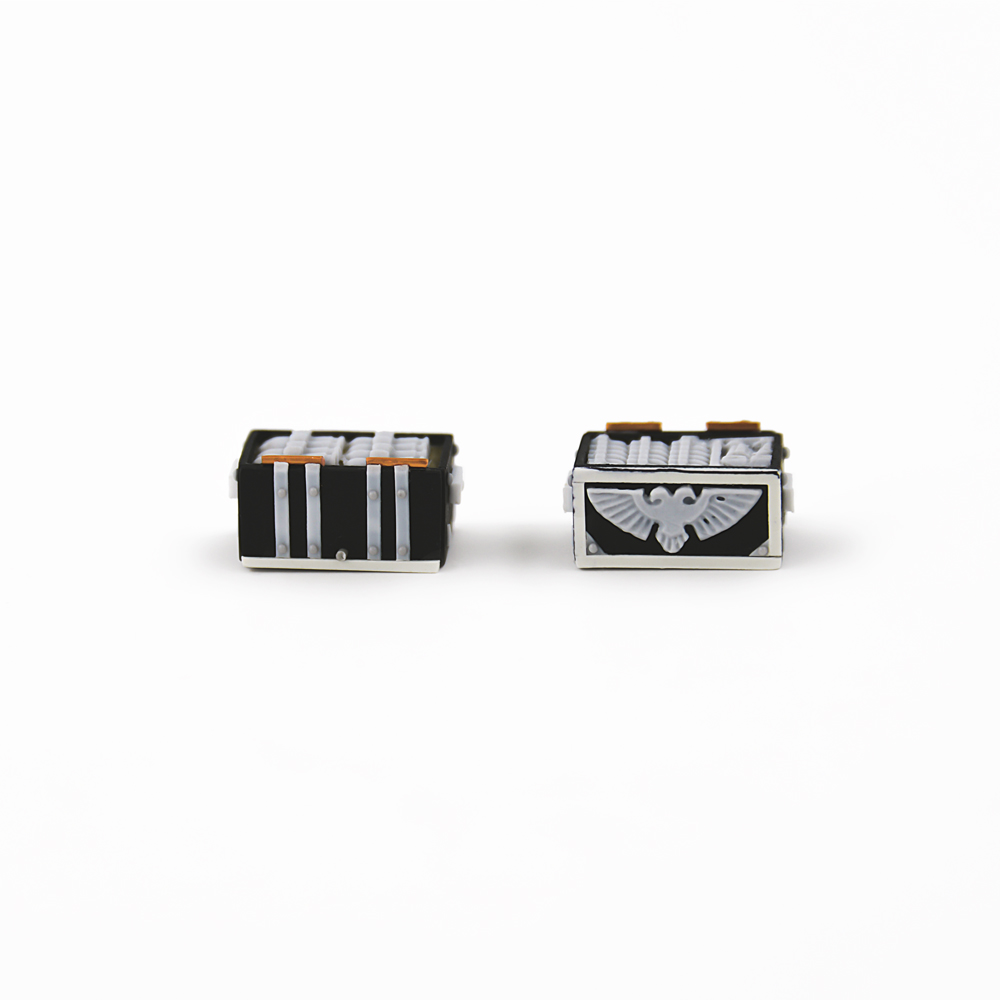
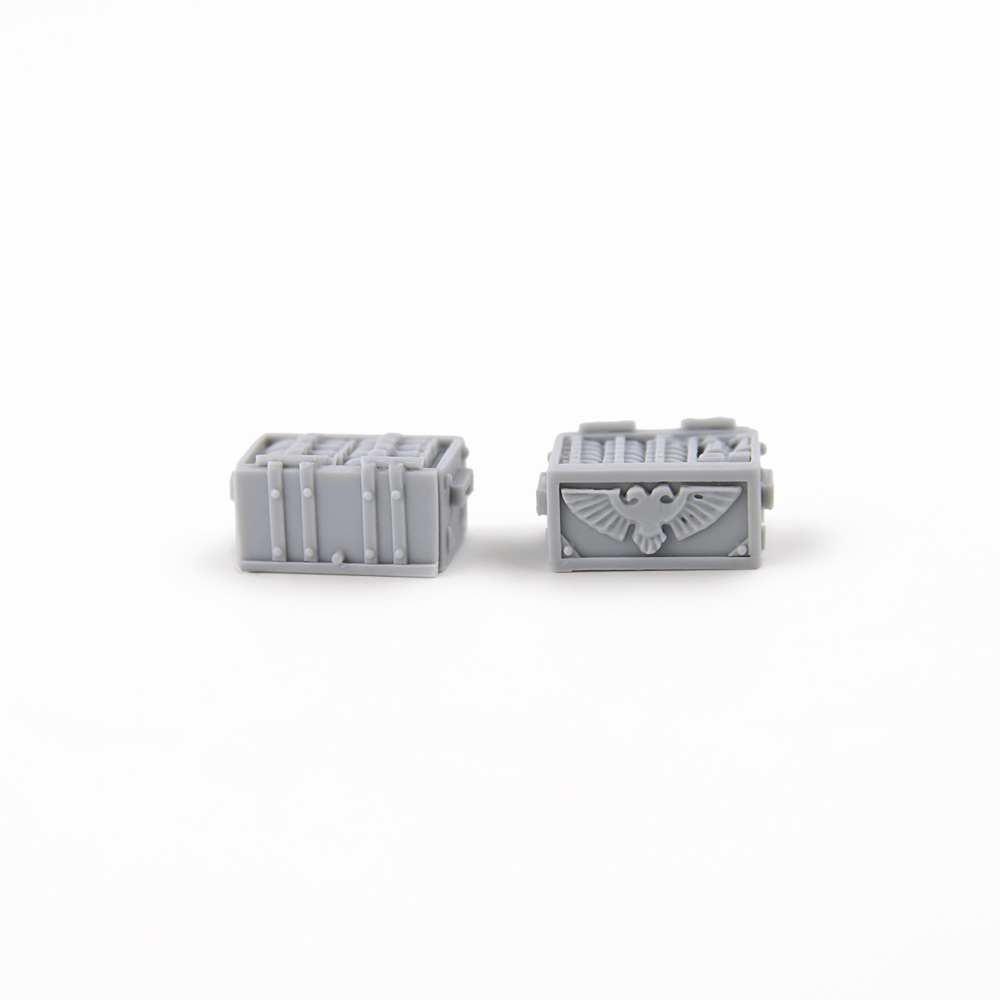
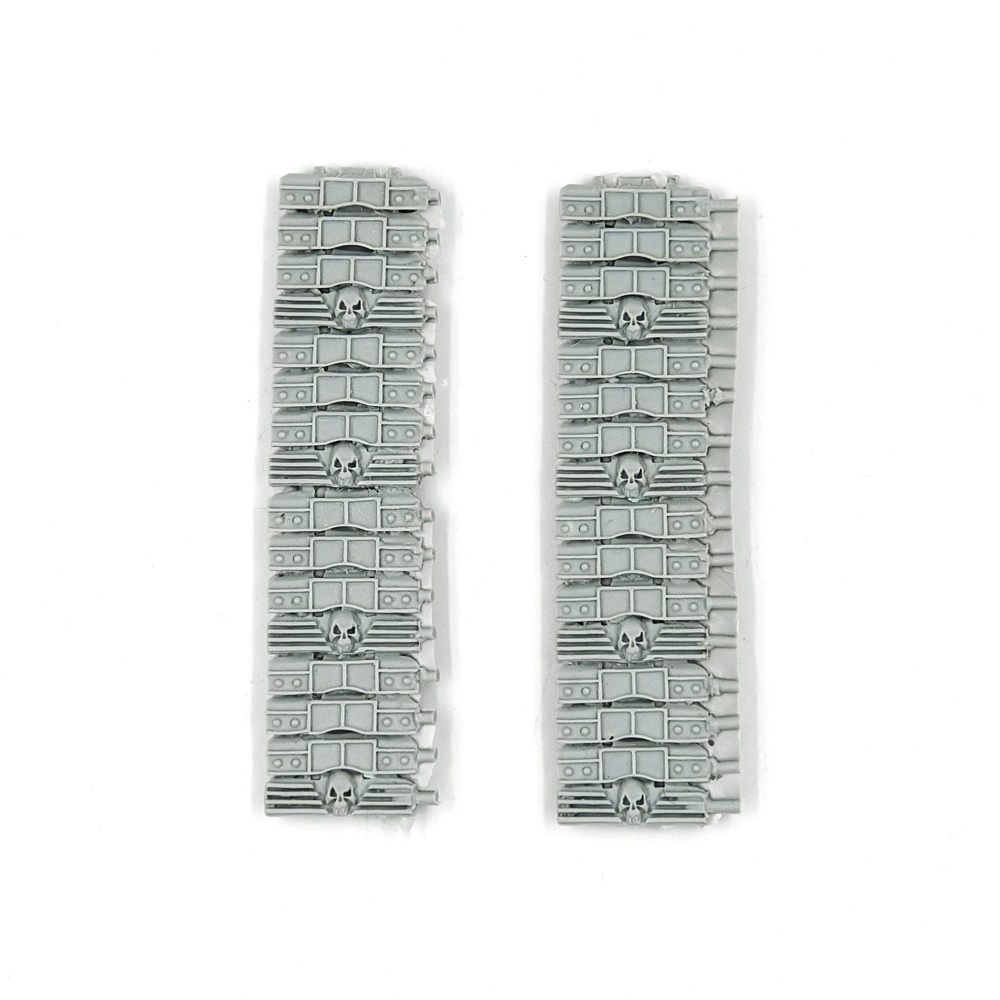
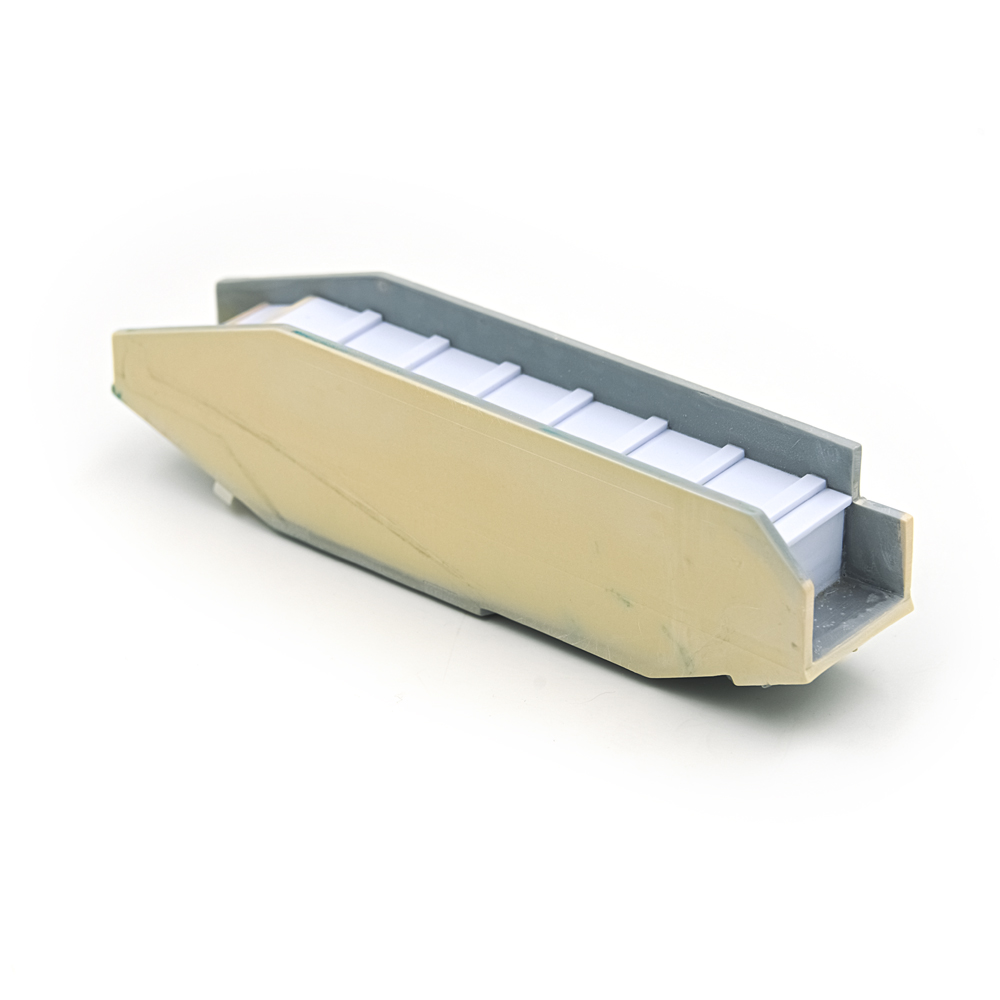
Next are Open Ammunition Crates. The boxes that were sent by our partners were very much “blurred” and almost all the texture was lost on them. We have, in fact, recreated them anew.
-
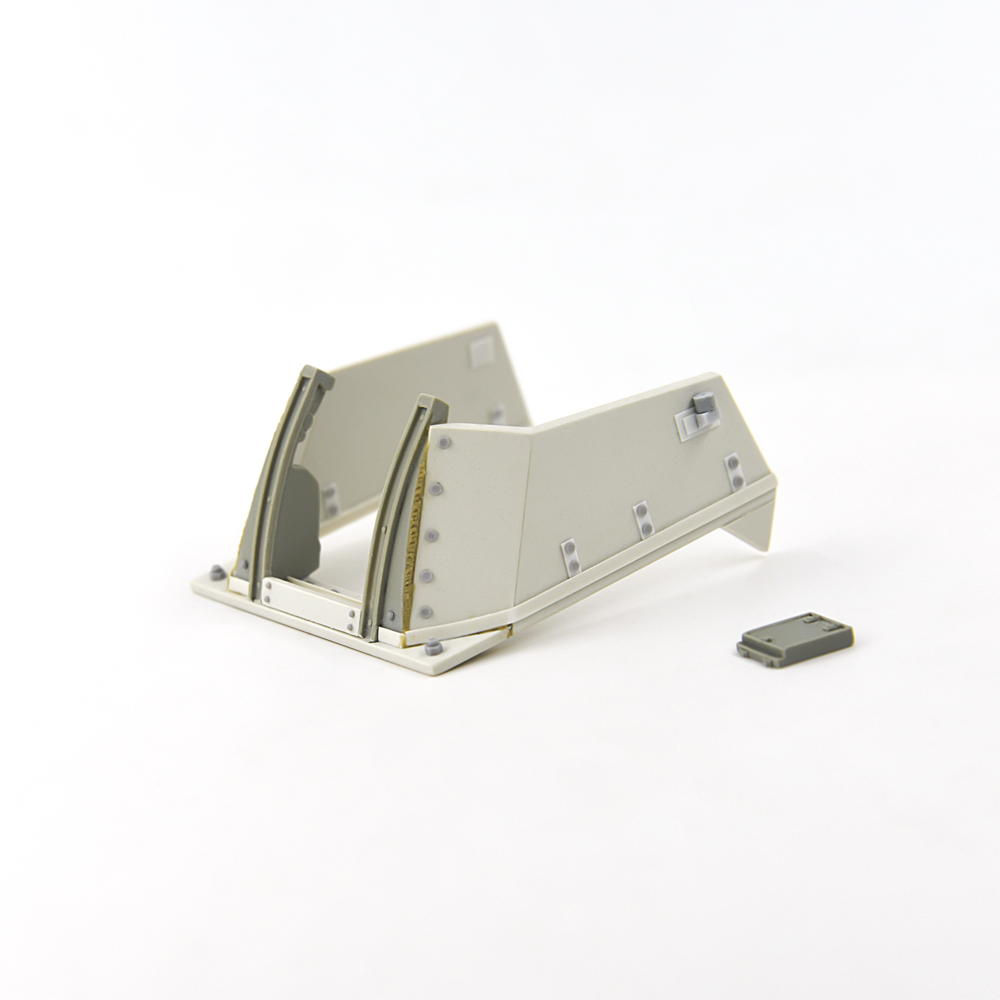
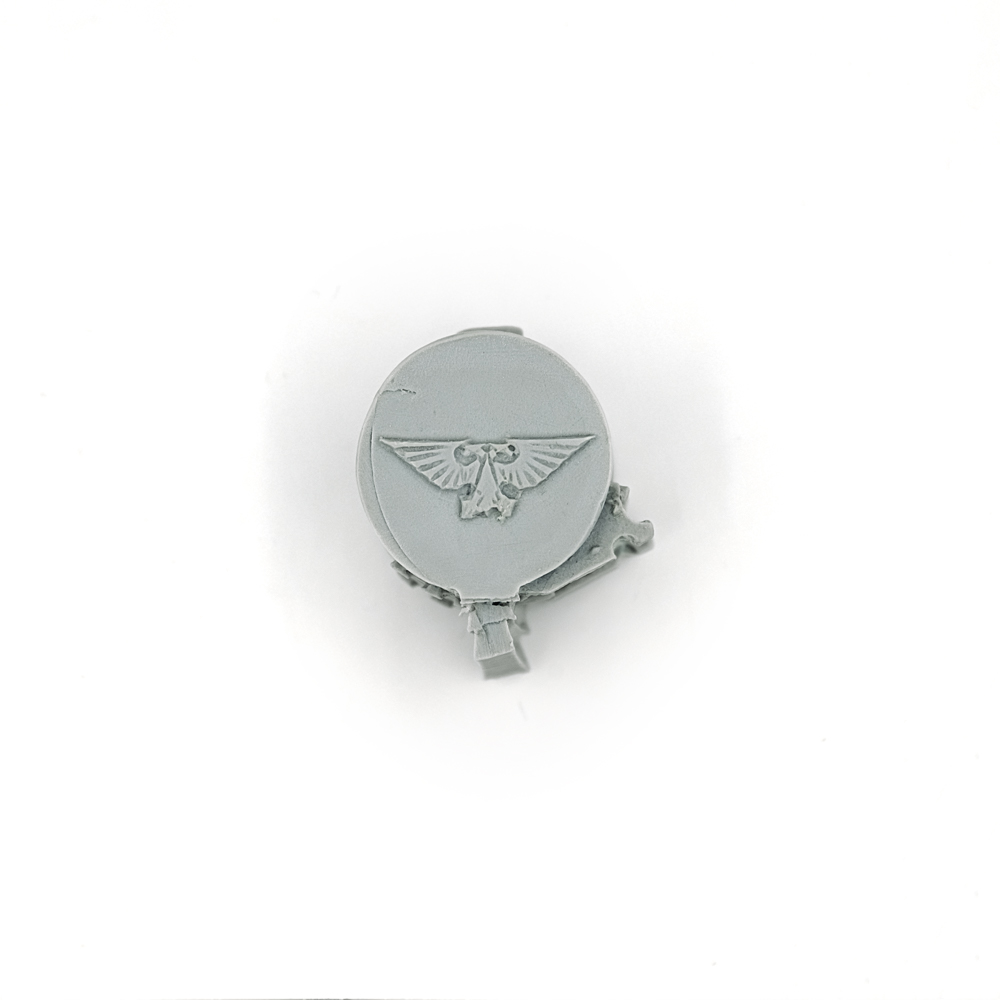
In this photo, you can see the restored Vanaheim Pattern Basilisk Gun Shield, before it was primed. All shields, plates, rivets and welding on the seams we made it from scratch.
-
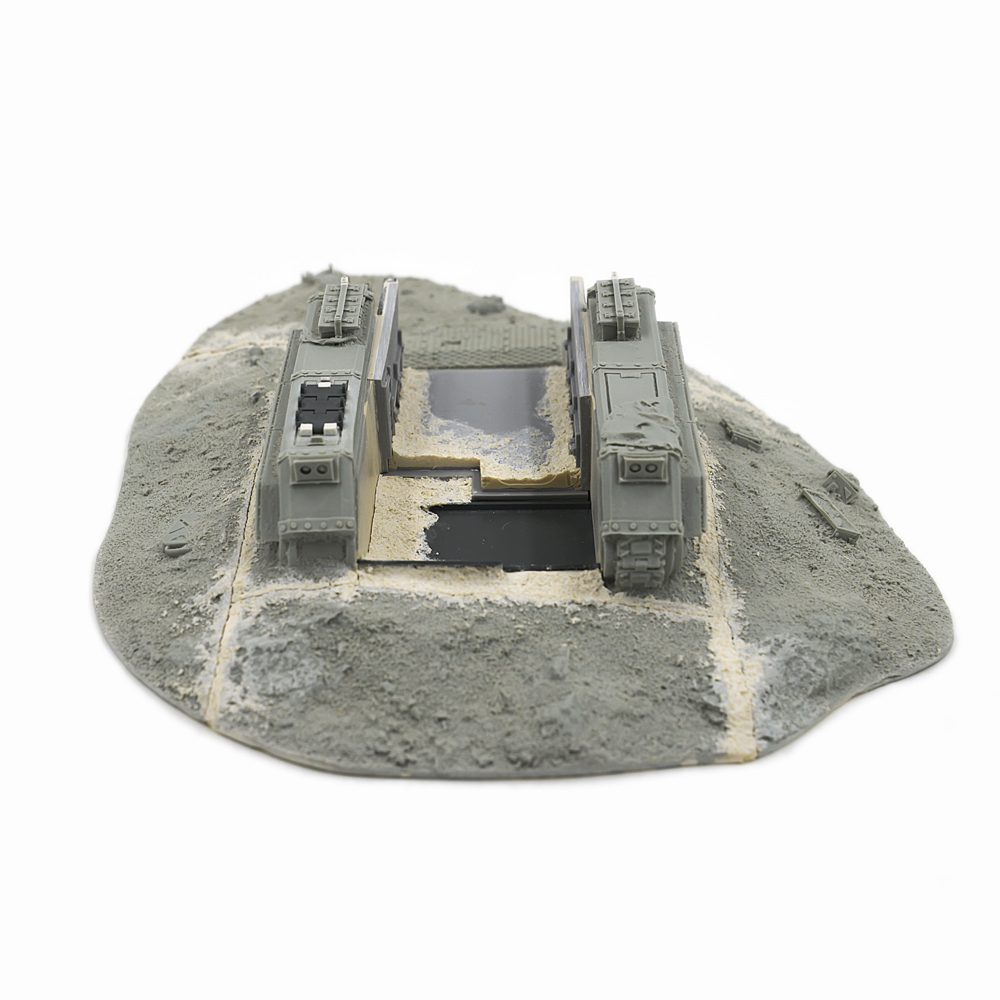
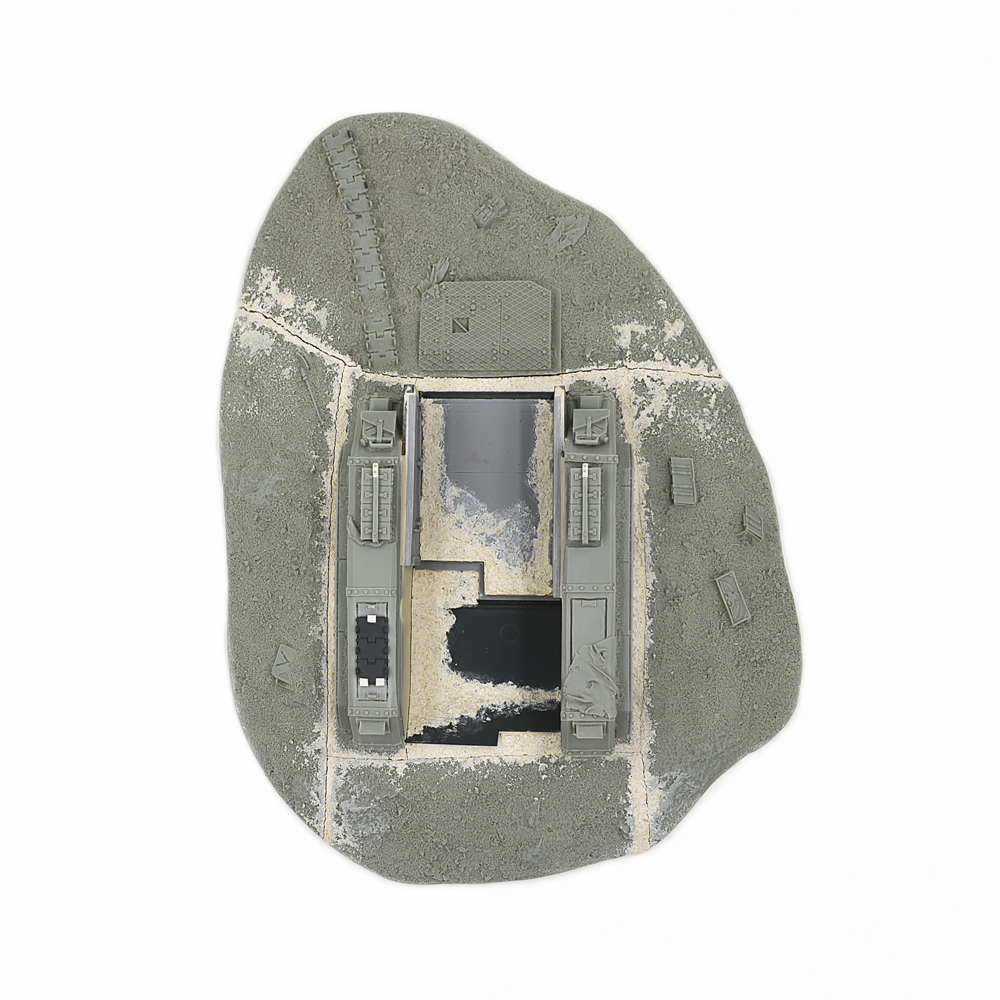
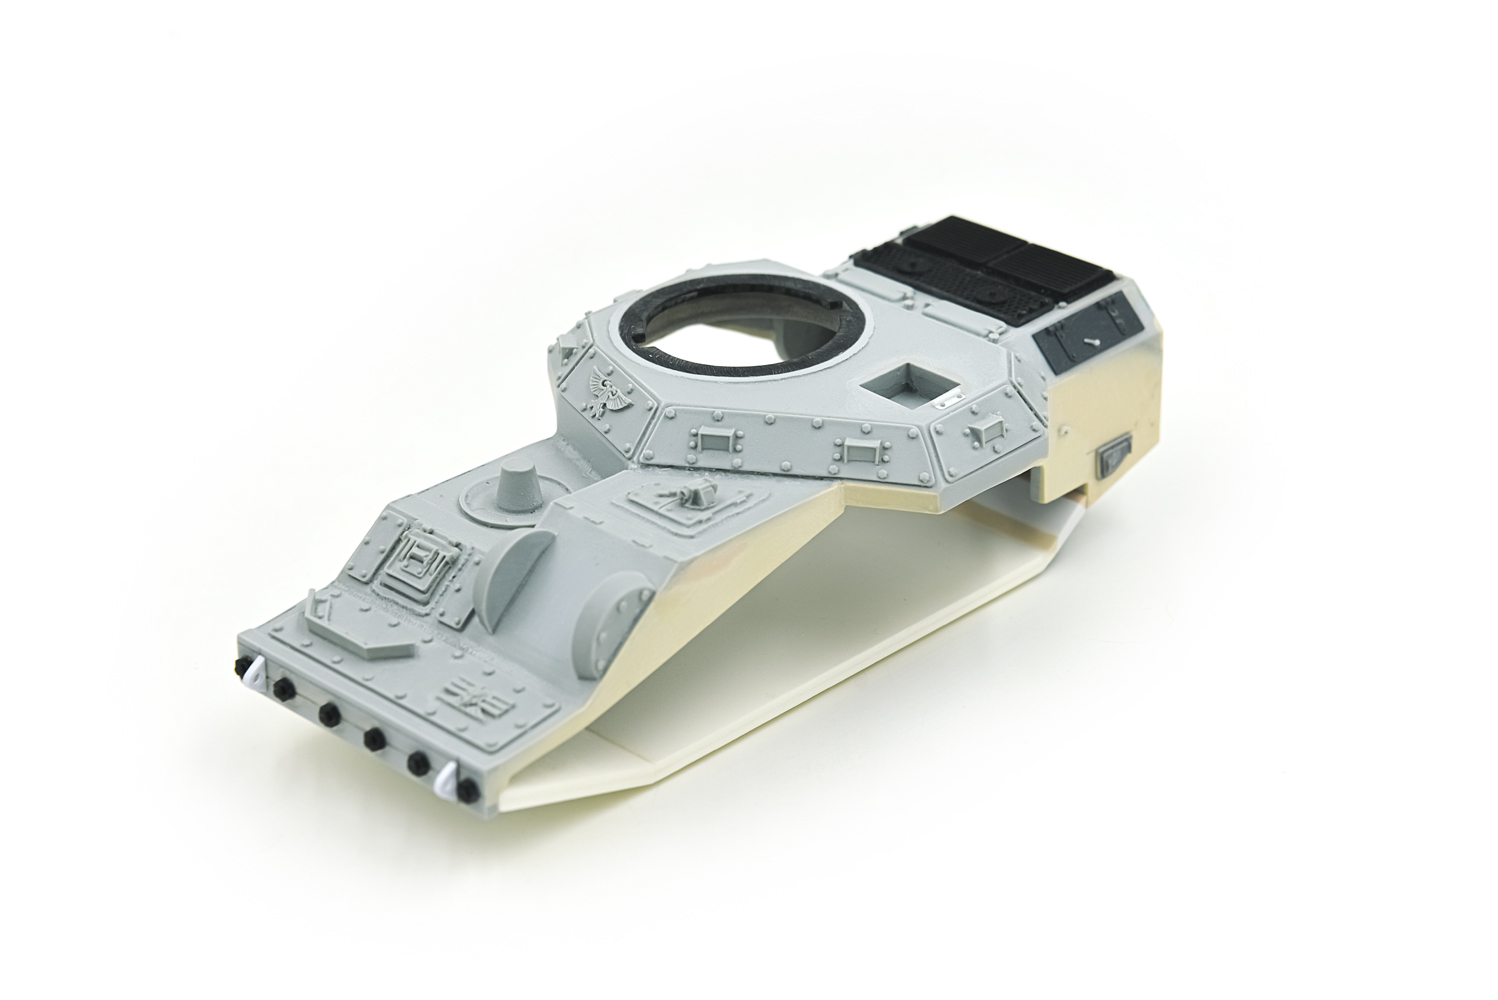
The floor in the Armageddon Pattern Basilisk Update Kit has been completely recreated to its original dimensions.
-
Contemptor Pattern Autocannon – one of the barrels was damaged and completely sharpen by us from a cylindrical block on the workbench.

-
We had to work hard to restore the Vanaheim Pattern Griffon Update Set. The fact is that due to the peculiarities of production, the latest miniatures in batches in any workshops, including Forgeworld, are not of high quality. Silicone, in which epoxy resins are poured, “swells” from constant use. Over time, the miniatures become with very thin walls, there are deformations of proportions. You can often see this on the cloaks and armor plates of your miniatures. If we see something like this, we try to restore it. As you can see, first the armor plate was sawn, then the thinned walls were replaced with a plastic that was suitable in proportions and thickness. And yes, we cut all the equipment from the old shields and then re-glued it. We also replaced the transverse and longitudinal plates and rivets on them. Then we adjusted all the parts with the help of putty, one to the other, so that they perfectly matched and restore the weapon.

-
The Trench System also had to be tinkered with. In addition to the banal fitting and mating of surfaces, we, almost everywhere, noticed defects in the channels that hold the armor plates together. This is also a consequence of silicone swelling.
 It was decided to cut off the old ones and completely restore the new ones by the samples. As you can see, the result was excellent.
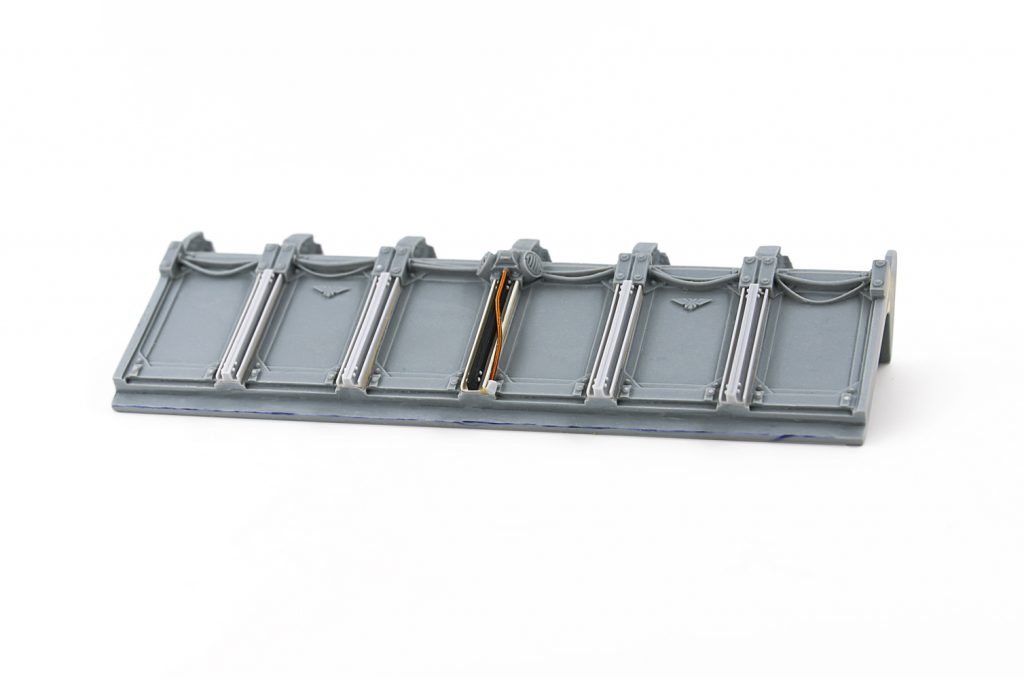
-
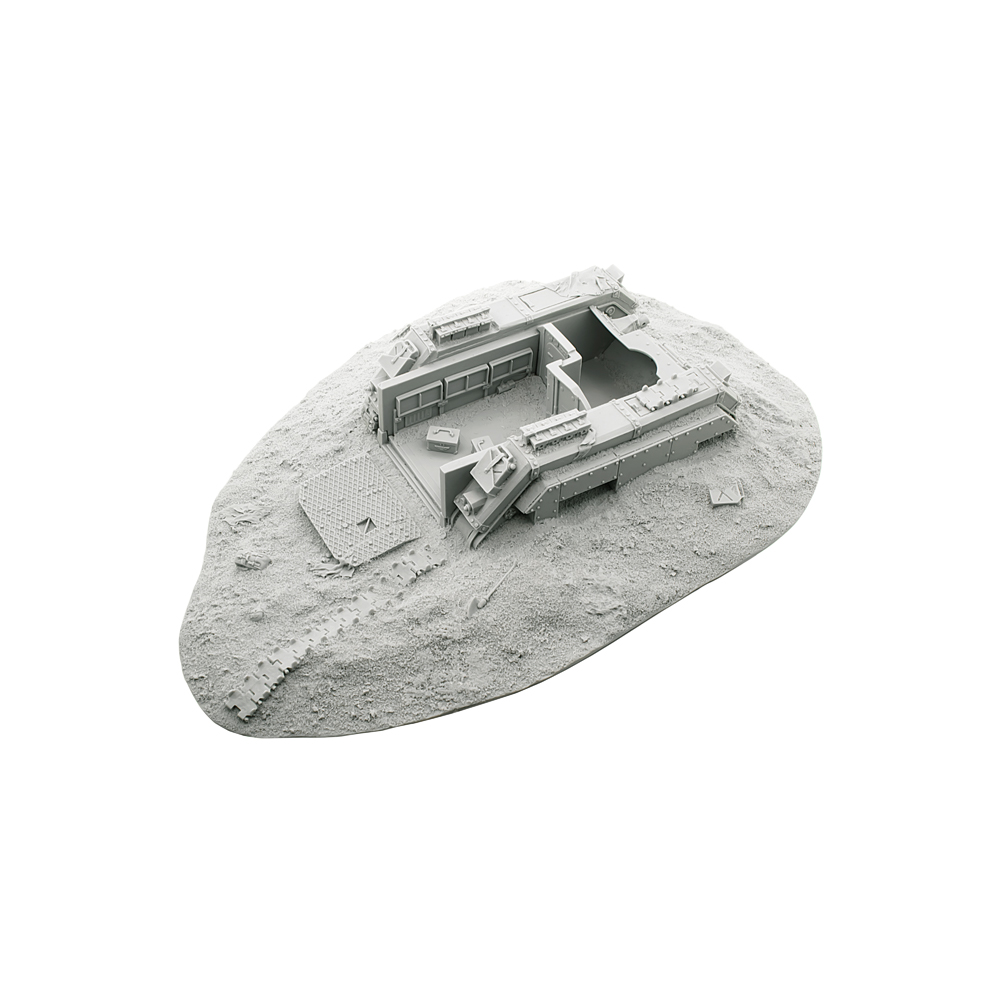
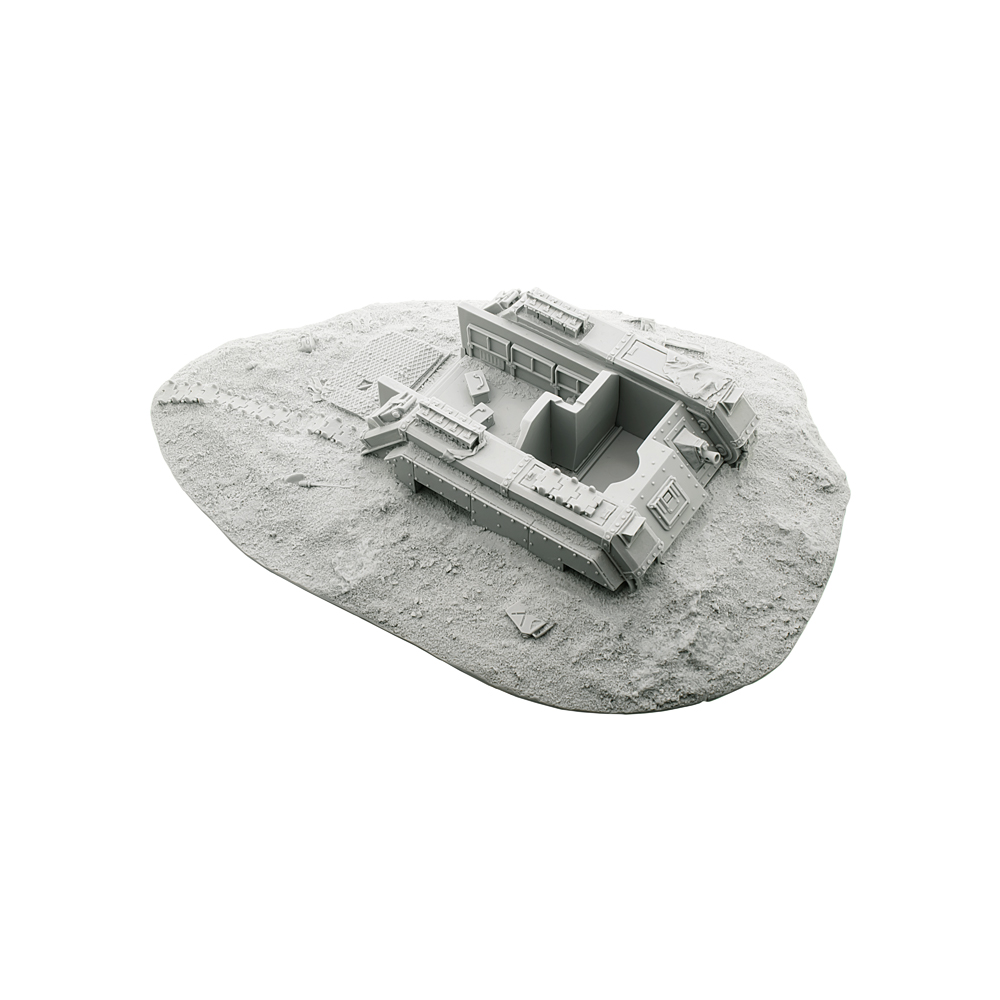
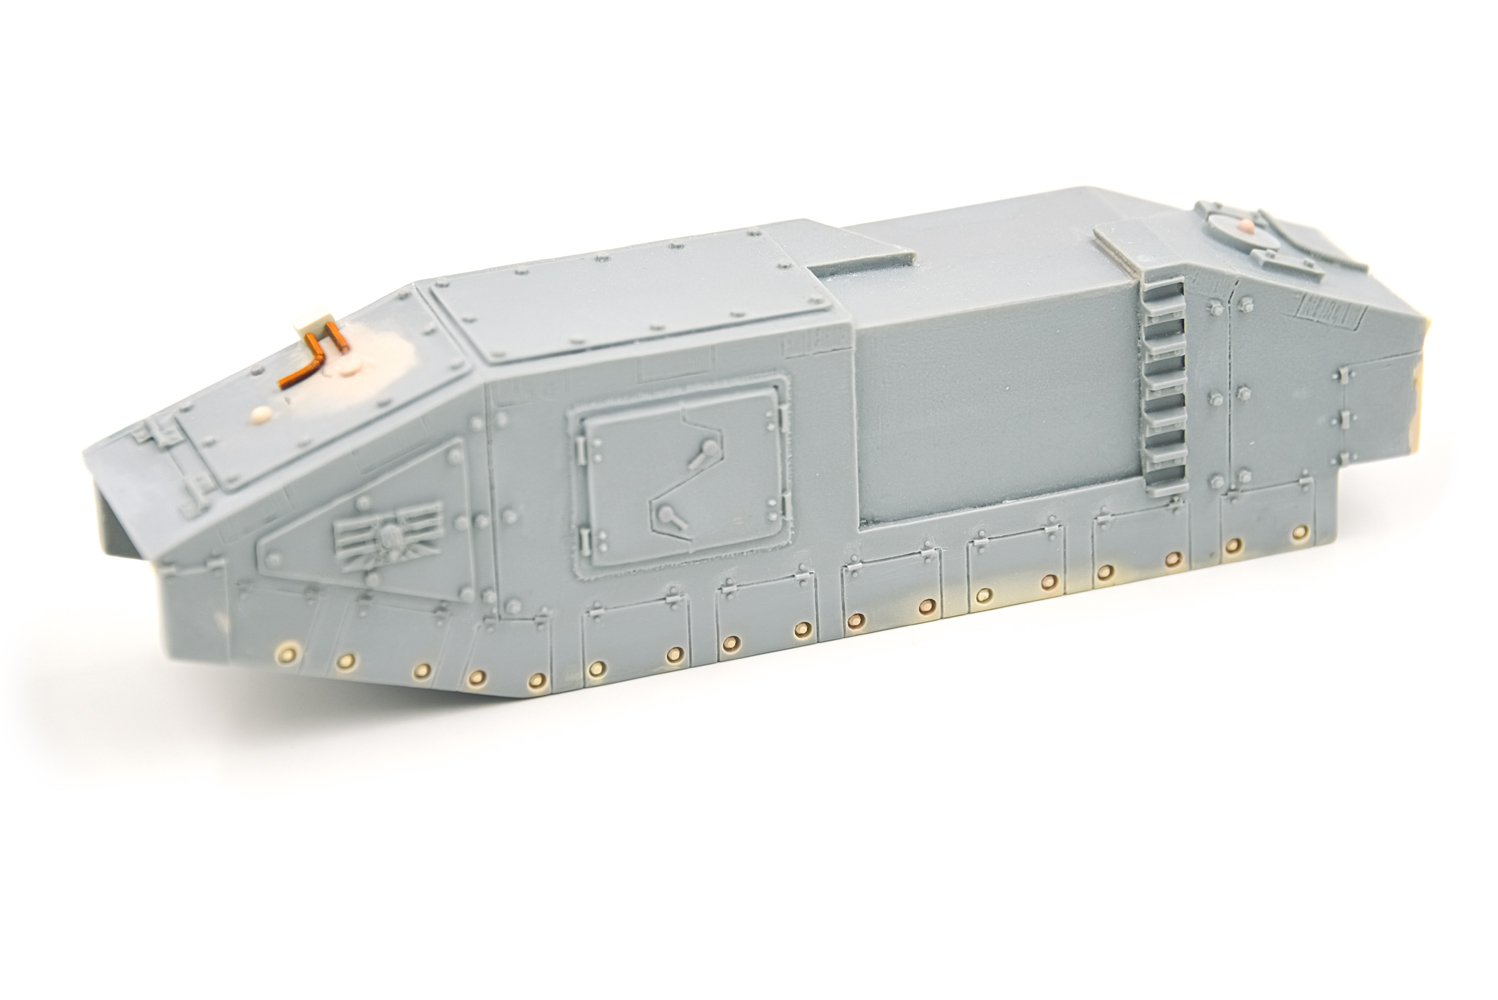
And the cherry on our cake today will be an exhibit called Forgeworld Abandoned Chimera. At one time, namely in the beginning of 2000, it was quite a rare and popular set. Since then, it has become even more rare and popular). But due to the imperfection of technology at that time, it came out a little unthought-out. The huge plate that served as its base was deformed. The interior elements were smudged and smudged. We carefully studied this model and decided to go for drastic alterations. First , the base was dismembered, and then adjusted. Now all the parts are not deformed and at the same time perfectly fit together. Since in parallel we were working on another set of Forgeworld Chimera Interior Detail Kit, and it was also not very high quality, we decided to kill two birds with one stone. We completely modeled and 3D printed the interior of the Chimera according to the originals. Then we combined it all with the parts from the first set+ added the top cover with the sprue of the Chimera, which is now sold in stores. We added a little more manual work on the restoration of plates, rivets, ammo boxes and put it all together. You can see the result in the photos. At the same time, this is still the same set that was, it just became more thoughtful and high-quality. (for better quality, click on the picture):

and here is the final result:


In conclusion, I want to say that we are not magicians. Sometimes our team is simply powerless to restore anything(then it is easier to make a miniature from zero than to redo it), sometimes the human factor intervenes in the process. But we are not standing still. Our craftsmen are constantly improving the methods of restoration and trying to combine classic manual work with the latest 3D modeling techniques. Each new miniature that we work with brings us one step closer to perfection. We are grateful to our partners and customers for their patience and the opportunity to do what they love. Thanks.
With respect, Mr. Smuggler
Story No 7.
The Emperor’s armored Fist .
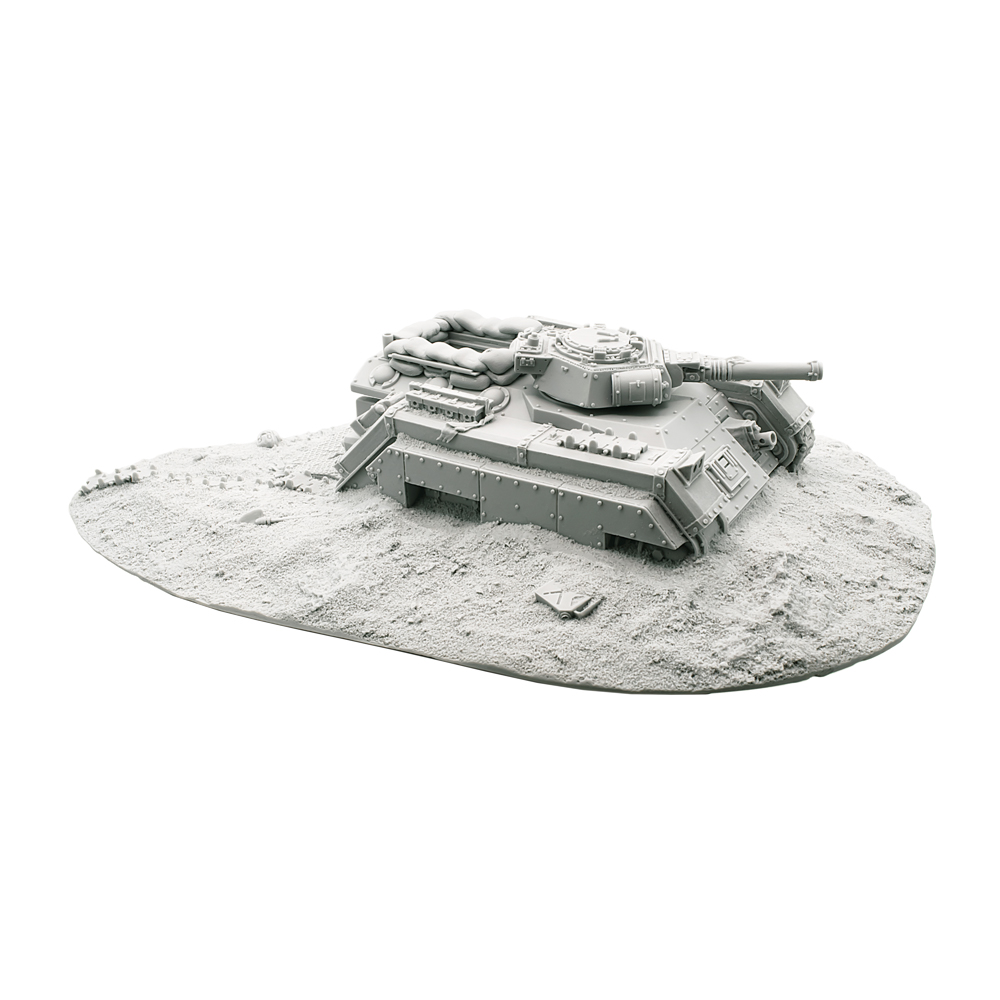
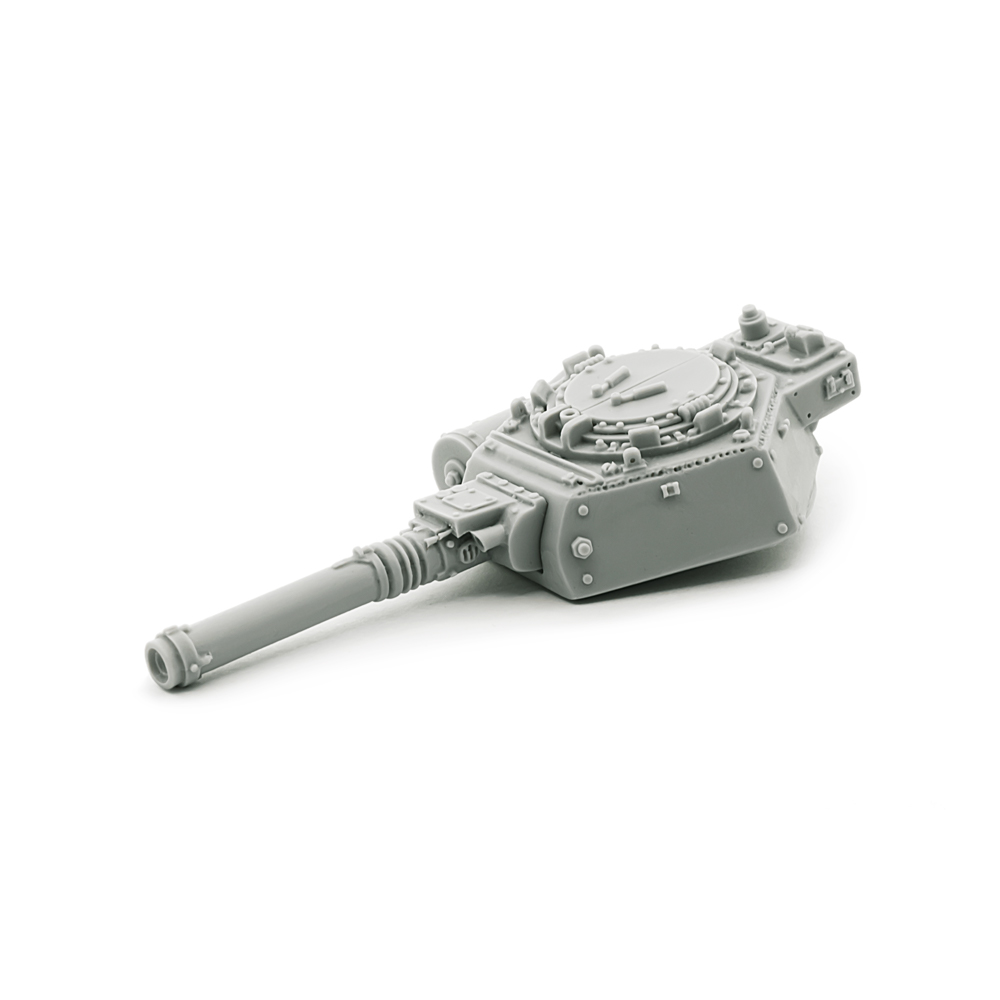
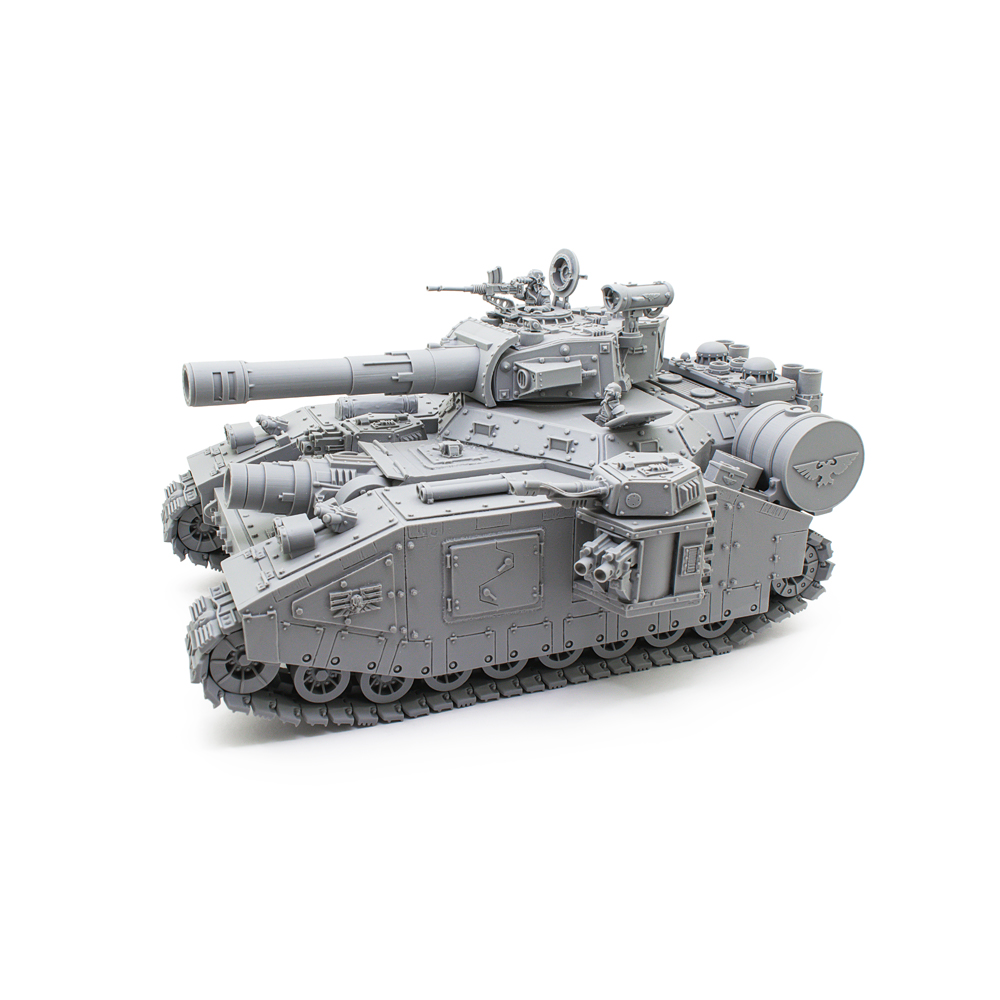
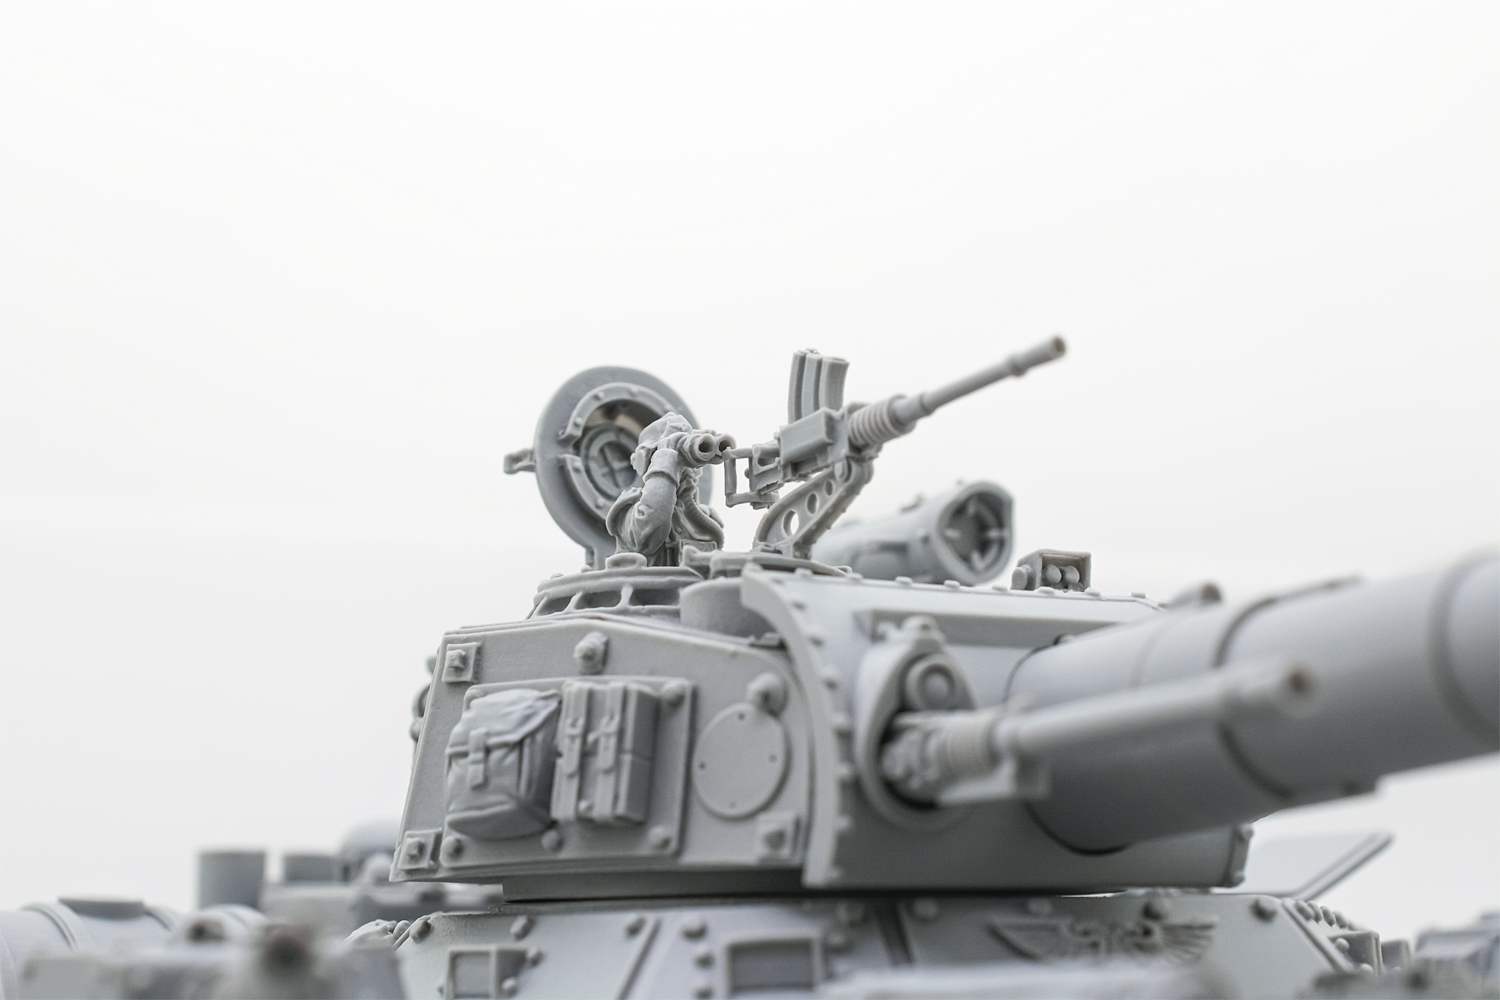
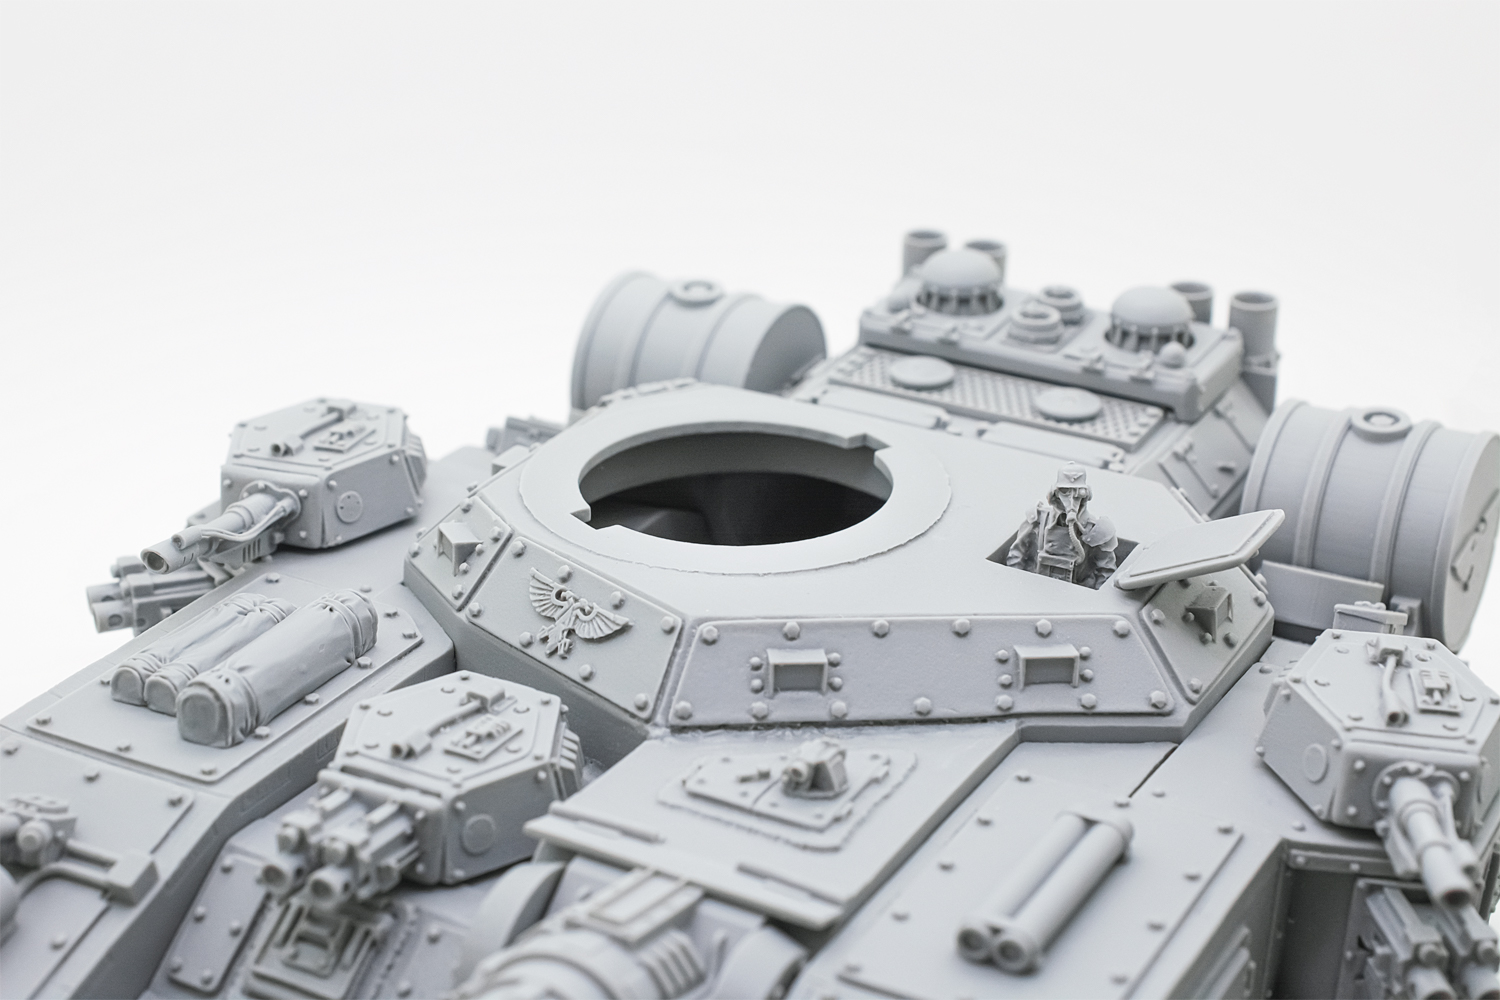
In this article we will talk about the pride of Astra Militarum, the scourge of xenos and various heretics – the great and terrible Baneblade!.
A little history. Baneblade is a universal platform of super-heavy tanks from the time before the Horus Heresy, created on the basis of the STC (Standard Template Construct) and has passed the test of time for 11,000 years.. Traditionally produced on Mars, but the Imperium is huge and over time a plenty number of varieties of Baneblade have appeared. Here are just a few varieties: Modifications Lucius Pattern, Hellhammer, Shadowsword, Stormsword, Stormblade and a huge number of other modifications. You can learn more about this technique, its varieties and differences from a huge number of thematic resources.
About 20! years ago, these tanks made of resin were produced by the wonderful studio ForgeWorld, which gave this world a huge number of samples of the military industry of the 40th millennium. But times are changing, Forgeworld stopped the release of these tanks and Lucius Pattern, and even more so Mars Pattern began to appear only on collectors’ shelves. Yes, now Baneblade and its modifications are present on the battlefields, but they are mass-produced in many worlds of the Imperium without proper control of Mechanicus and the quality of tanks, to put it mildly, began to deteriorate.
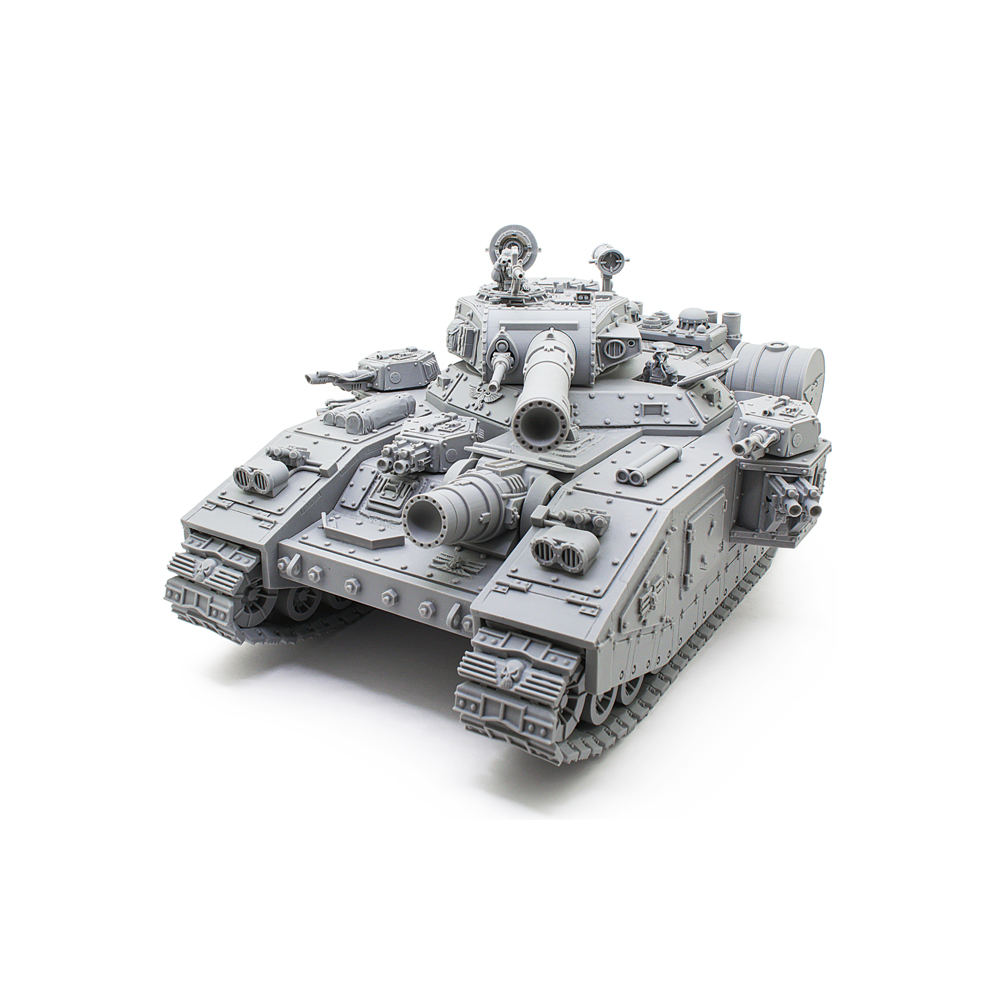
Our studio got one of the rarities – the Maximillian Weisermann’s Baneblade Lucius Pattern apparently produced, judging by the quality, during the Horus Heresy at a bombed-out factory). Initially, our task was to restore this tank to working condition, but, as usual, when performing this kind of work, we got carried away… You can see the result below.
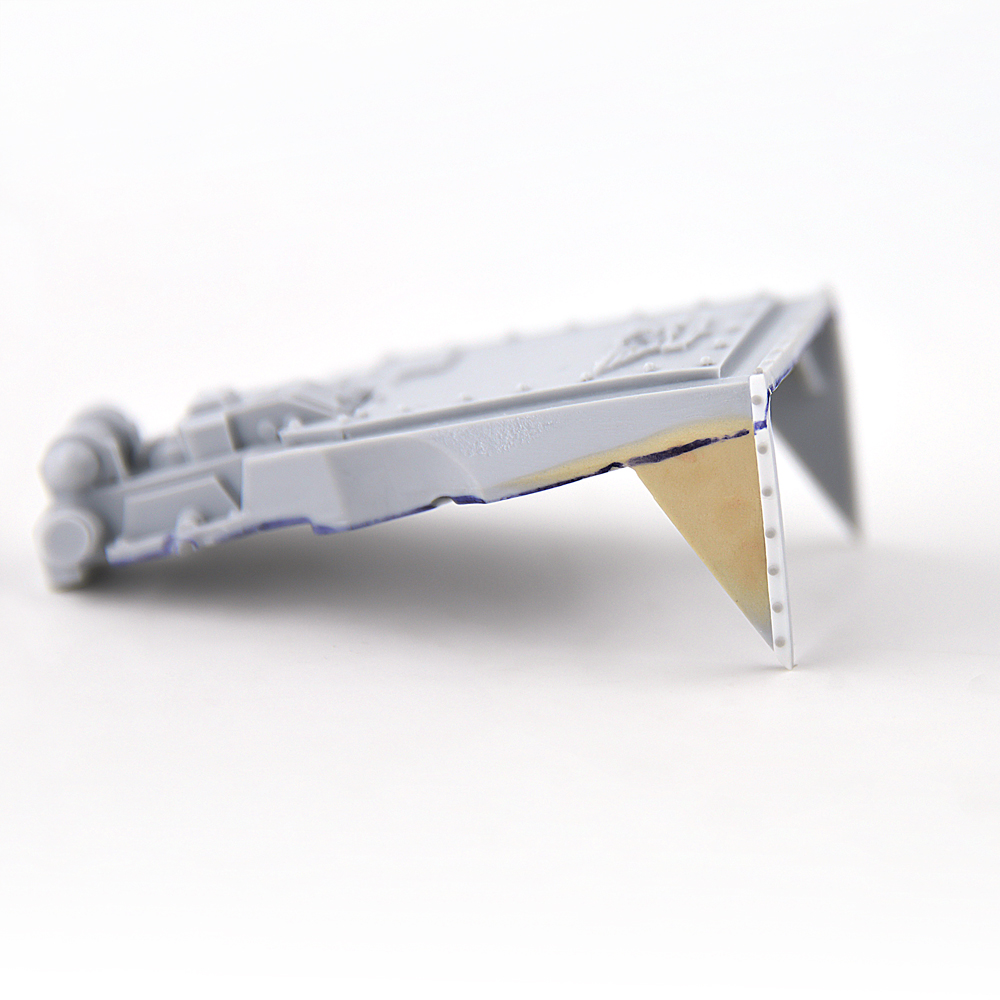
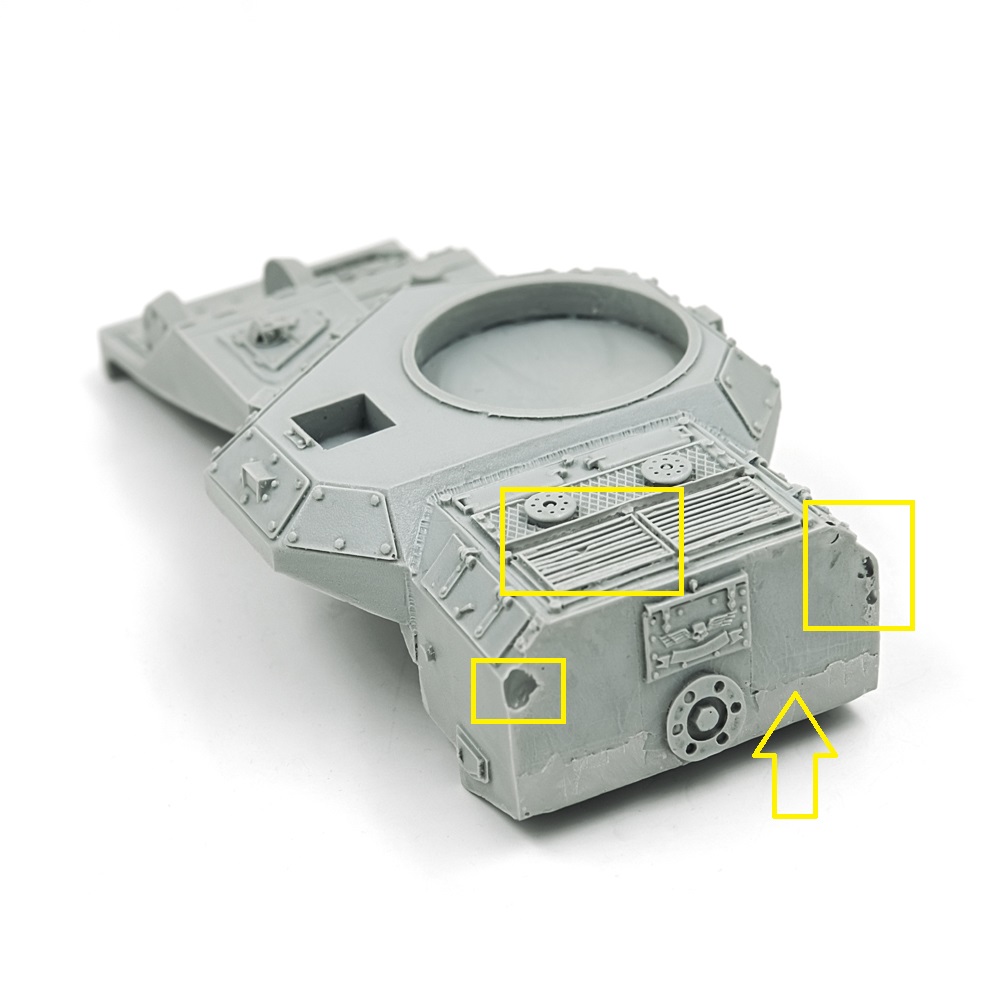
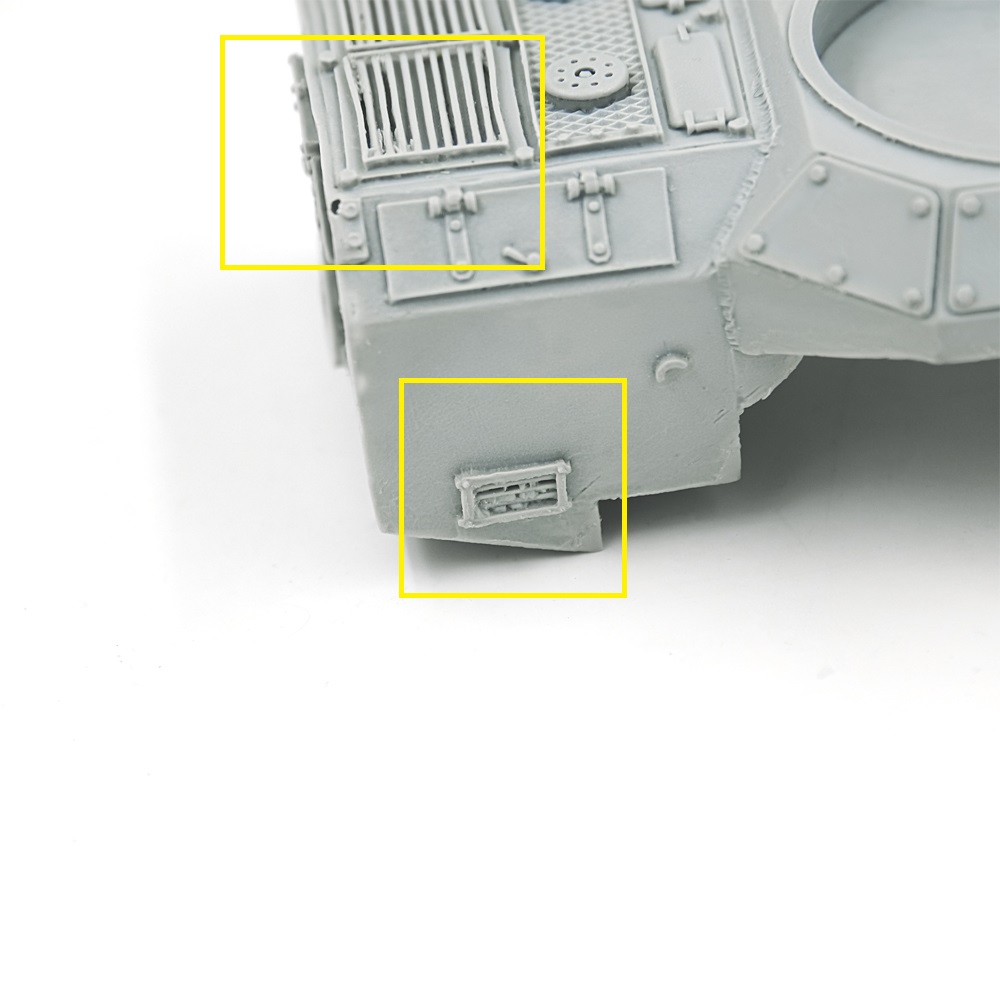
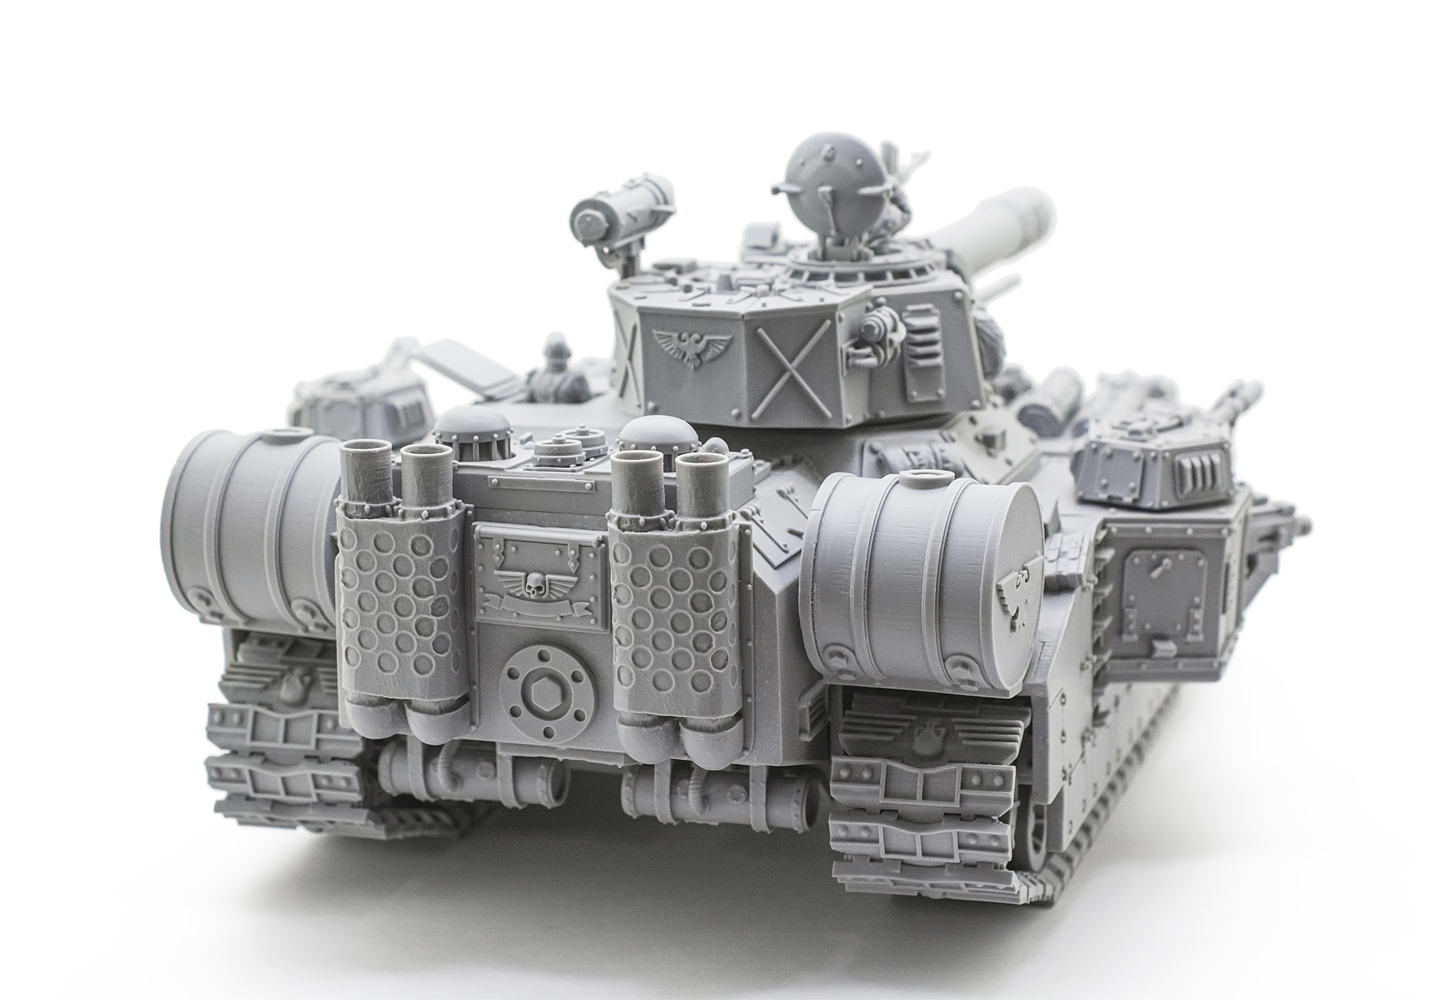
So, in these photos you can see a plural defect:
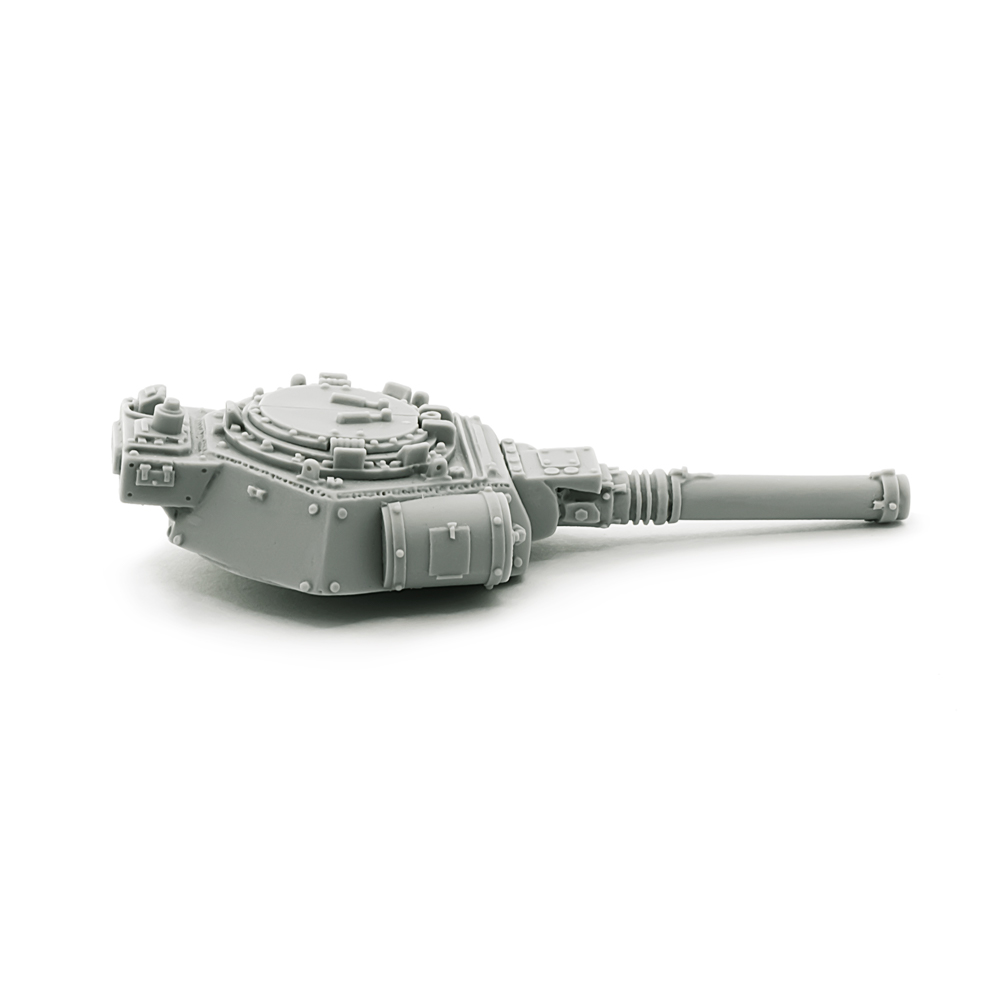
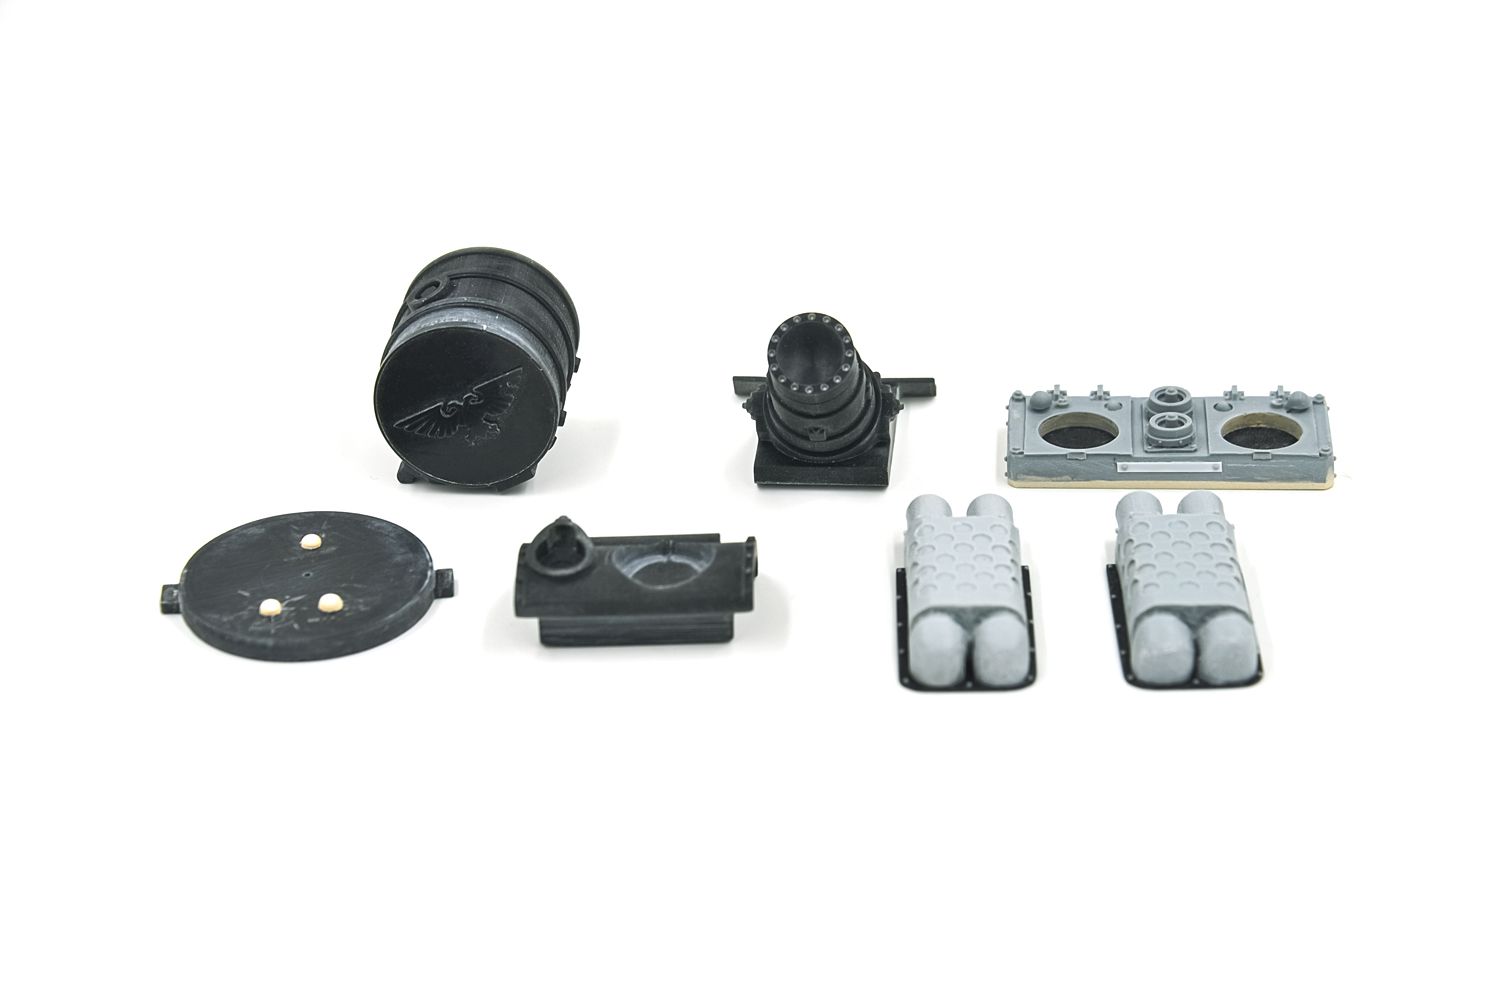
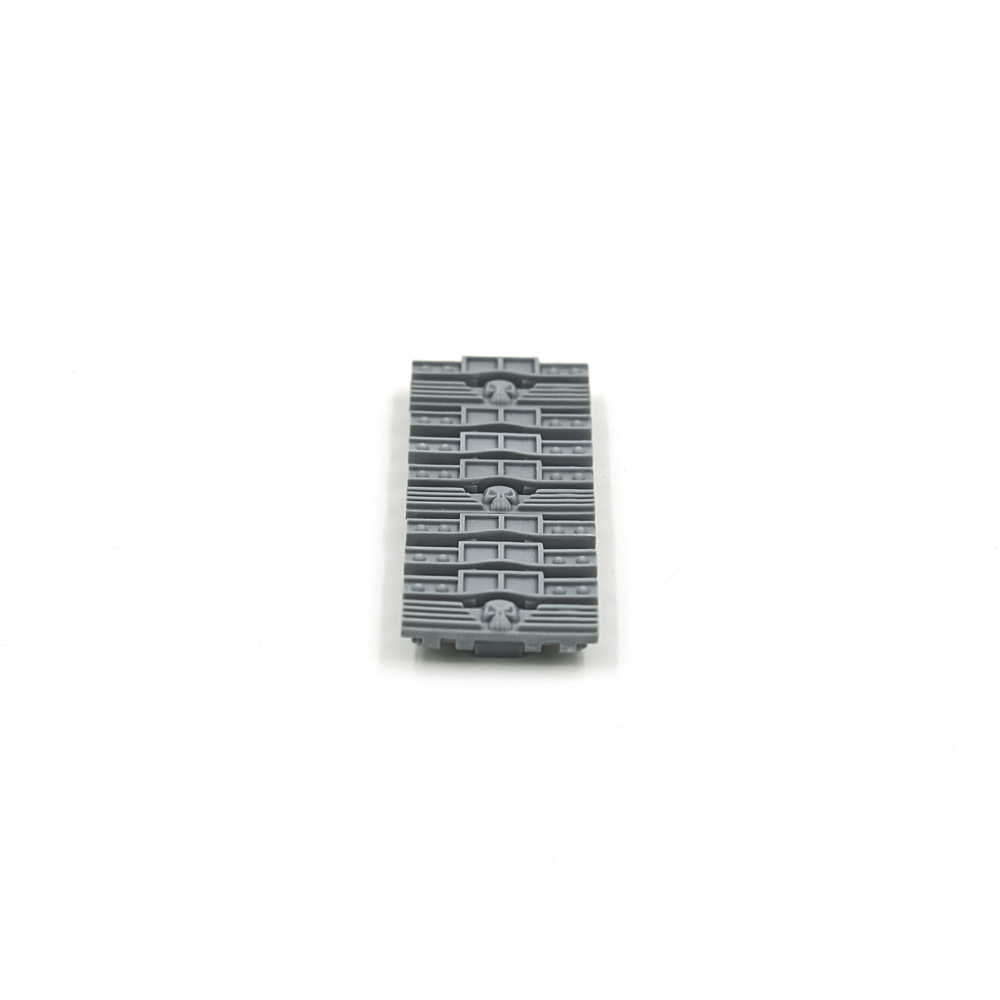
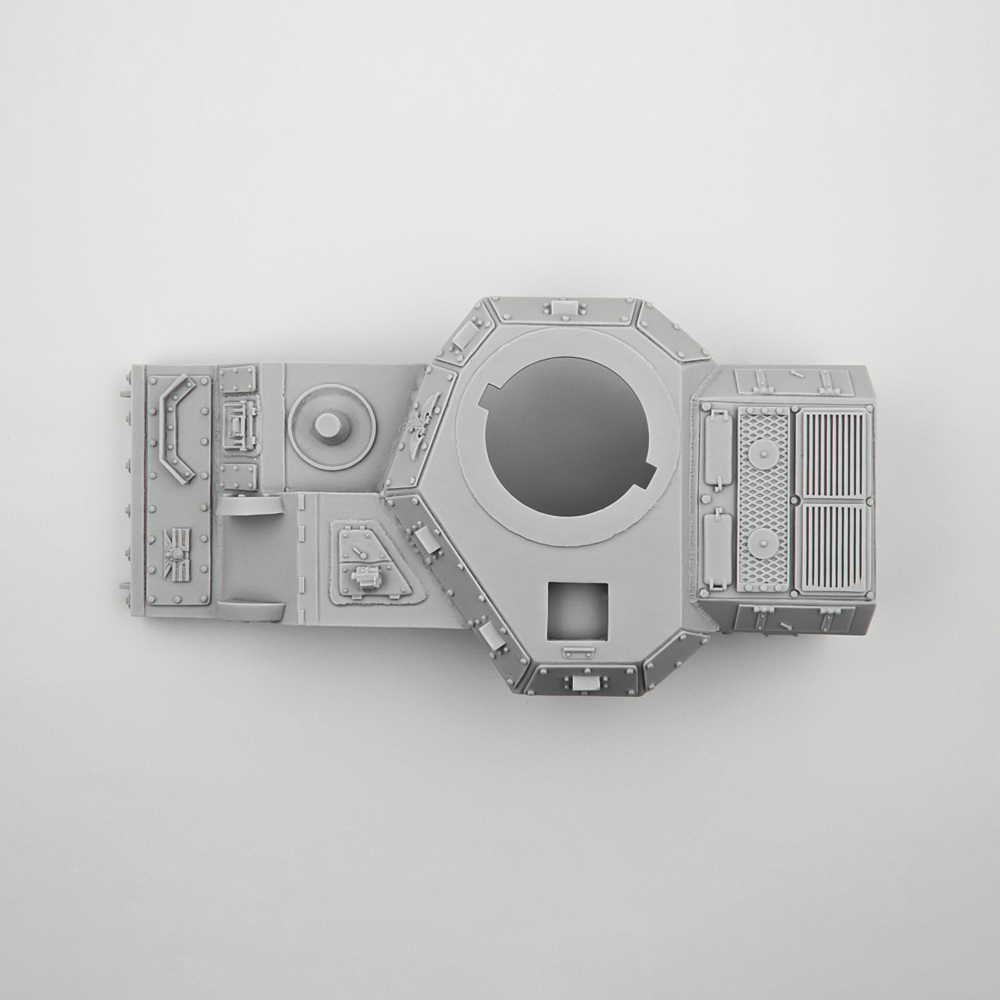
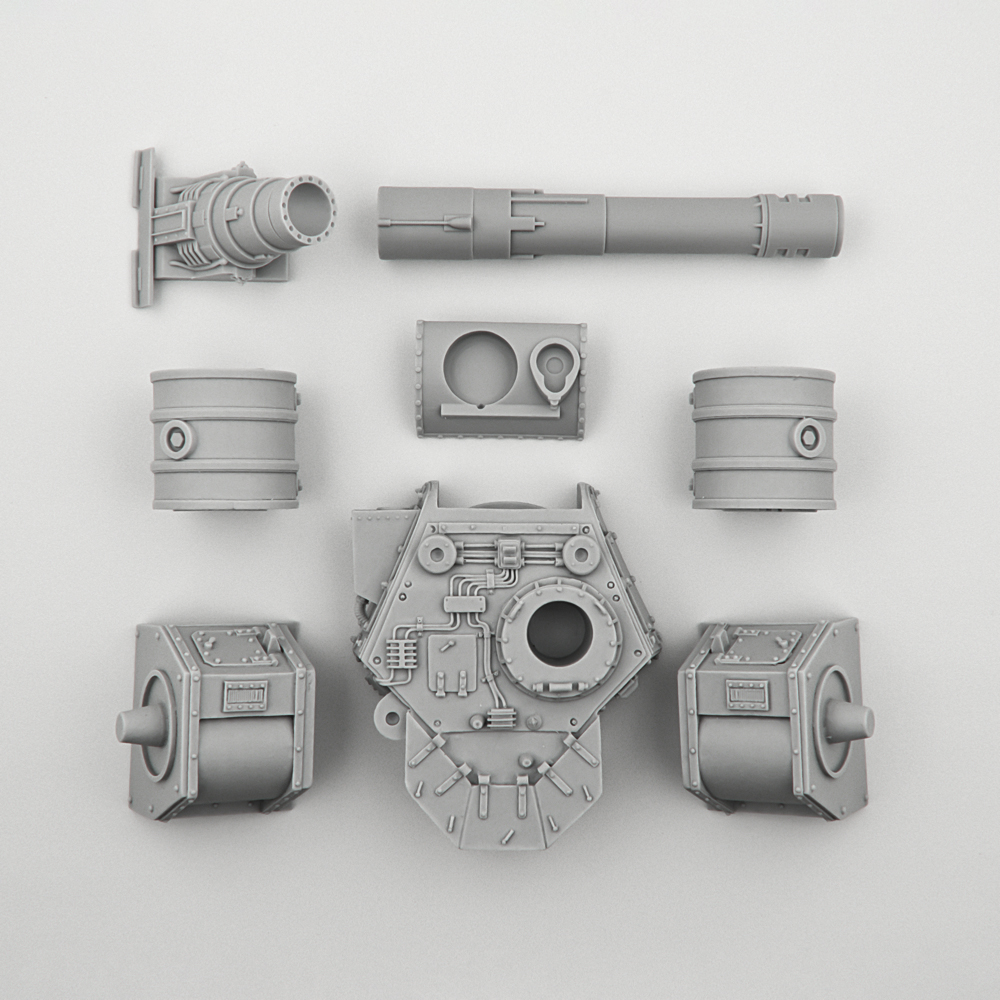
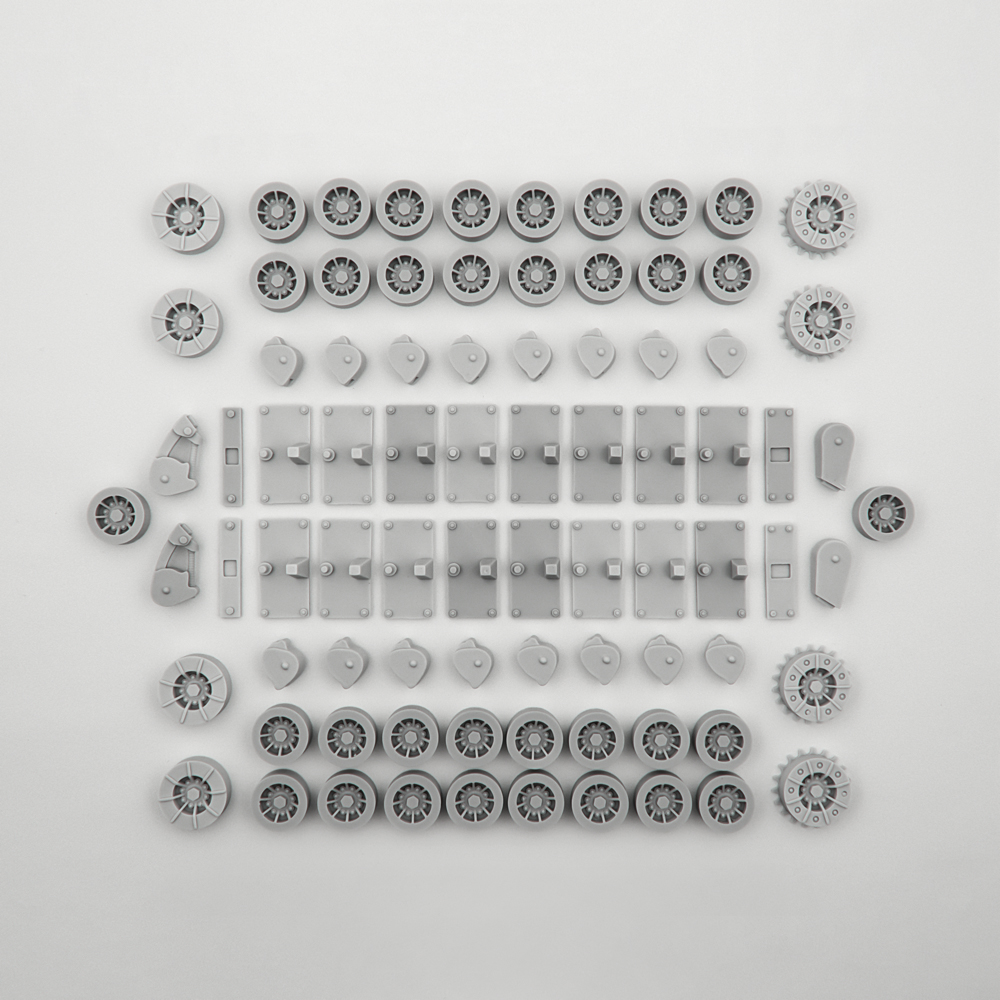
The tank body, especially at the rear, had a large number of “bubbles”, voids and casting defects. The barrel of the main caliber had a very strong displacement and was actually oval in section, not round. The tracks also had casting defects and a very poor-quality texture. Fuel tanks and rollers also had geometry deformations.
In the process of working on the Tank, we again applied all our skills, both classical sculptors and 3d modelers. In philosophy, there is a so-called Theseus paradox, which can be formulated as follows: “If all the components of the original object have been replaced, does the object remain the same object?” The point is that our team, being fans of board games with miniatures, is constantly looking for a balance between the total alteration of the miniature and its restoration with the preservation of some flaws of old technologies and sculptors. What is right? Leave it as it was, removing only manufacturing defects and leaving the miniature completely authentic? Or still show a little creativity and improve? As a rule, we choose the second way…
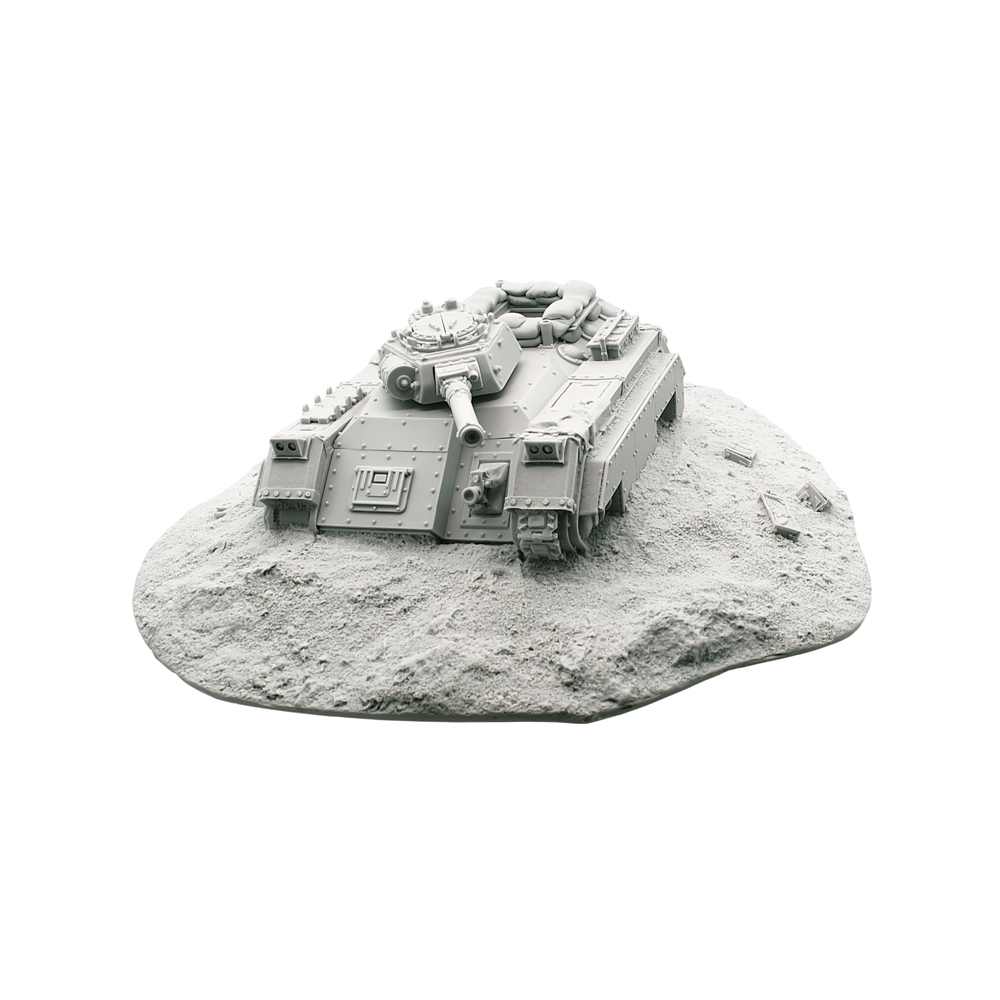
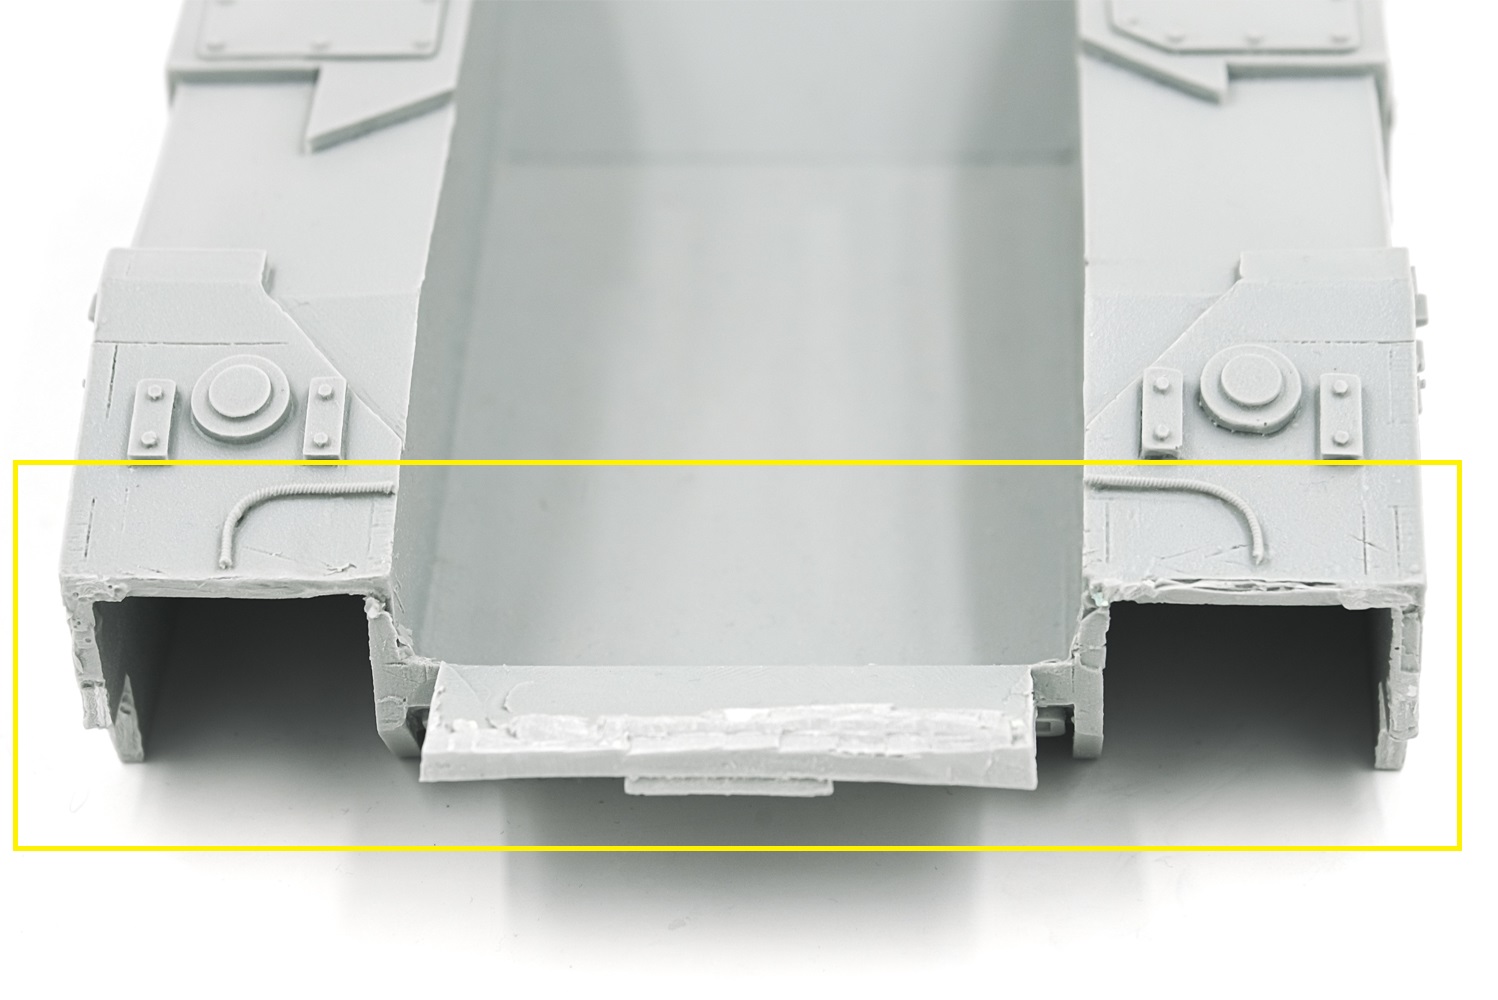
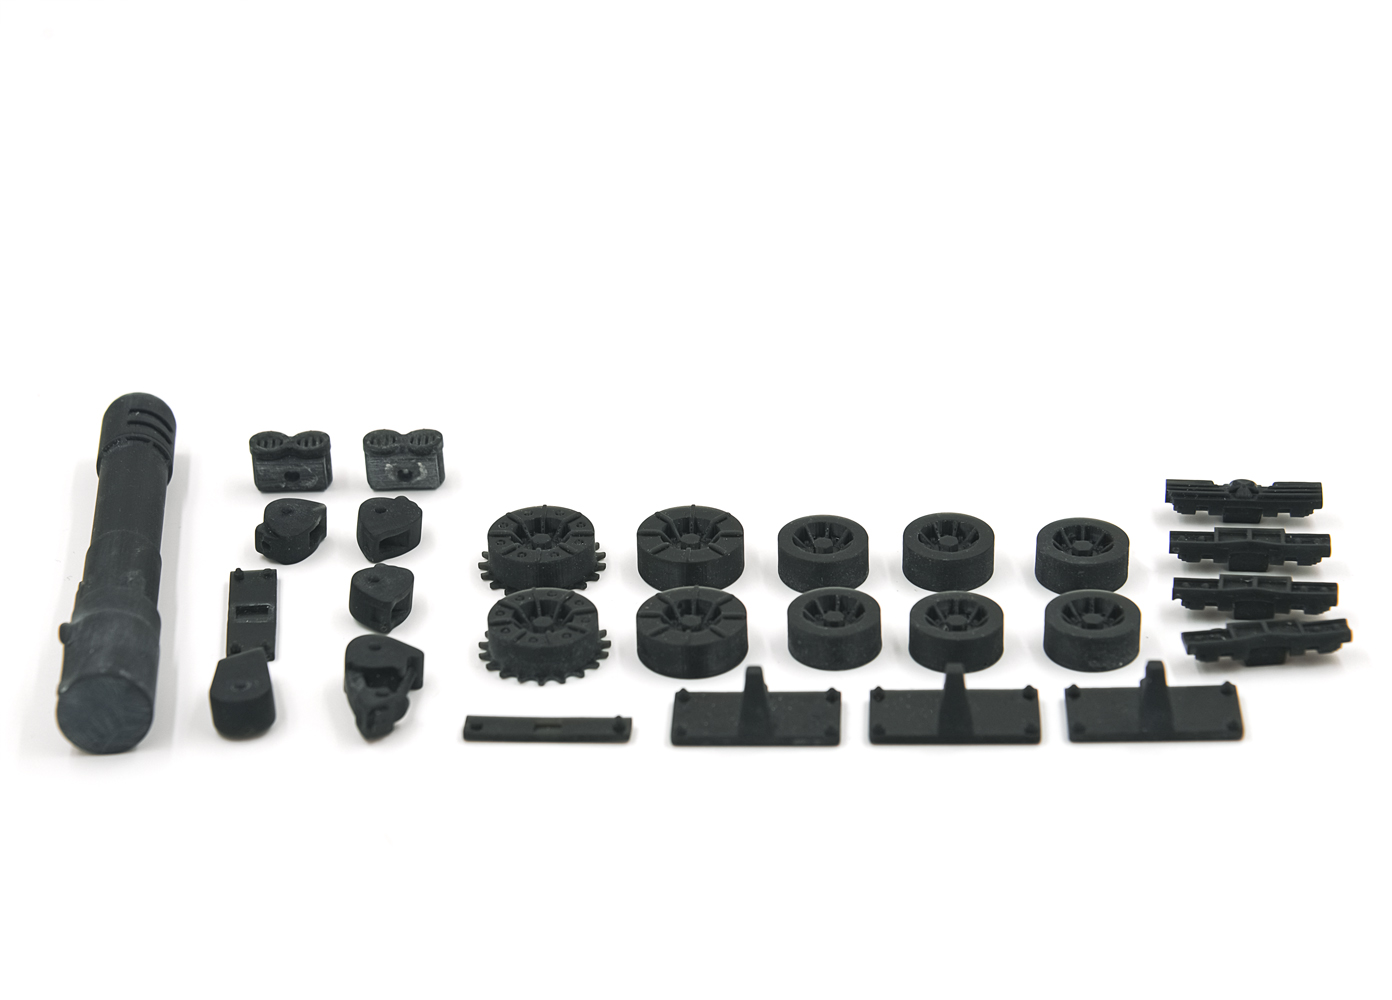
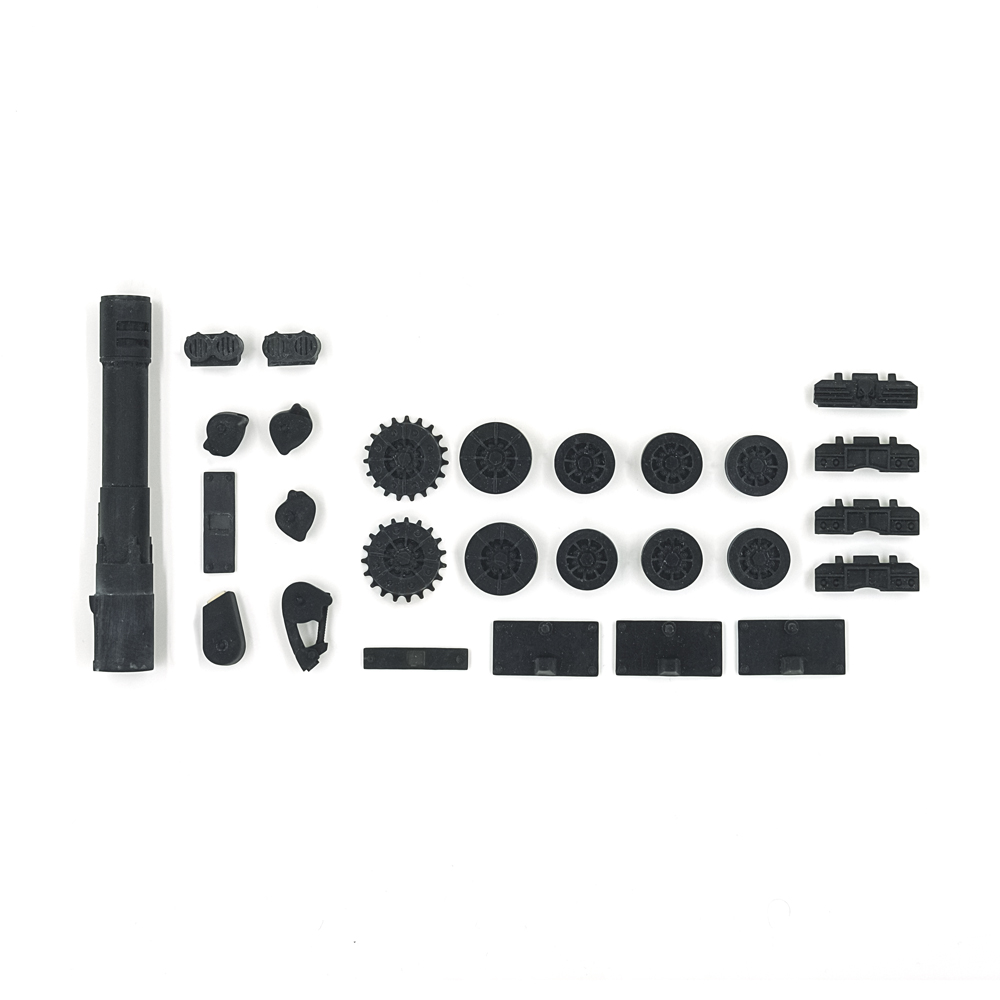
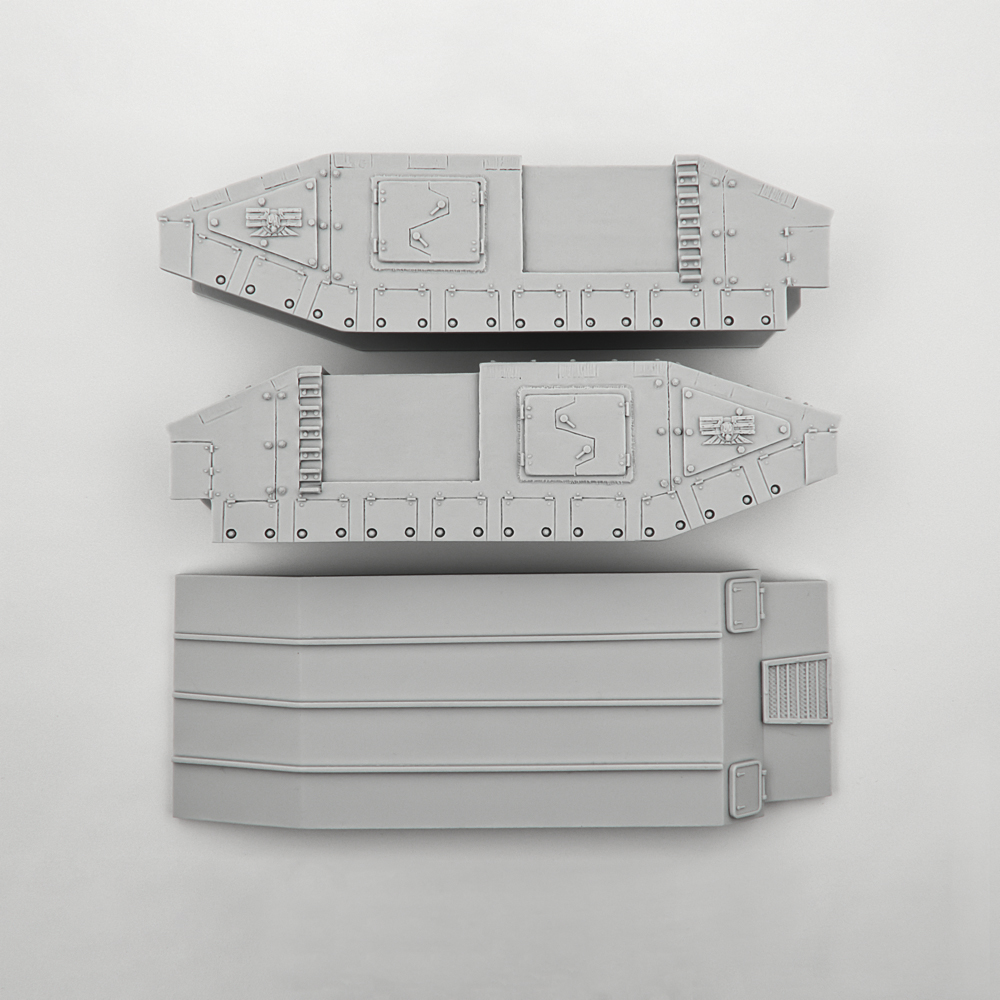
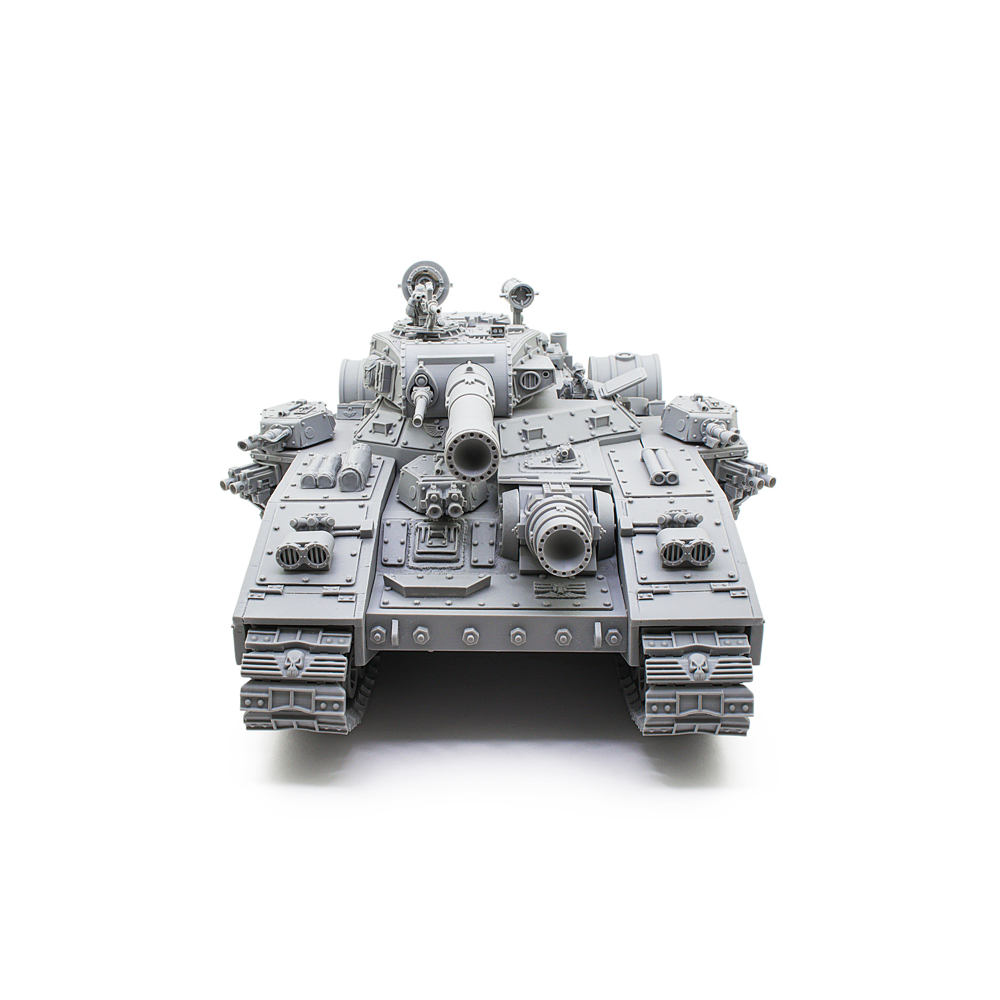
So: First of all, it was necessary to straighten the hull. The largest part of the case did not allow the entire structure to stand up straight. The solution of the issue was cardinal. We sawed the hull into three parts. It was immediately decided to replace the central part with a thick sheet of plastic. All the hatches and grilles were restored with the help of parts from other tanks. (I’ll tell you a secret, most of the hatches, grilles and armor plates in the Baneblade are identical parts of other tanks. Of course, this is the STC, not only in the history 40k background, but also in our realities!))
After we leveled and assembled the central part of the hull, we managed to fit the sides of the tank. In addition, we printed ventilation grilles and filter caps on the upper part of the case. Agree, it looks great! The rear panel of the engine room was a sad sight. We had to level everything and replace the hatches with a new one. (The central hatch was taken from the standard Сhimera) The exhaust pipes were generally good. The uneven surface rather added charm and spoke of the harsh and long-term operation of the tank. We replaced only the mounting plates with rivets. A large amount of time was spent on straightening the fixing bolts on the hatches of the rollers. Each bolt had to be drilled and molded anew.

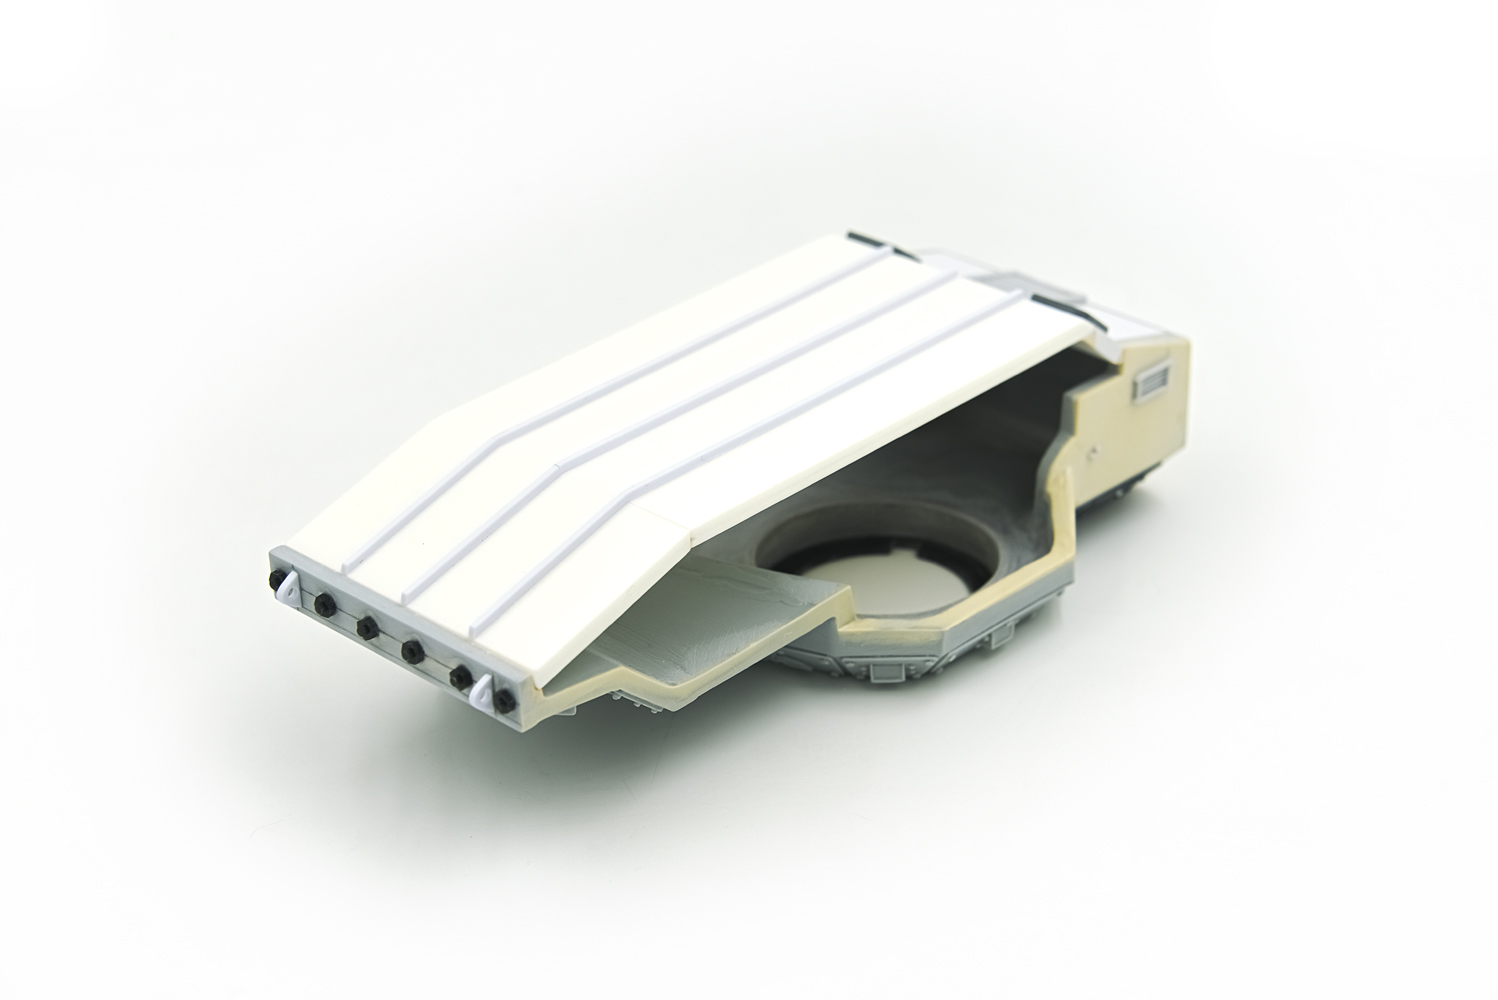
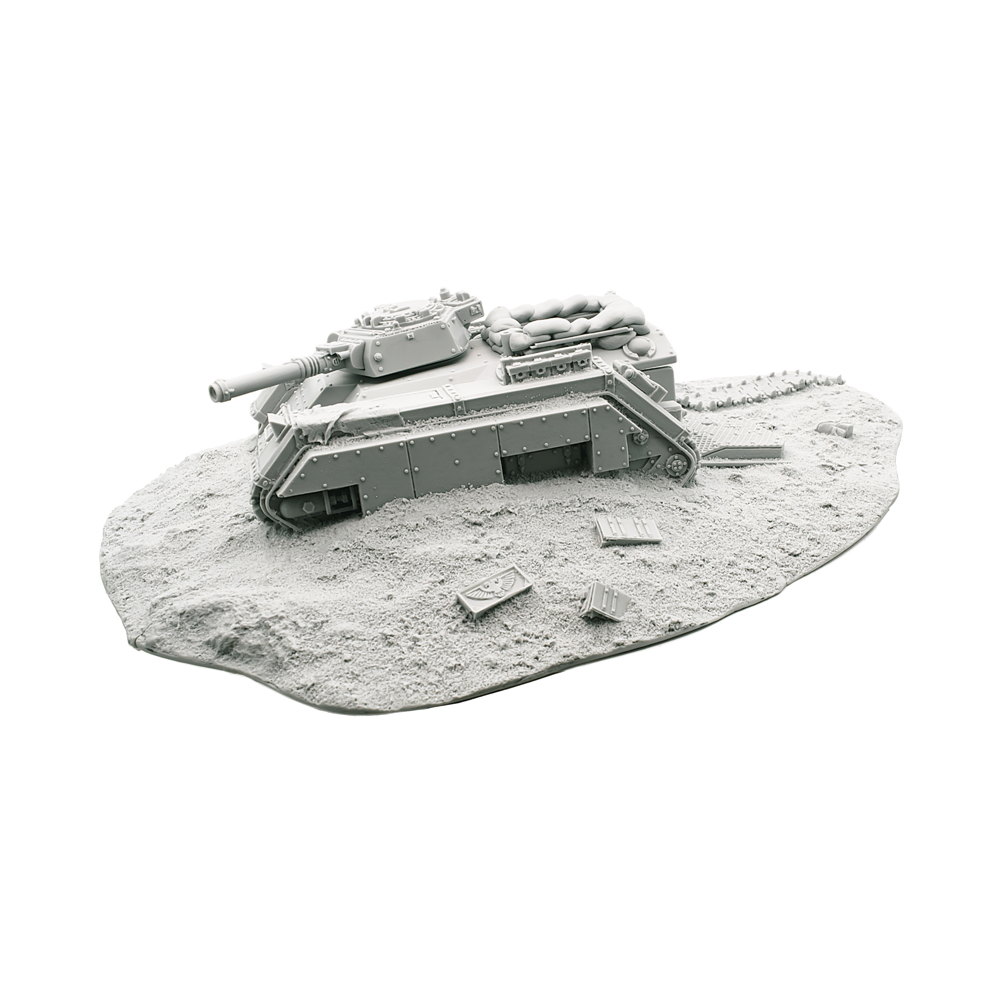
The rollers and link of the caterpillar were crooked and were not suitable for our purposes. It was decided to draw and print all the elements again. The flattened and curved fuel tanks and the Cannon’s Demolisher were also replaced. Each link of the caterpillar was printed separately and then formed into a caterpillar tape.
You can see the result in the photos:

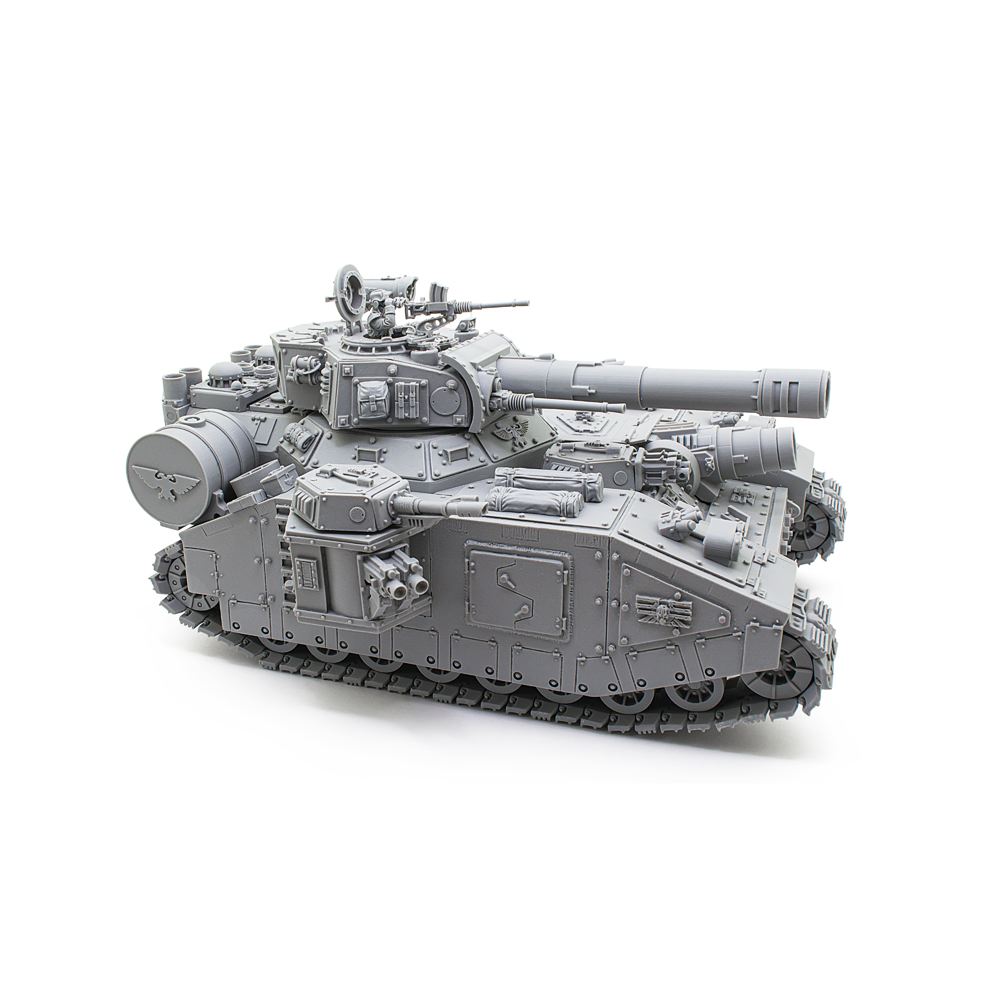
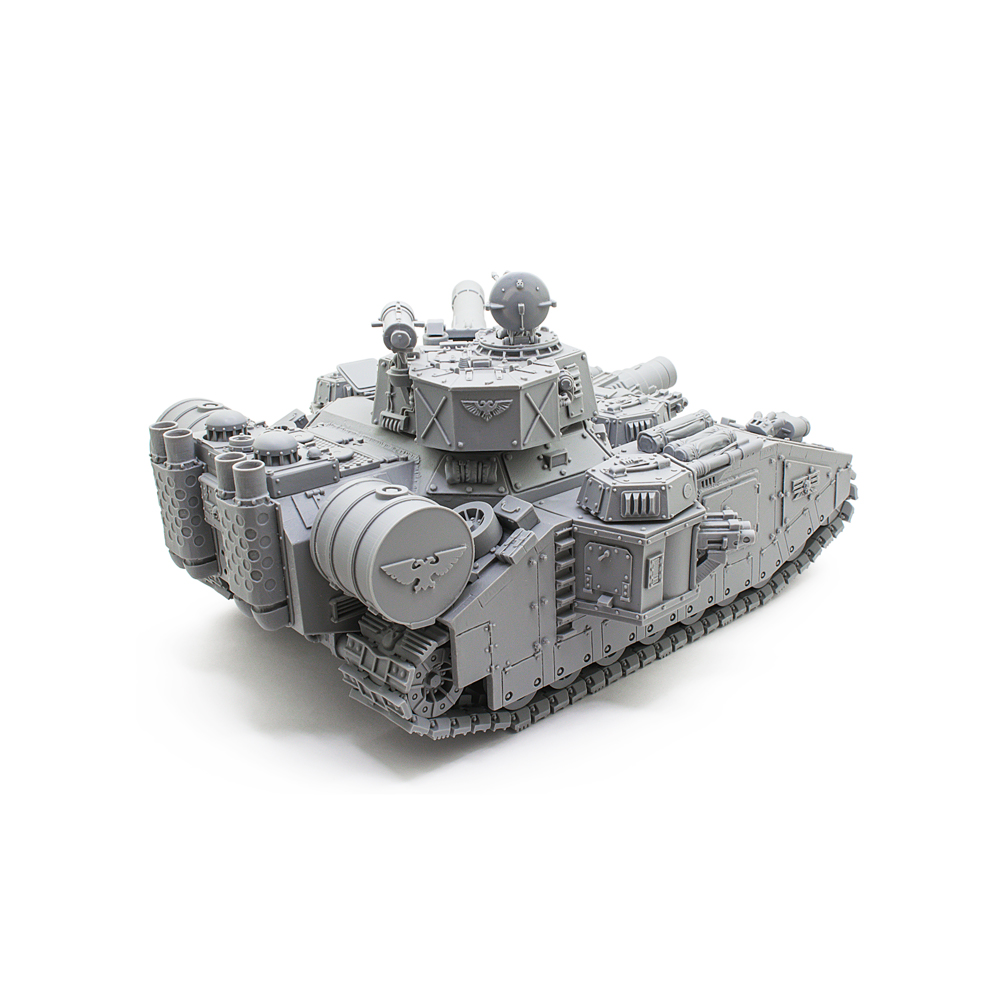
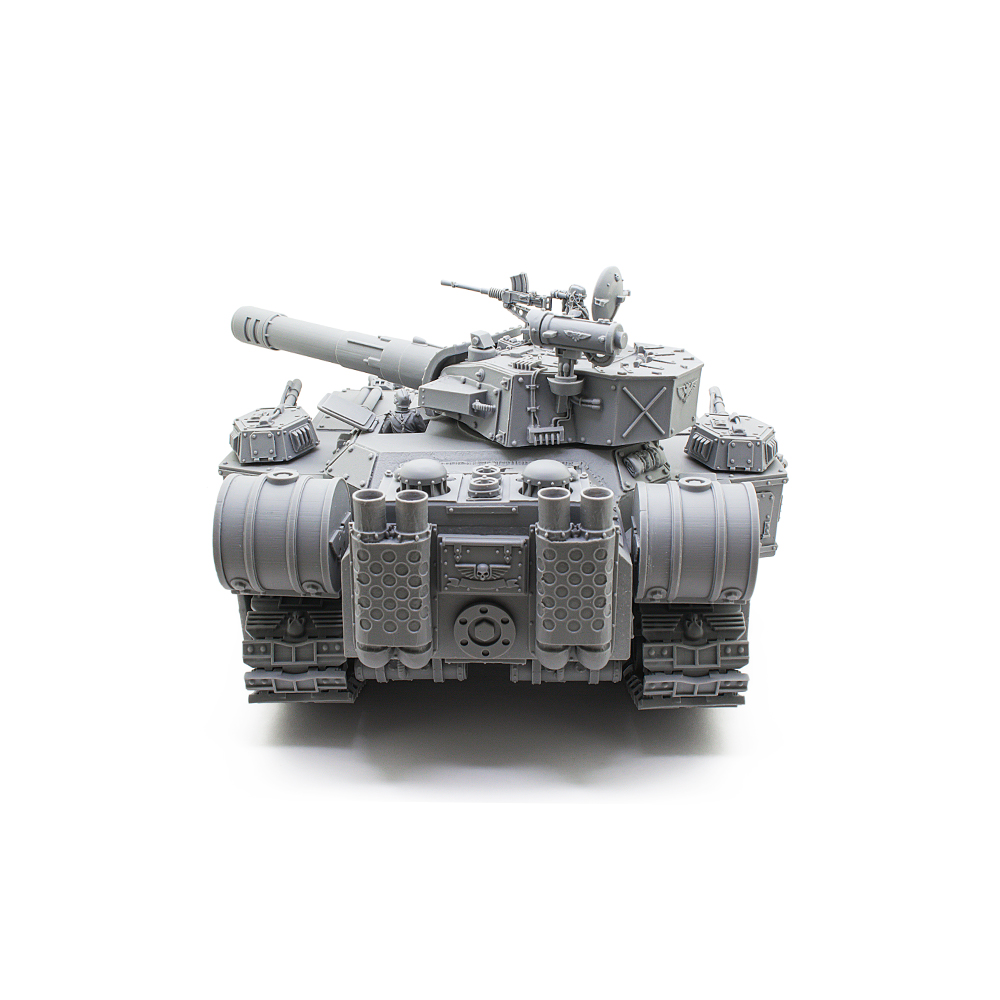
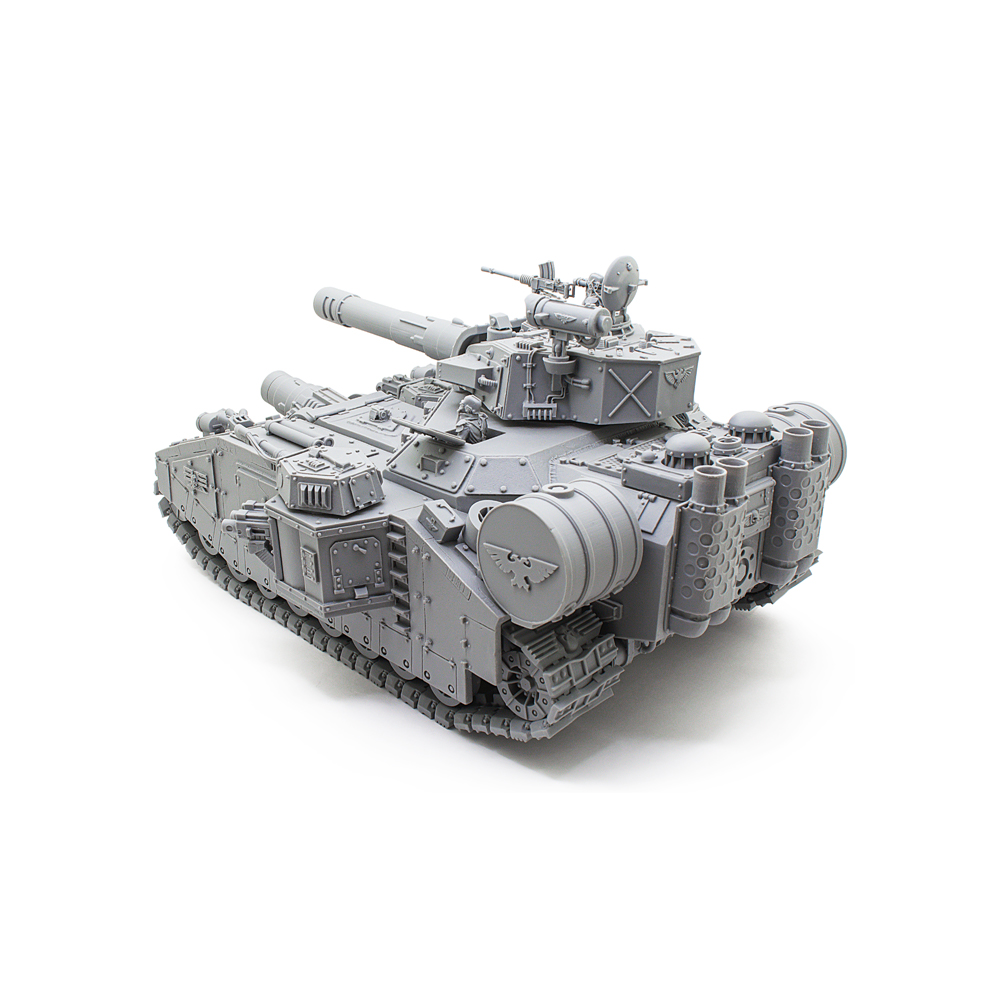
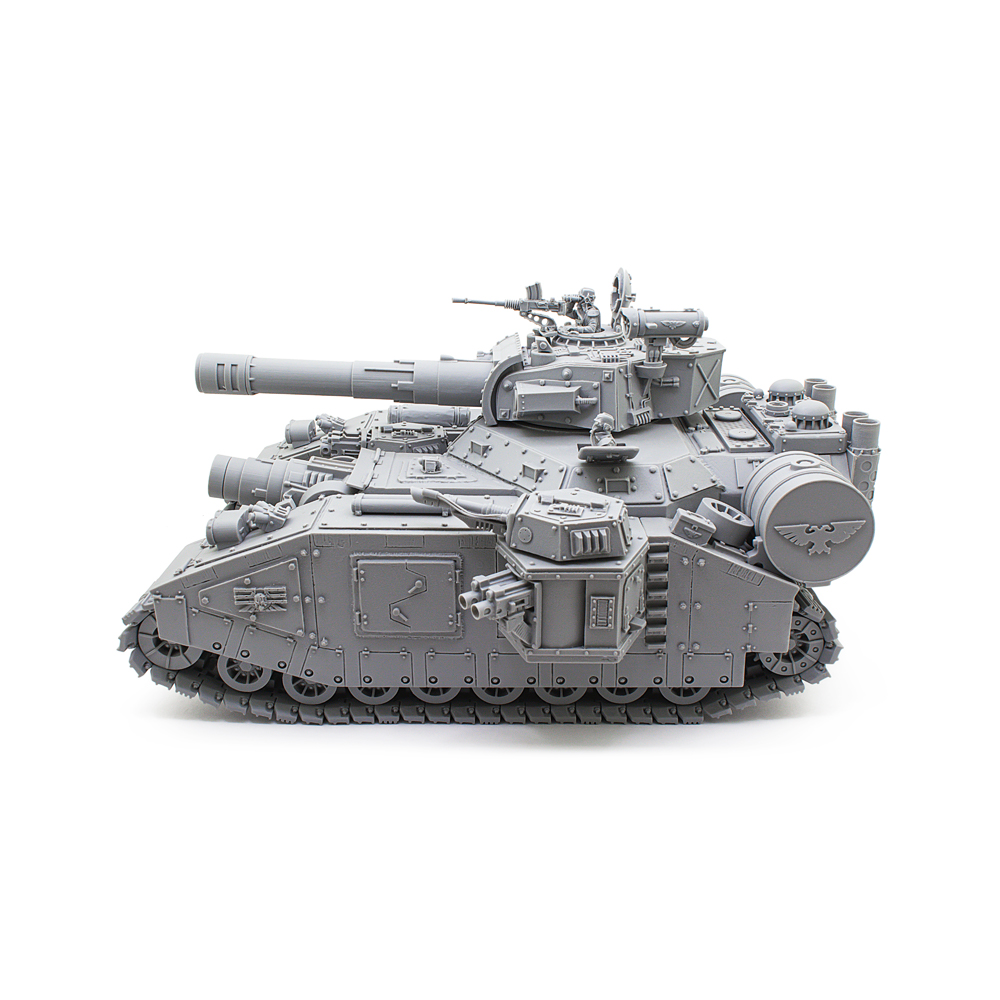
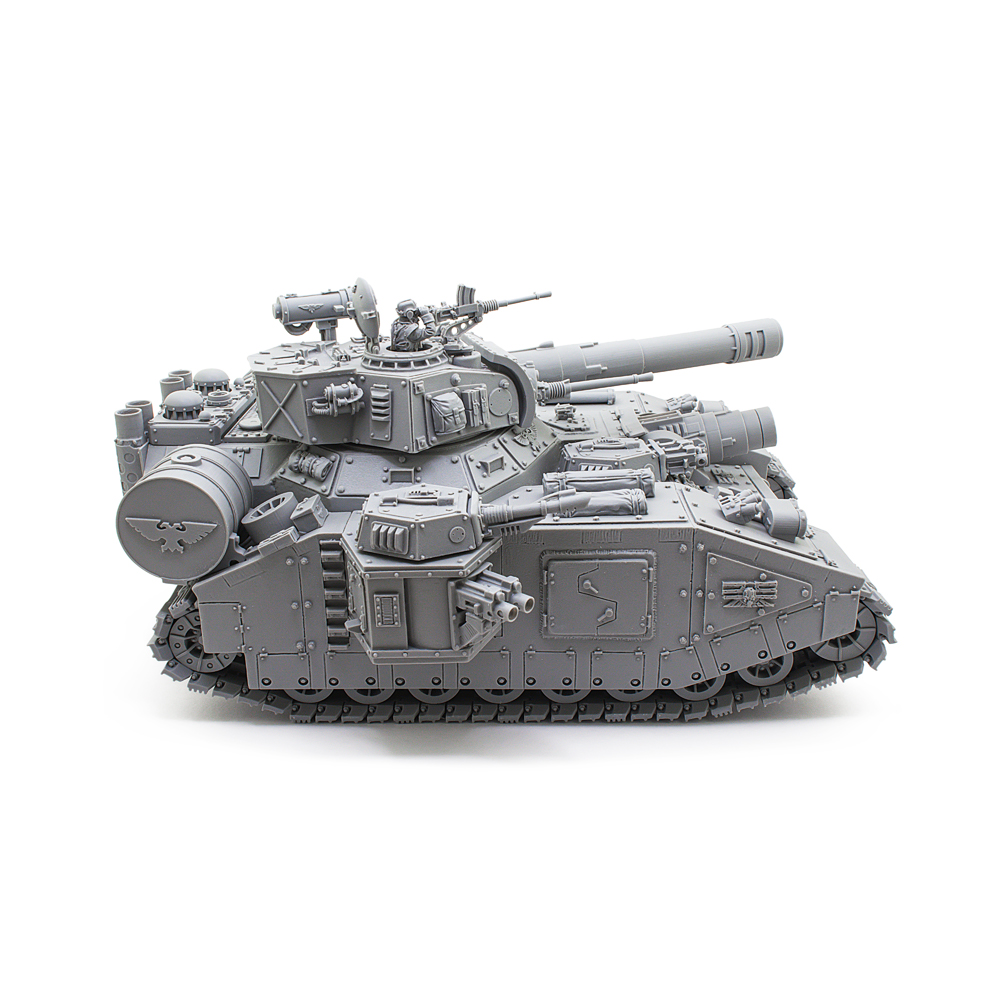
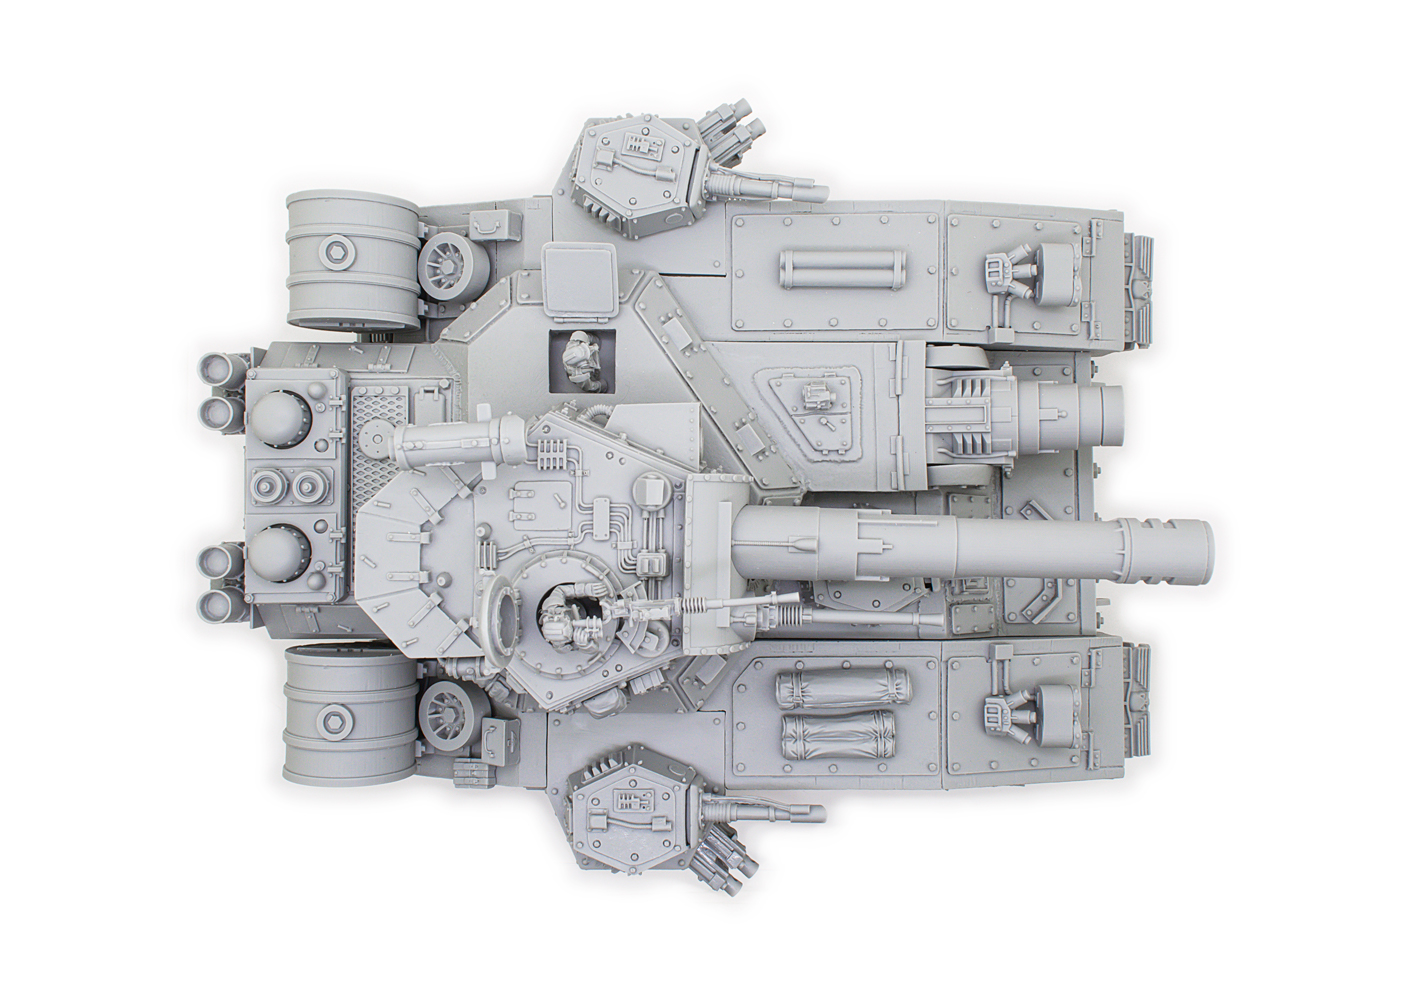
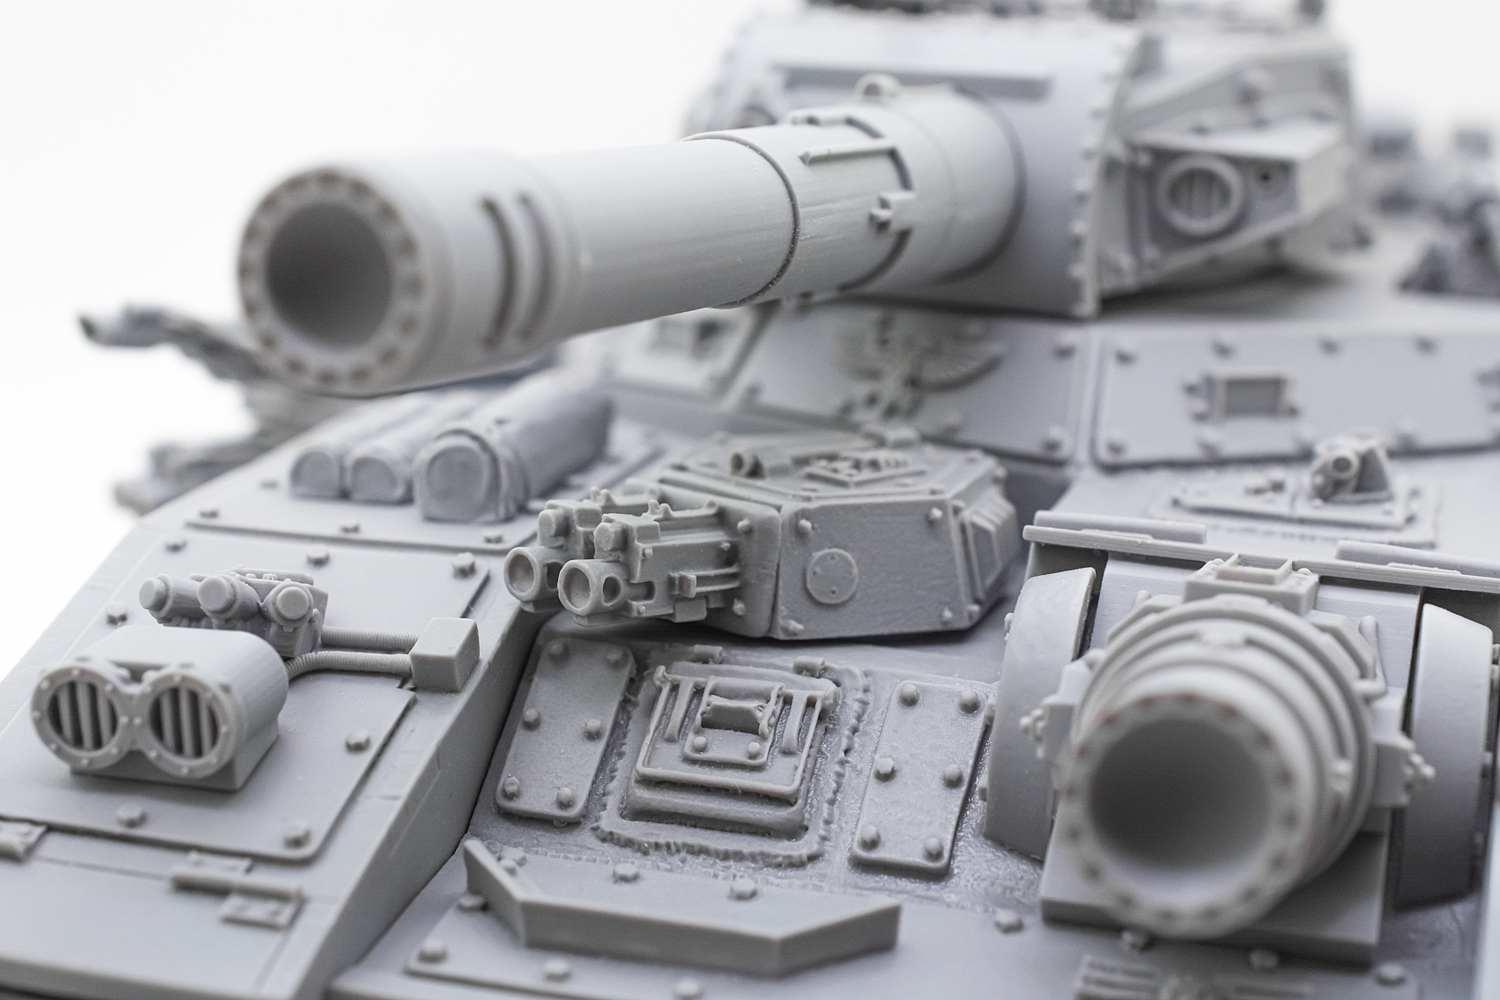
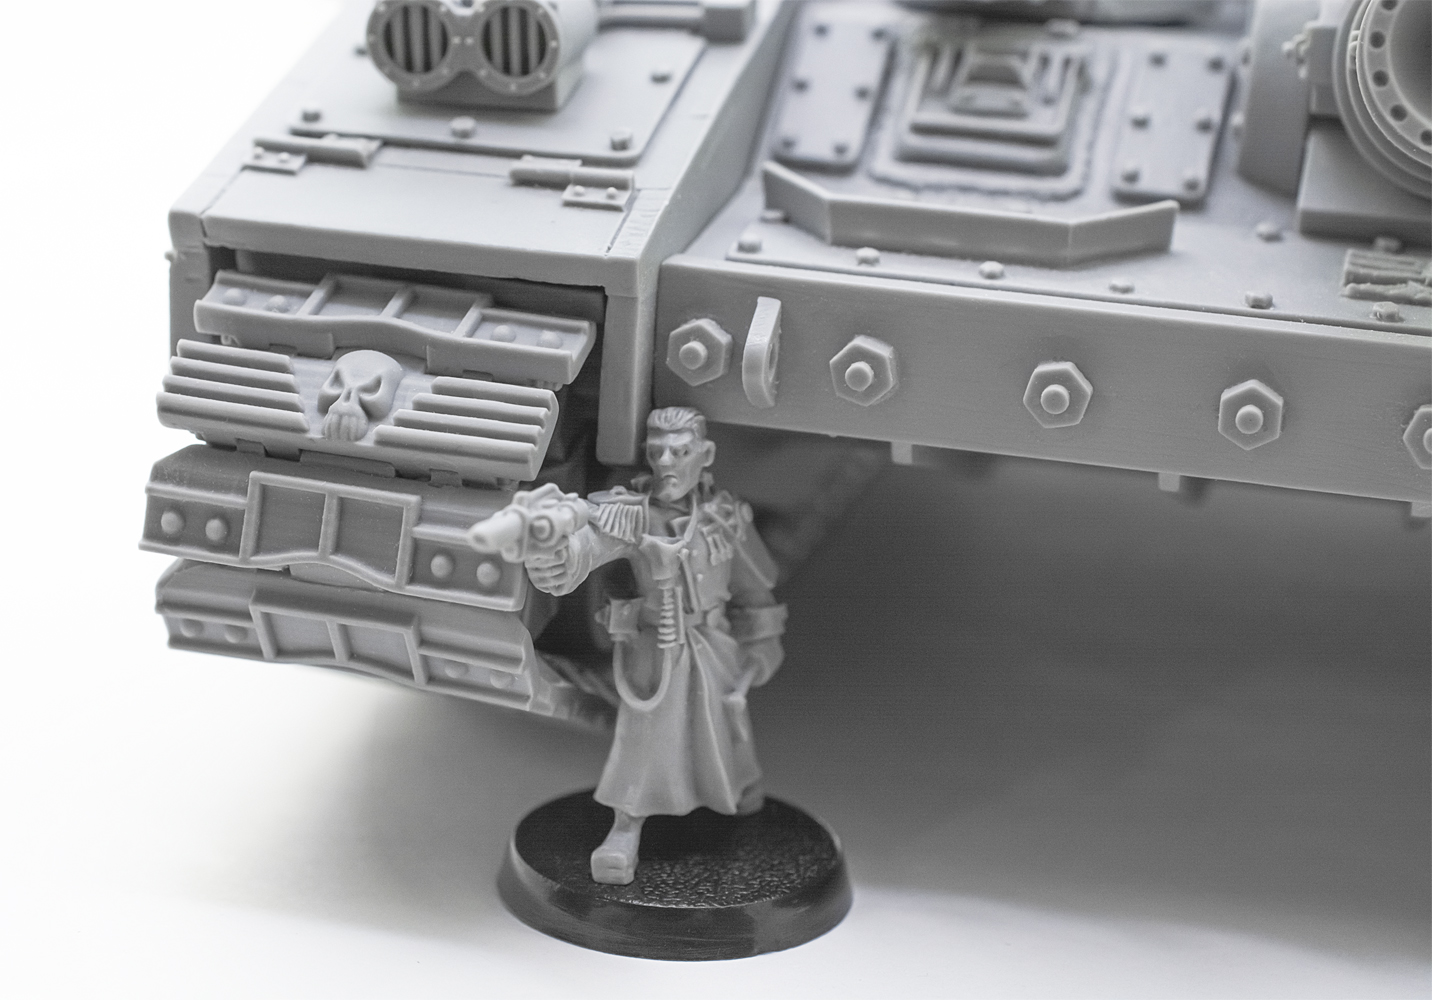
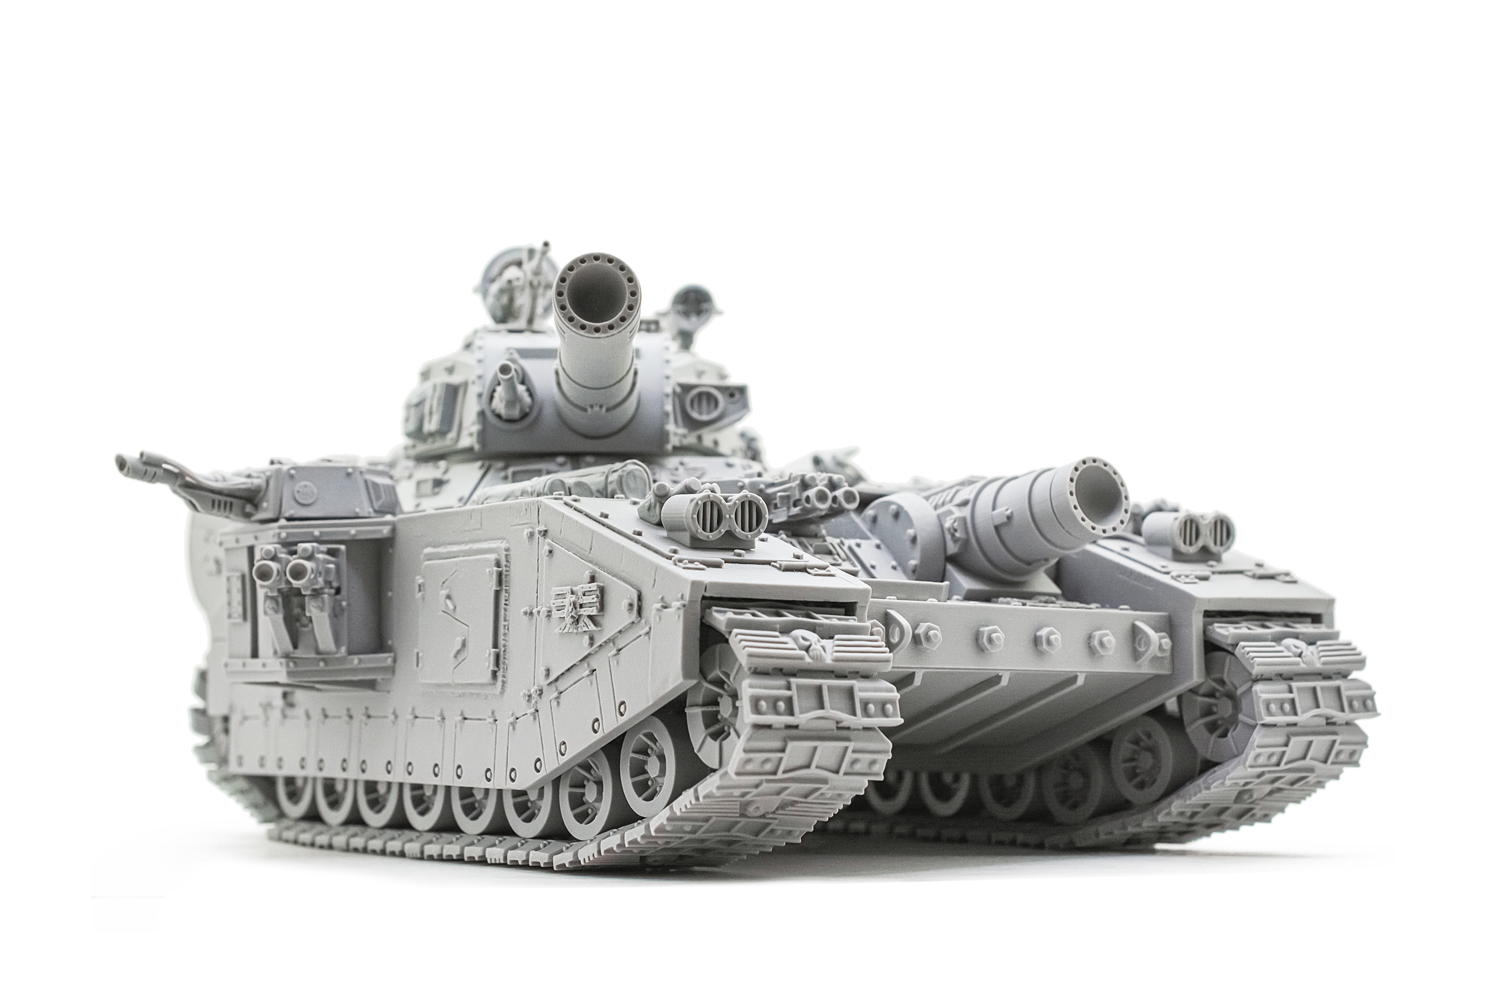
As a result, we spent an incredible number of man-hours to restore this model, but we do not regret a minute!
Whether the tank has become better after our restoration, it is up to you, our dear customers and partners, to judge…
With respect, Mr. Smuggler